CTR Cookies for a Missionary Package

I made these CTR cookies for my nephew who will be returning from a two year LDS Mission in Houston, Texas. This would also be great cookies for a baptism, LDS primary activity, missionary farewell or homecoming. I do not have a CTR shield cookie cutter and found it very simple to cut this shape out by hand. CTR stands for “Choose the Right” and young LDS kids are reminded of the importance of making good choices when they see this green shield with the letters CTR. Keep reading for instructions on how to make these cookies.
Step 1 : CTR cookies – Prepare the Cookie Dough
Prepare cookie dough. I used my favorite recipe found here. This is a very delicious sugar cookie recipe I use for most cookies where I’m not worried about the most intricate shape. I usually roll the dough between two sheets of wax paper and chill the sheets of cookie dough until they are firm. The dough has to be very cool, especially when you are cutting shapes out by hand.
Step 2: CTR cookies – Cut out Shapes and Bake Cookies
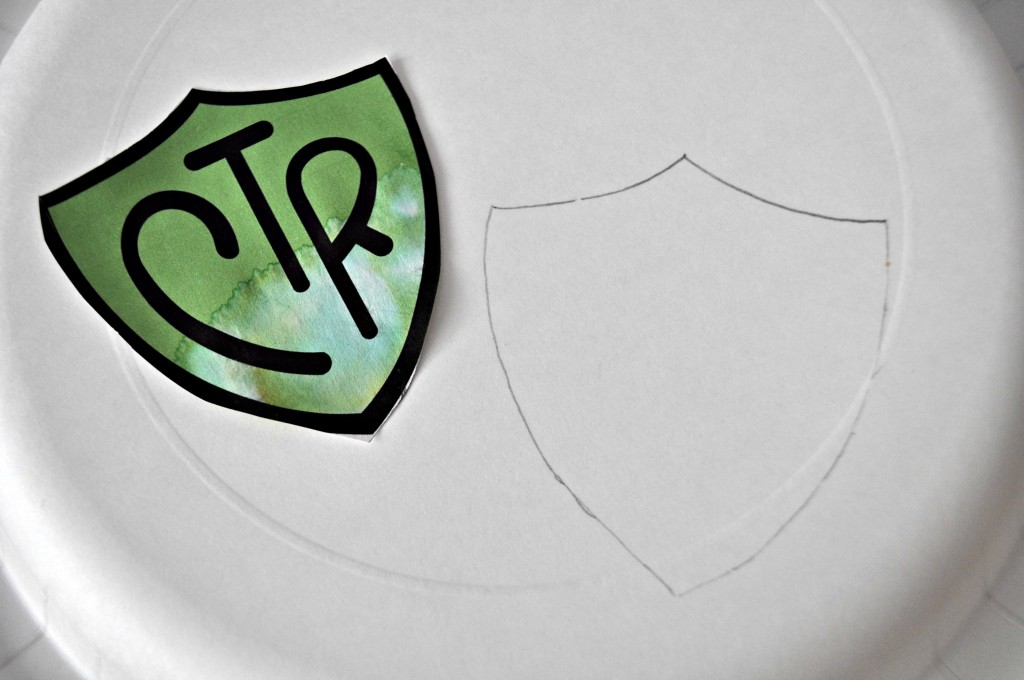
I printed off a CTR jpeg image and resized it to make about a three inch cookie. I then traced it onto a paper plate and cut out the shield shape that will be used. Unless I was making several dozen of these cookies I would not worry about purchasing a CTR cookie cutter.
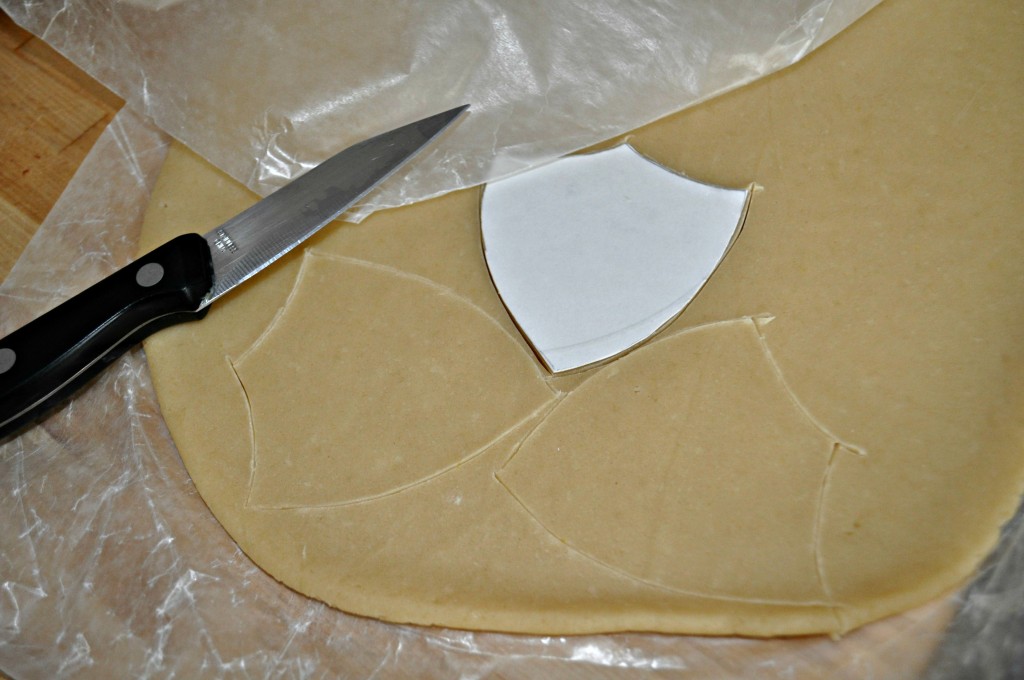
Use a sharp paring knife to cut the shield shape out of the dough. Make sure the dough is very firm before cutting the CTR shapes. Chill the shapes for 10-15 minutes in the freezer before baking. This helps to keep the shapes from spreading in the oven.
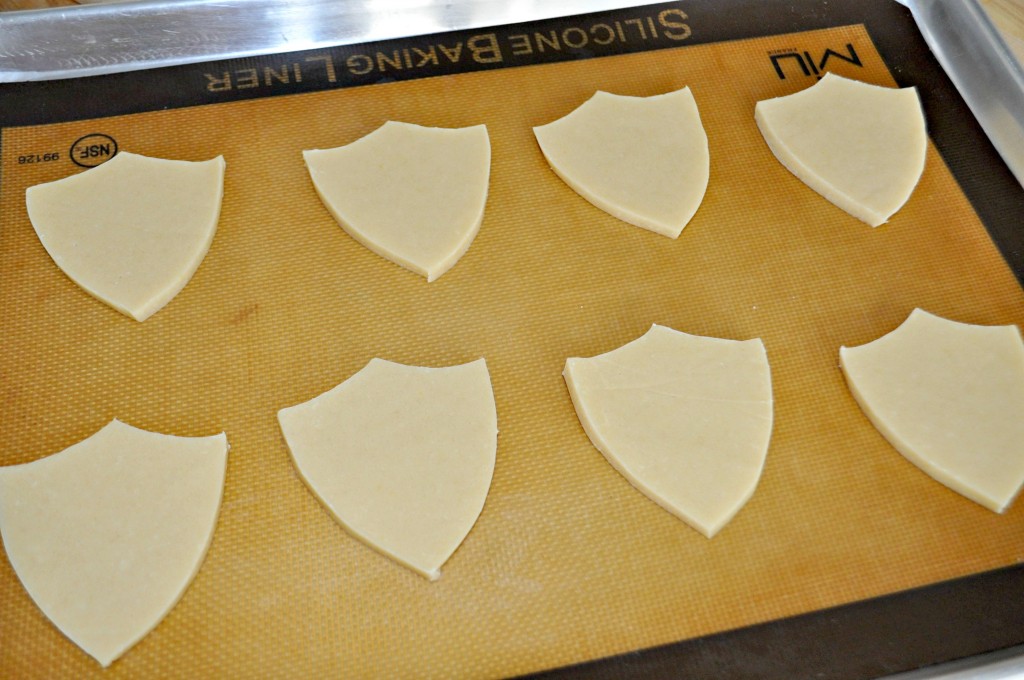
I like to chill the cookies on the cookie sheet in the freezer for baking. These CTR cookies are ready to go into the oven.
Step 3: CTR cookies – Prepare Royal Icing and Decorate
For this cookie you will need royal icing dyed green with Americolor or Wilton leaf green and royal icing that is white. Here is how I make royal icing. If desired, use your favorite glaze recipe. I prefer royal icing for this cookie because it is so easy to work with and it dries nice and smooth. Royal Icing also adds a lot of stability to the cookie which will help guarantee that they arrive in one piece.
Follow the instructions for preparing royal icing found here.
Thin some of the white icing for outlining the cookie. This icing should form soft peaks, be flowy yet still hold its shape. Place this in a piping bag with a Wilton size #5 tip for outlining.
Dye some of the icing green and thin it so it is like the consistency of honey, or corn syrup. Place in a plastic squeeze bottle for decorating.

Using the thicker white icing and a Wilton #5 tip outline the CTR shields. The #5 tip will make a nice thick band of white that will still show up when green icing is added. Wait about 20 minutes for the white icing to dry.
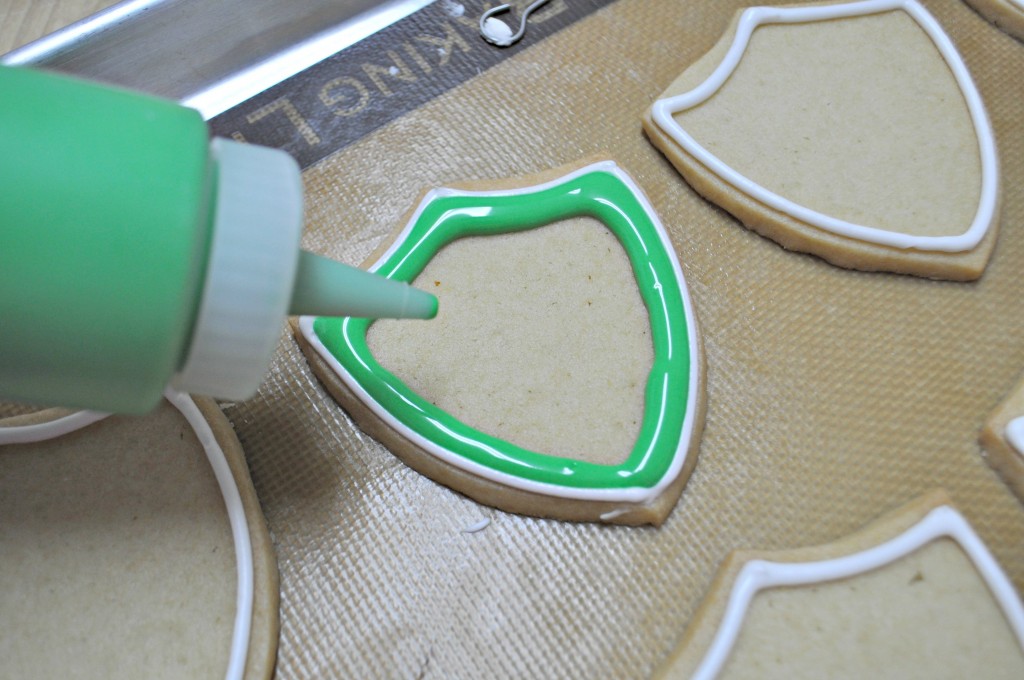
Once the white icing is set go ahead and outline the edges of the white with thinner green icing as shown above.
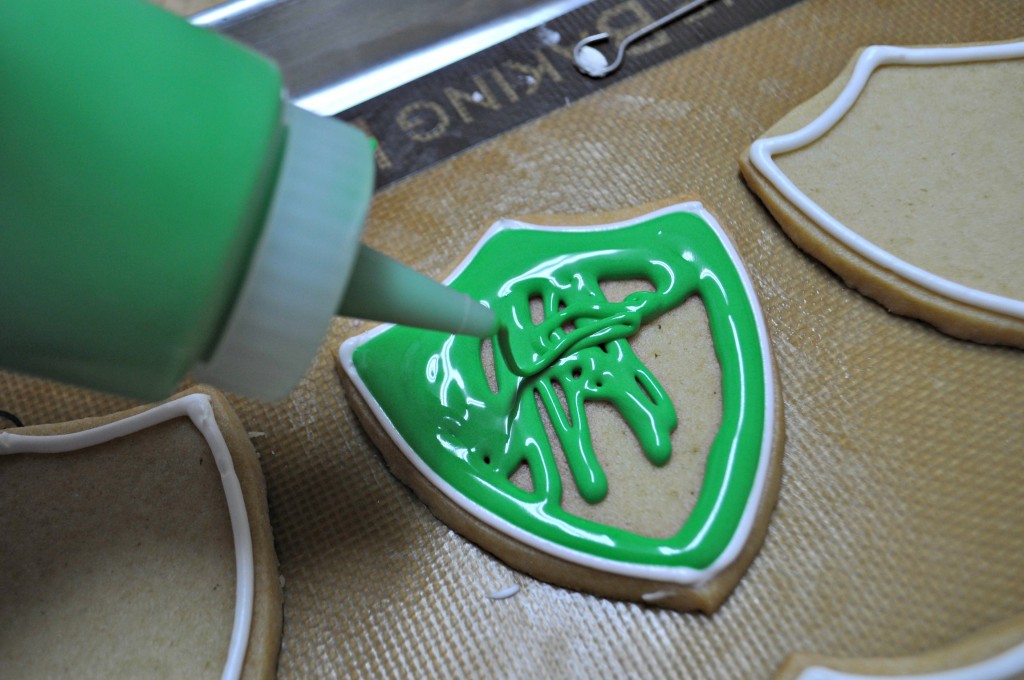
Continue by squeezing the green icing to cover the cookie. It will naturally flow into place and the white border will keep the icing from falling off the edge of the cookie. Wait at least 30 minutes for the green icing to set.
Wow my cookies changed color! What is up with my camera? Use the white icing, again with the Wilton #5 tip to carefully write the letters “CTR” on the cookies. I would make the T first, then move on to the other letters.
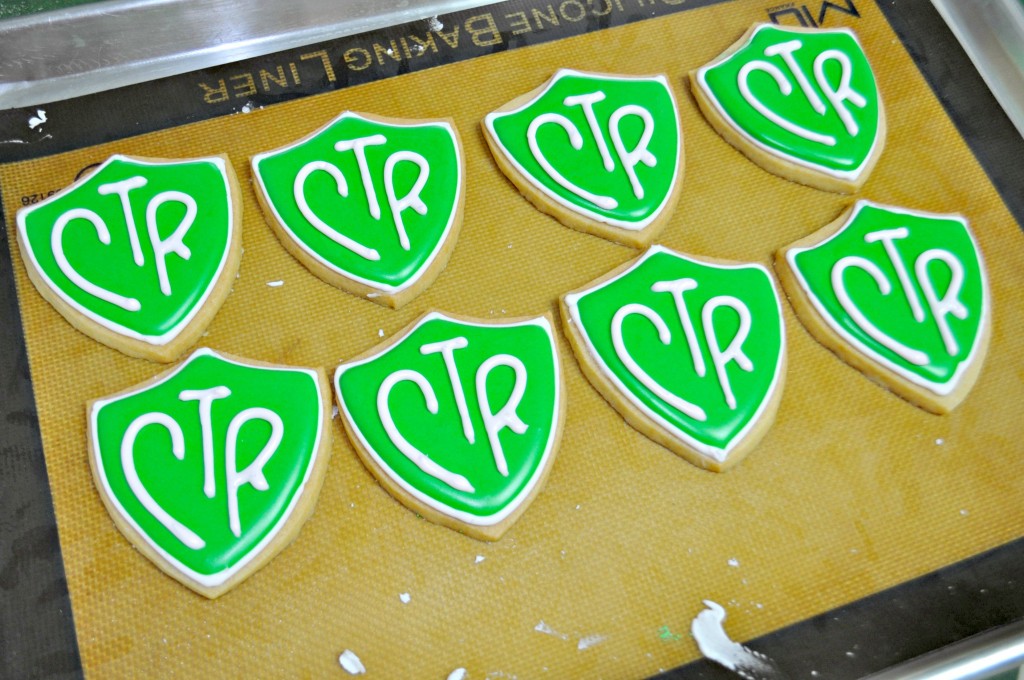
Here is the finished product. Allow the cookies to dry overnight before packaging.
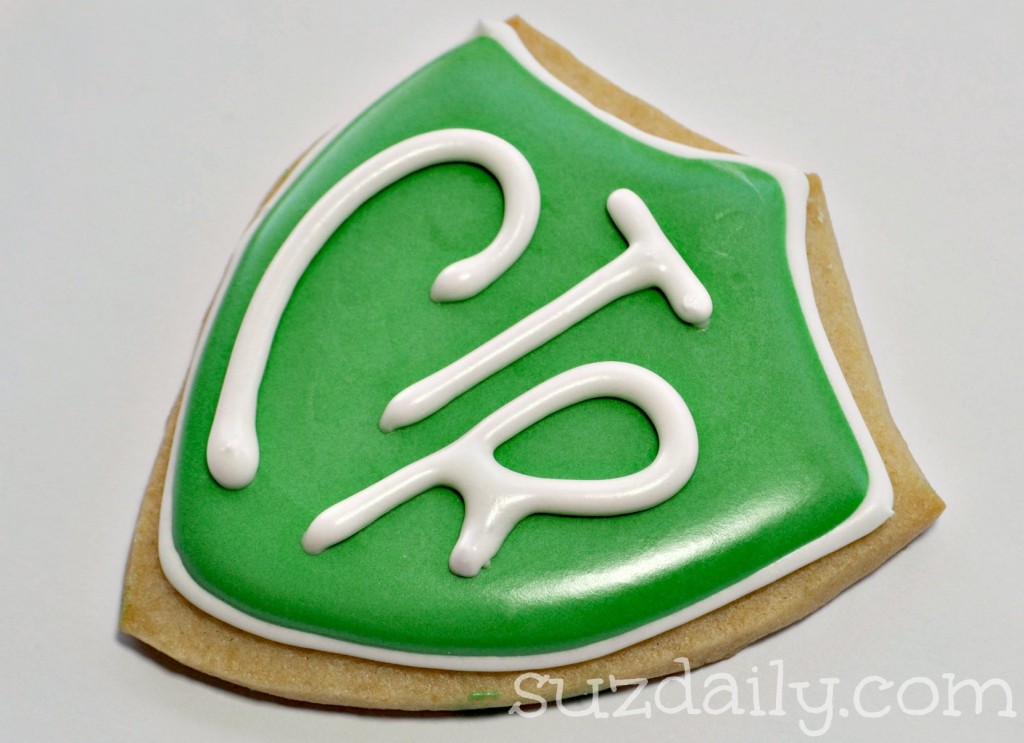
Here is a close up of the finished cookie. These cookies are very simple to prepare and they are a hit with the kids…
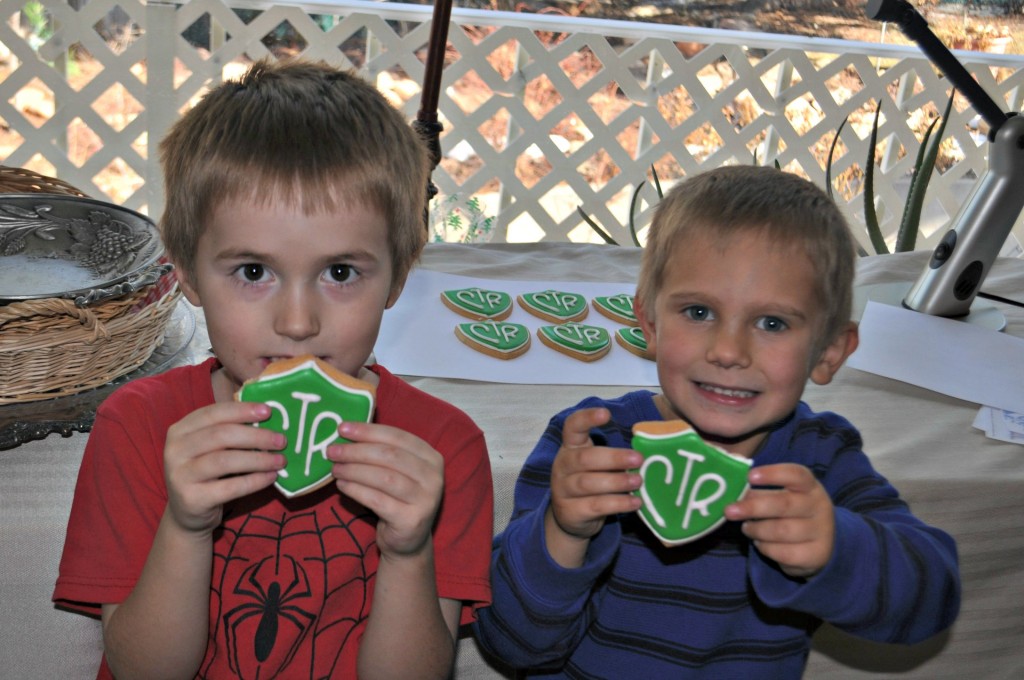
So much of a hit that these two little guys thought if they chewed at the edges I wouldn’t notice. I will have to make these for Matilda’s baptism this fall. I hope you are able to make these CTR cookies for your next Primary primary, Missionary farewell, or Baptism celebration. Hopefully these arrive in Houston in one piece!


Thank you for posting how to frost these cookies since I had no clue how to get them so perfect. I hope this isn’t a dumb question but I am going to be making these cookies today and tomorrow and was wondering ..How do I thin out the icing for the green frosting. Do I use a little milk? I hope that wasn’t a stupid question. I just don’t want to mess up your royal frosting.
Simply thin the icing with a bit of water. You want the outline to still have soft flowing peaks. The filling should be more runny, like molasses or honey. If it is too thin it will fall off the cookie. If it is too thick it will not dry flat. I think I mention it in this post
https://www.suzdaily.com/2012/09/how-to-make-royal-icing.html
This is the second time I have made these cookies. Thank you for the tutorials and recipes!
Want to make mention that you don’t have to wait for the green to dry before putting the lettering on if the consistency is right. I’ve done it this way both times and they look great.
You are Correct! I wrote this when I first learned to decorate cookies 🙂
I’m so glad it has helped!