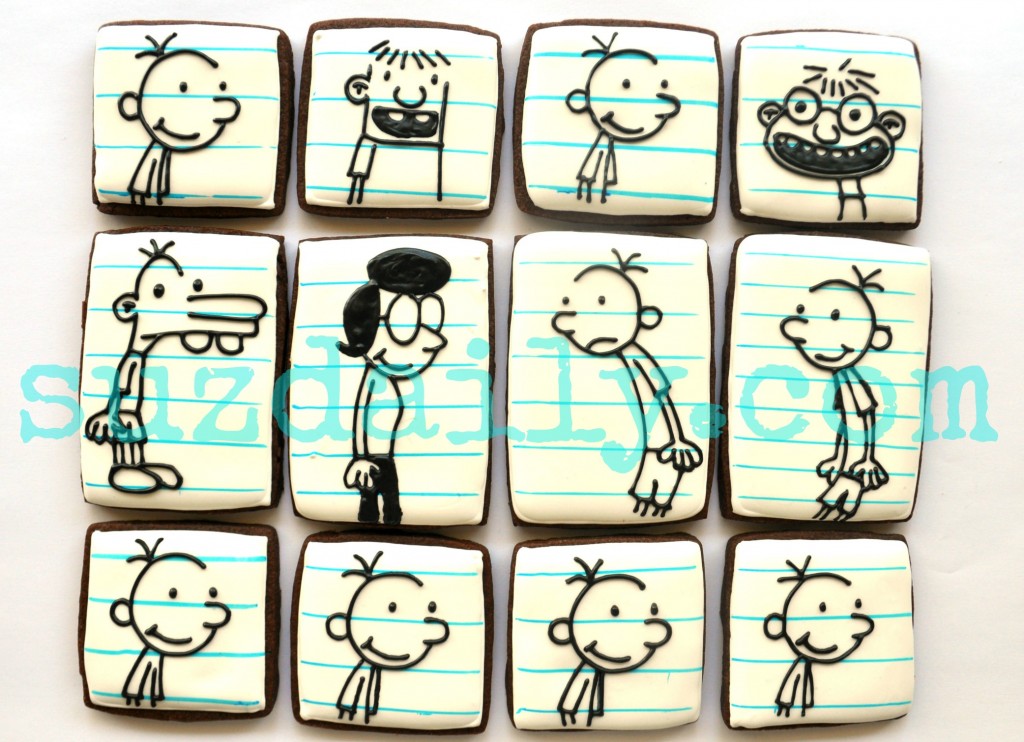
How to Make “Diary of a Wimpy Kid Cookies”
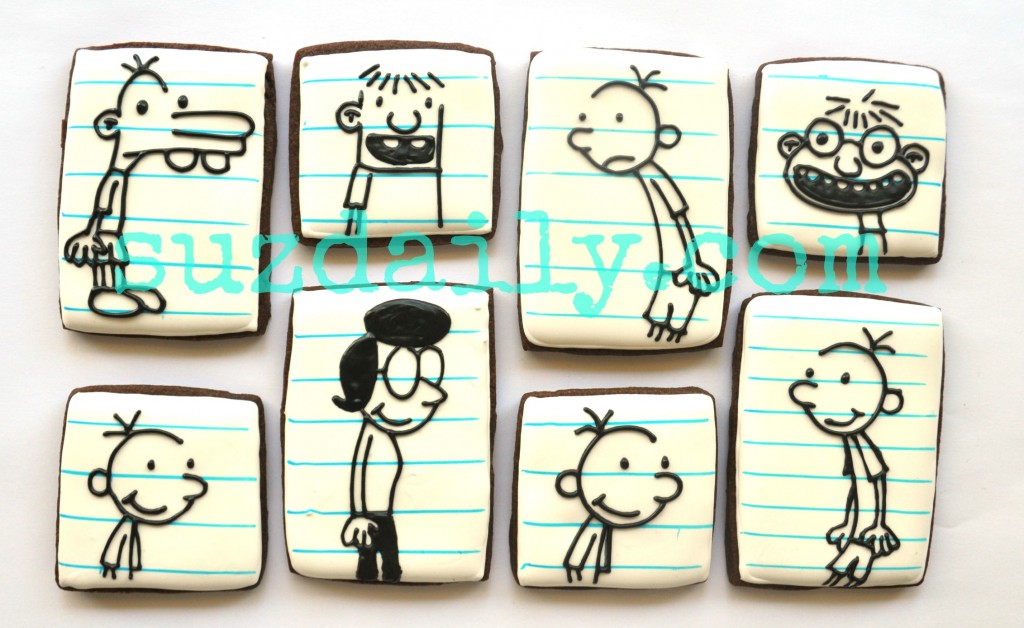
Well if I can say I ever was a first to make a certain cookie – I will say it is this design. A “Diary of a Wimpy Kid” cookie on a lined “paper” background. Since that time I have seen several “cookiers”who sell this design on Etsy or on their personal site. No big deal! It’s actually flattering. I don’t believe in the whole “I own this design” or “I own this recipe” mentality. These cookies take hours to decorate and the challenge is not in the design, rather it is in finding the hours in the day or night to decorate. Happy Baking!
Keep reading for details on how I made these “Diary of a Wimpy Kid: Cookies…
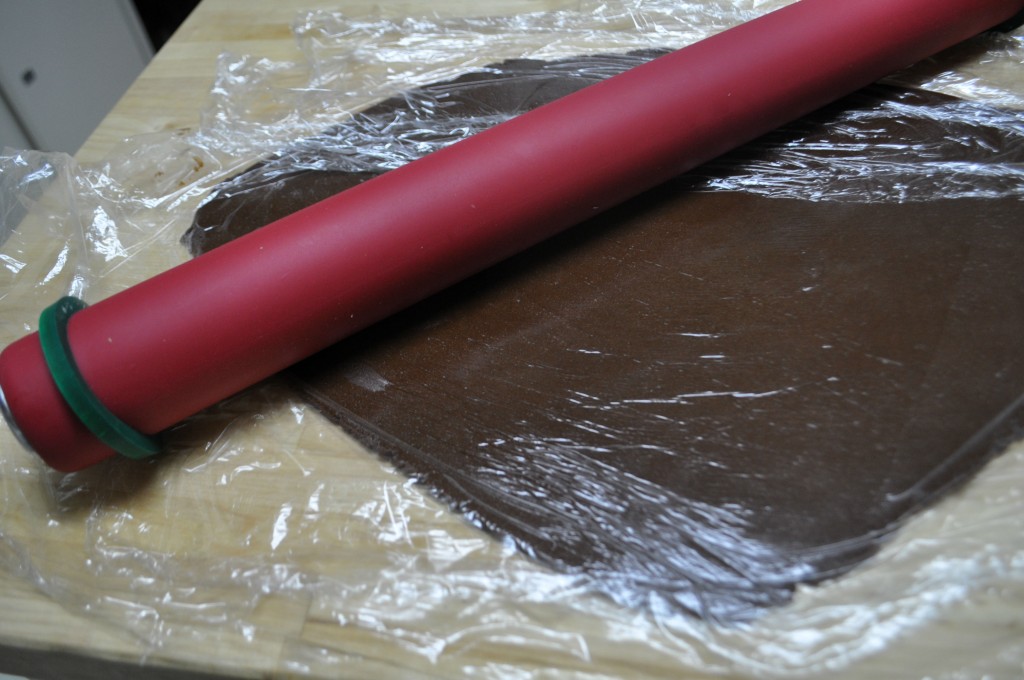
Step 1: How to Make a “Diary of a Wimpy Kid” Cookie – Prepare Cookie Dough
- 1 cup butter
- ¼ cup shortening
- 1 ½ cups granulated sugar
- 2 eggs
- 1 teaspoon vanilla
- 1 teaspoon salt
- ¾ teaspoon baking powder
- 2/3 cup cocoa
- 3 ¼ cups flour
Step 2: How to Make a “Diary of a Wimpy Kid” Cookie – Prepare Royal Icing
For this project you will need is white icing for outlining and white icing for flooding the cookies. You will also need black icing for details.
Royal Icing
- 2 pounds powdered sugar
- 2 ounces Meringue Powder, (1/3 cup + 1 Tablespoon)
- ¾ cup water
- 2 teaspoons clear vanilla extract
- 1 teaspoon almond extract
- 2 Tablespoons corn syrup (optional)
Place powdered sugar in a heavy duty mixer. Add meringue powder. Whisk together with the mixer turned on low speed. Measure water and extracts and mix together. Add to this to the powdered sugar and meringue powder. Start on medium speed to combine. Scrape down the sides of the bowl often. Increase the speed to high and beat the icing until stiff peaks form. Add 2 Tablespoons corn syrup if you would like the cookies to have a bit of a sheen to them.
Remove about one cup of icing and thin to “piping” consistency by adding water a few drops at a time. You know you have reached this consistency when the icing makes soft, flowing peaks.
Prepare a piping bag with a #3 round tip for outlining the cookies in white, using about half of the thinned “piping” consistency icing.
Prepare a piping bag with a Wilton size 1 round tip or a PME #1.5 round tip for the black icing. Use the remaining half of the thinned “piping” consistency icing to make the black detailing icing. If possible make the black icing several days in advanced. Dye the icing to a charcoal gray color and you will notice the color turning darker every day until it is black.
Thin the remaining white royal icing with water to flood the cookies. I usually thin the icing to the thickness of honey or corn syrup by adding water 1-2 Tablespoons at a time. This recipe is enough to decorate about 48-60 cookies depending on size and number of colors of icing. Adjust accordingly if you are going to make fewer cookies.
You can find out more about how I make my royal icing by reading this post.
Step 3: How to Make a “Diary of a Wimpy Kid” Cookie – Add a base layer of white icing to the cookies.
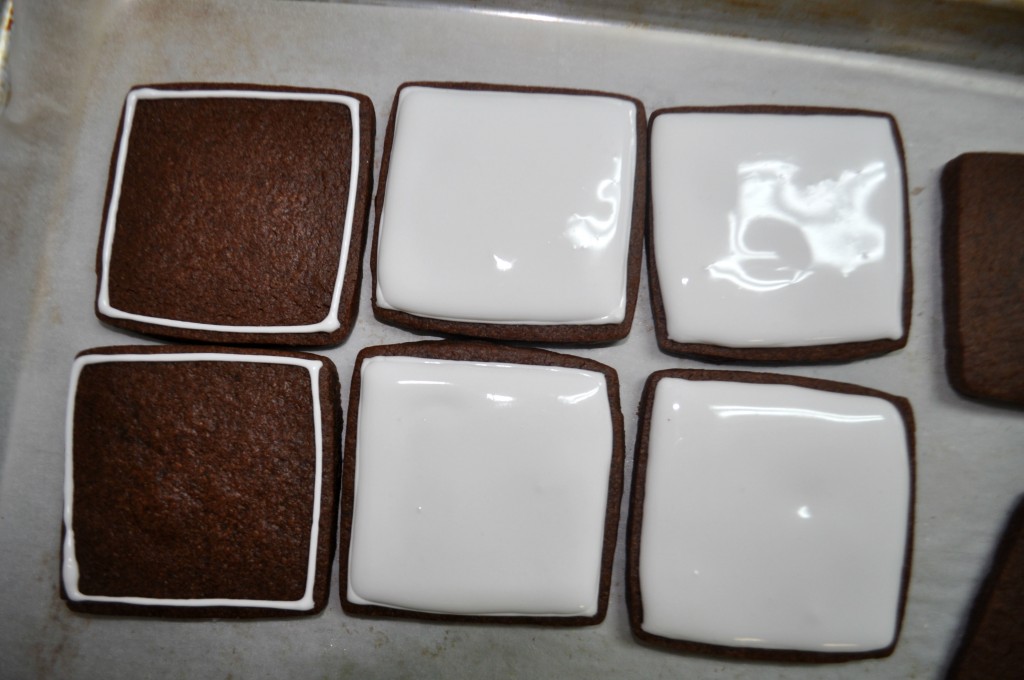
Using the prepared royal icing, outline each cookie with white icing. Fill in, or flood the cookies with the white icing that is the consistency of honey or corn syrup.
Allow these cookies to dry for at least 12 hours before adding the details. They most be completely dry before the images can be drawn on.
Step 4: How to Make a “Diary of a Wimpy Kid” Cookie – Add details to the cookies
For this step you will need a blue edible ink marker and a black edible ink marker.
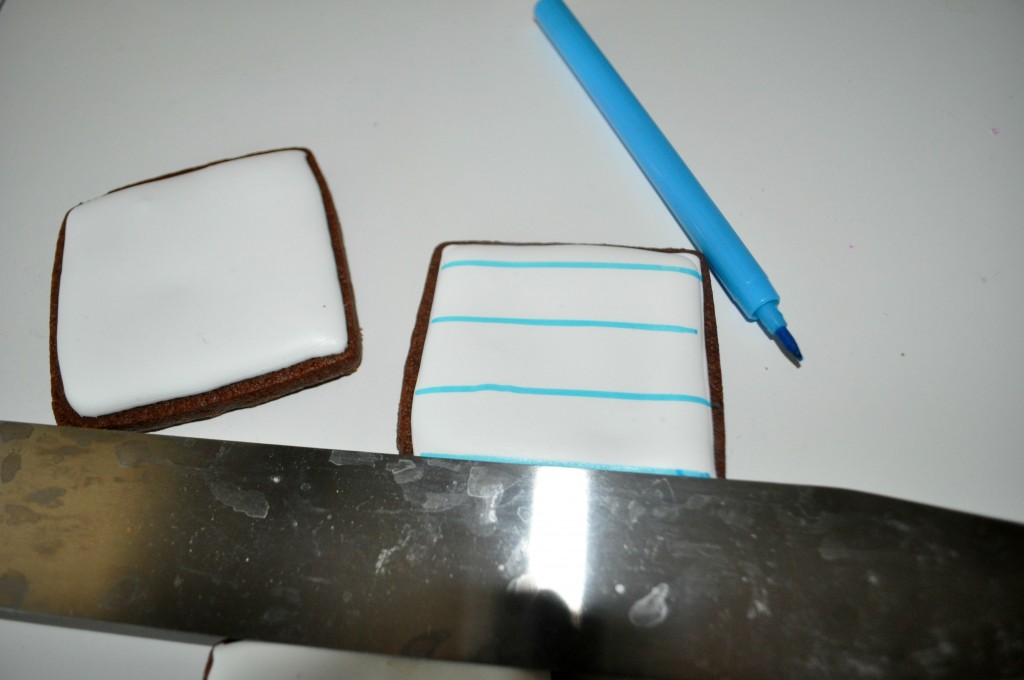
When the cookies are completely dry, use a straight edge to make the blue “notebook” lines on the cookies.
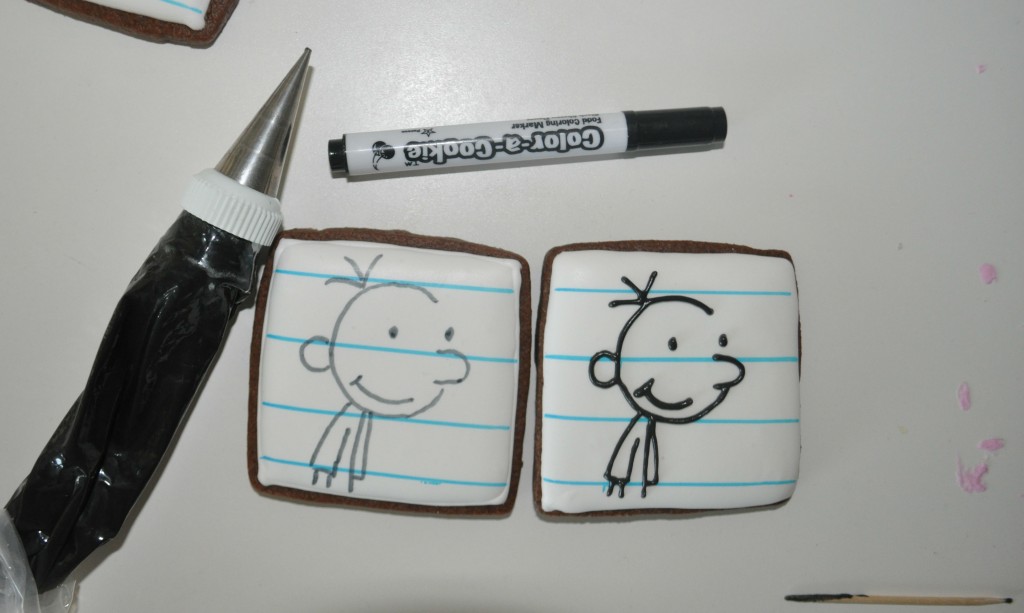
Next draw on the cartoon image using a black edible ink marker. There are several online tutorials on how to draw the “Diary of a Wimpy Kid” characters. I am “cheating” by using a specialized decorating projector – a Kopykake 300xk. For a bold effect, go over the black marker drawing with the black icing. I use a toothpick to help smooth the lines.

Allow the icing to dry several hours before packaging or serving.
These are great favors for a classroom or for a birthday party.
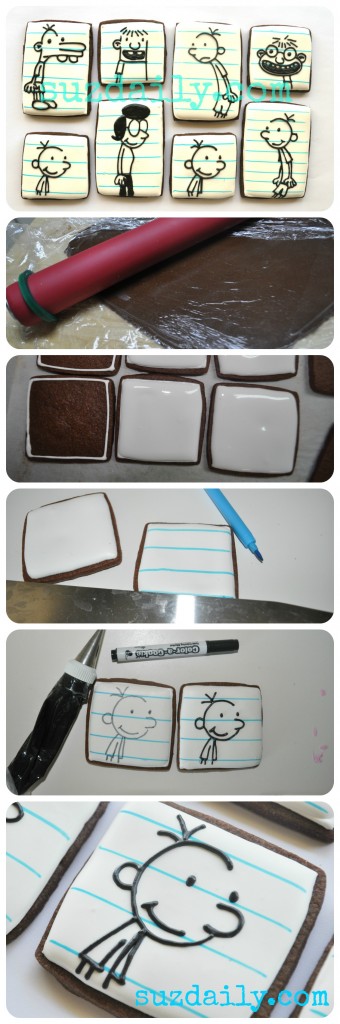
Photo summary for my Pinterest friends


I love these cookies, they look exactly like the original sketches! i am a big fan of the films and will defiantly be eating these whilst watching the films! 🙂
I’m so glad you like these! We love the movies too! Such fun characters. That is why we made these cookies.
Let me know how it goes!
Suzanne 🙂
HI SUZ, LOVE YOUR COOKIE SITE. WHERE CAN I FIND A ROLLER LIKE THE ONE IN THIS PHOTO (WIMPY KIDS RECIPE) WITH THE BANDS ON THE ENDS, AND CAN YOU EXPLAIN WHEN AND HOW YOU USE THE BANDS? THANK YOU, TRISH
Trish, I posted a link at the bottom of the post. I bought mine on Amazon. The bands are used to help keep the thickness even. I roll the cookies to either 1/4 inch (green bands) or to 3/8 inch (blue bands). Thanks for looking! Suzanne 🙂
You can buy the bands for your own rolling pin at Bed Bath and Beyond. Use your 20% off coupon, too.
Great idea! My rolling pin is falling apart. I need a new one!! I will save the next coupon.
Thanks!
Suzanne