How to Make a Captain America Cake
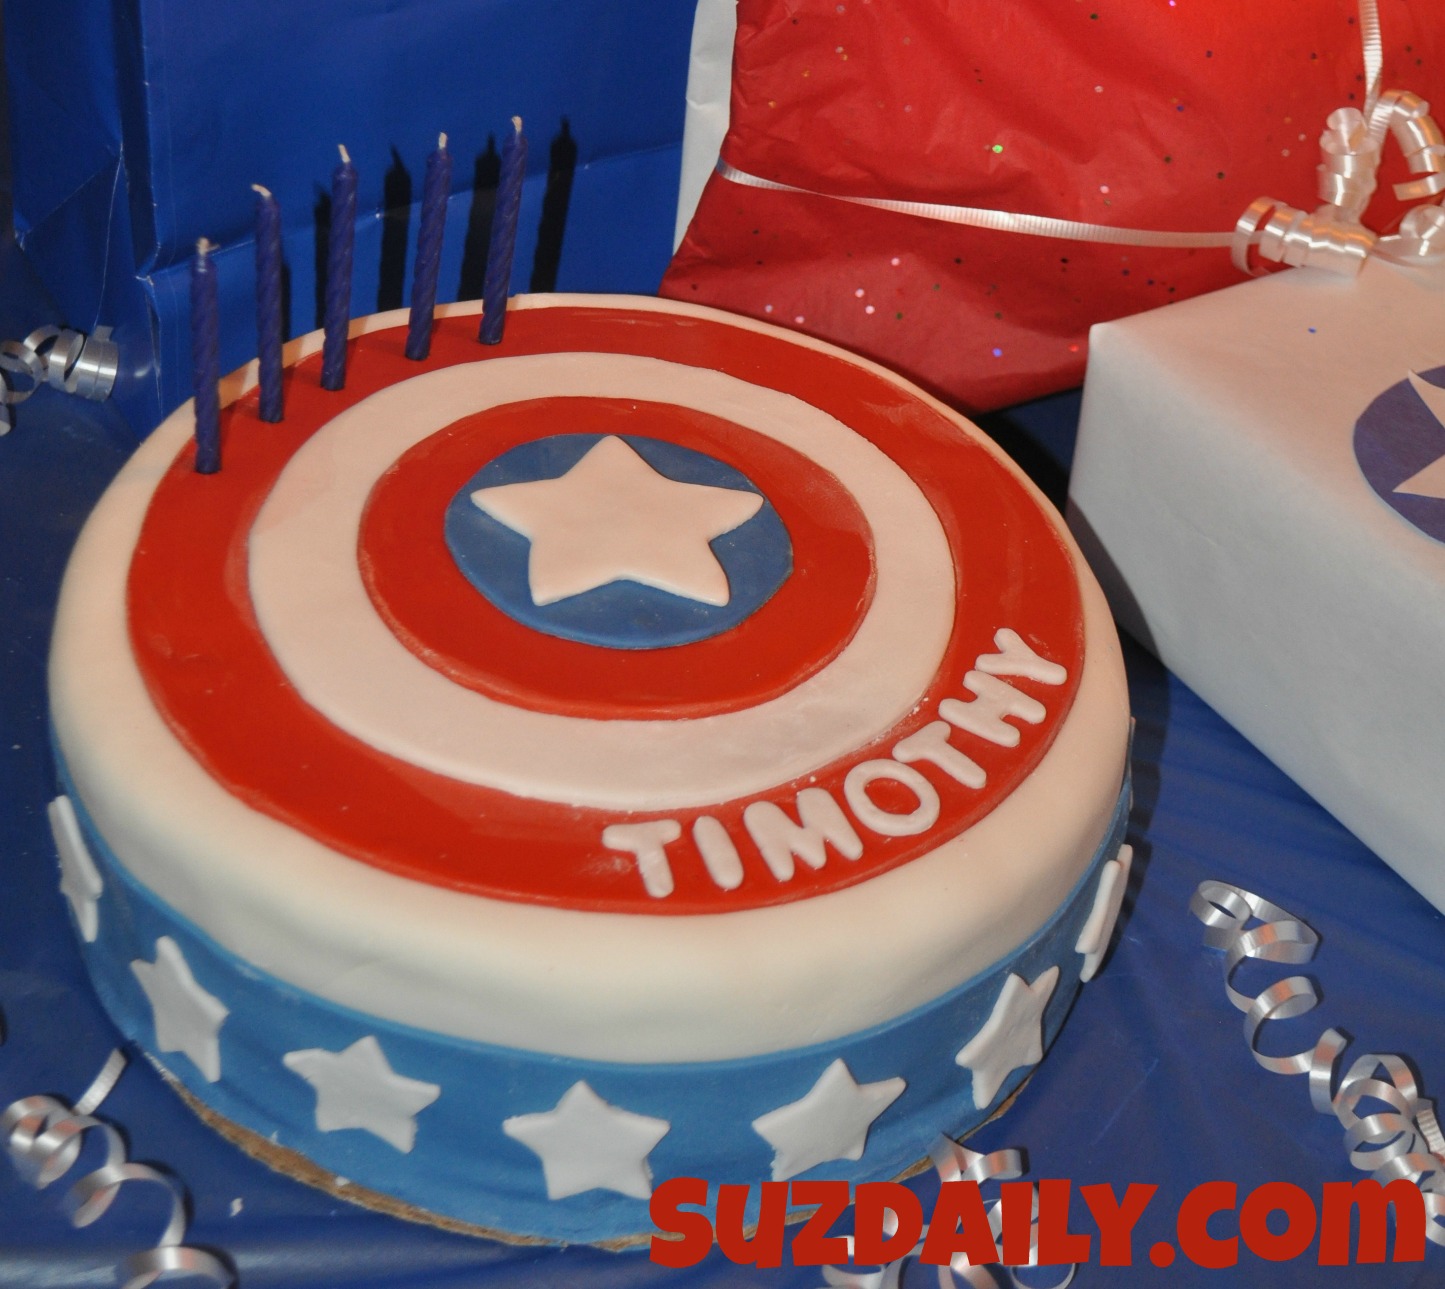
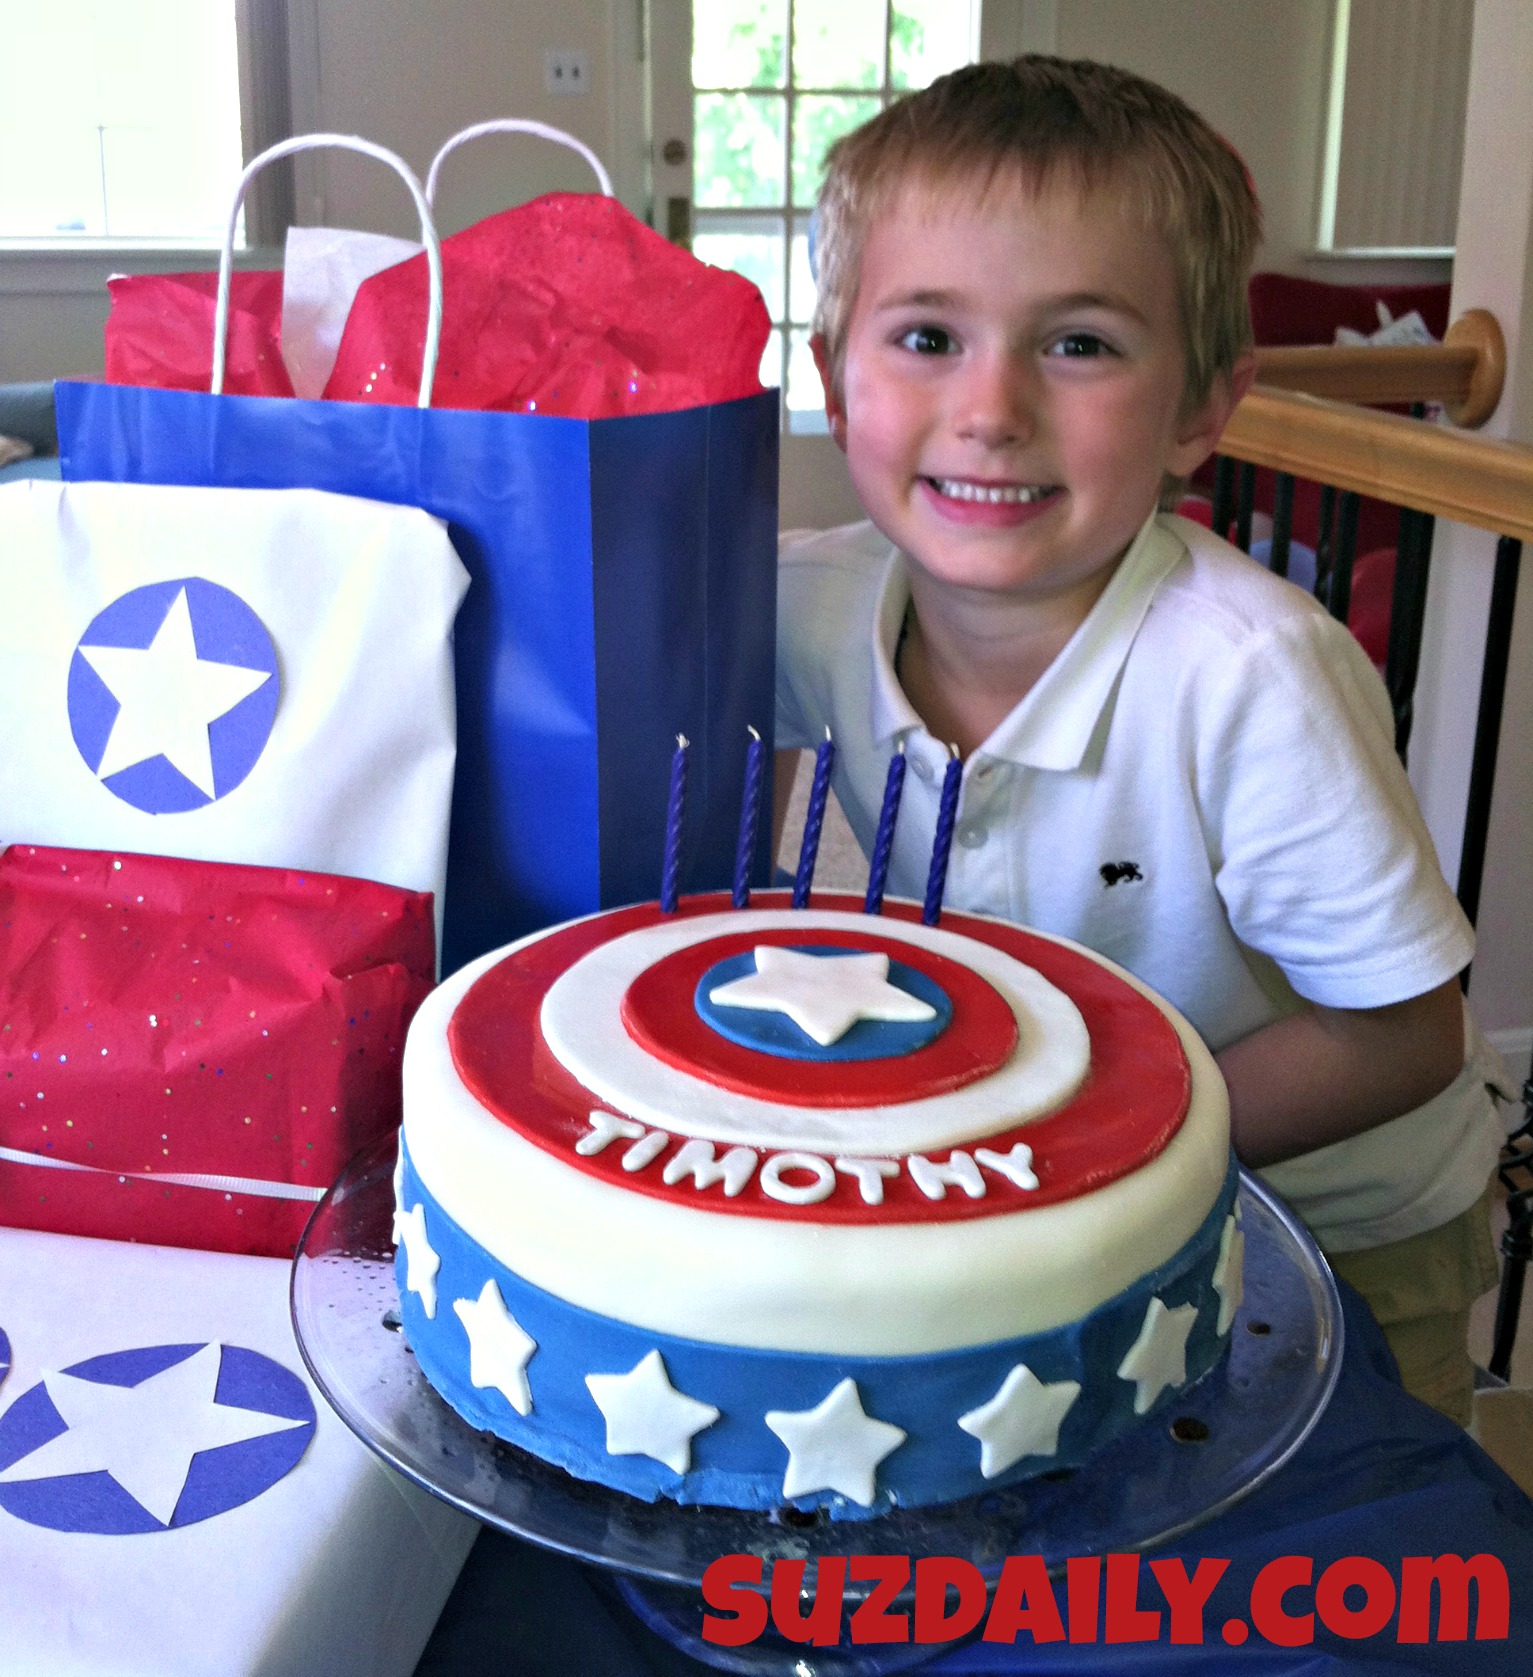
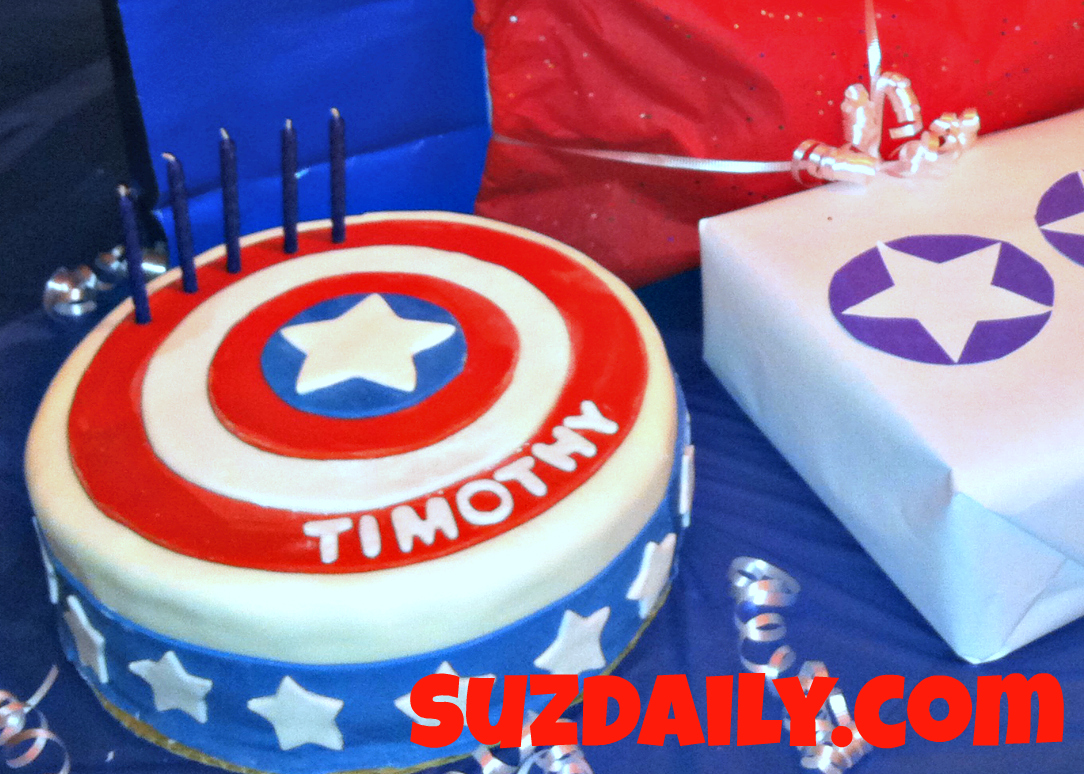
Happy 5th Birthday Timothy!! For his birthday he requested a Captain America cake. I started this cake a couple of days in advanced so I would not be overwhelmed with the process. I stressed about getting the circles on the shield just right, until I realized all I would need is an inexpensive protractor! It worked great and I am so happy with how this cake turned out. With just a few new fondant tools I was able to make a Captain America cake that my little guy was so proud of.
For details on how I made this Captain America Cake…
Step 1: How to Make a Captain America Cake – Bake rounds
To begin follow your favorite recipe and bake two cake rounds. I used two nine inch pans and my favorite recipe that works great for high altitude baking. That recipe can be found here. Allow the cake to chill completely and carefully level each cake using a simple Wilton tool.
Step 2 – How to Make a Captain America Cake – Ice the cakes
As the cake is cooling prepare delicious homemade buttercream icing. My favorite recipe is found here. Or, just skip this step and used store bought frosting. Place a small blob of icing on a cardboard cake round, then cover with one of the nine inch cakes. Cover the top of this first cake with a layer of icing and top with the second cake round. At this point you are ready to cover the entire cake with the first layer of icing – the crumb coat of icing. Cover well and do your best to keep the icing smooth. Place in the refrigerator to chill momentarily. Add the next layer of icing and again smooth the icing. Large gaps will be visible once you add the fondant. Place the iced cake in the refrigerator. For me, this is enough work for one day.
Step 3 – How to Make a Captain America Cake – Cover with Rolled Fondant
I like to keep the cost of materials for this Captain America cake down since it will be served at a simple family gathering. This is why I prefer to make homemade marshmallow fondant. You can find a detailed tutorial on how to make marshmallow fondant here. For this project I will keep the majority of the fondant white and dye the rest of it blue and red. For the blue I used Americolor Royal blue food dye with the smallest amount of Americolor black food dye. For the red I used Americolor Super red food dye with the tiniest hint of brown Americolor food dye. Be sure to use food safe gloves or even plastic bags to protect your hands from getting dyed as you knead the color into the rolled fondant.
The Process… please excuse bad lighting and the kitchen mess. This cake was decorated VERY late at night.
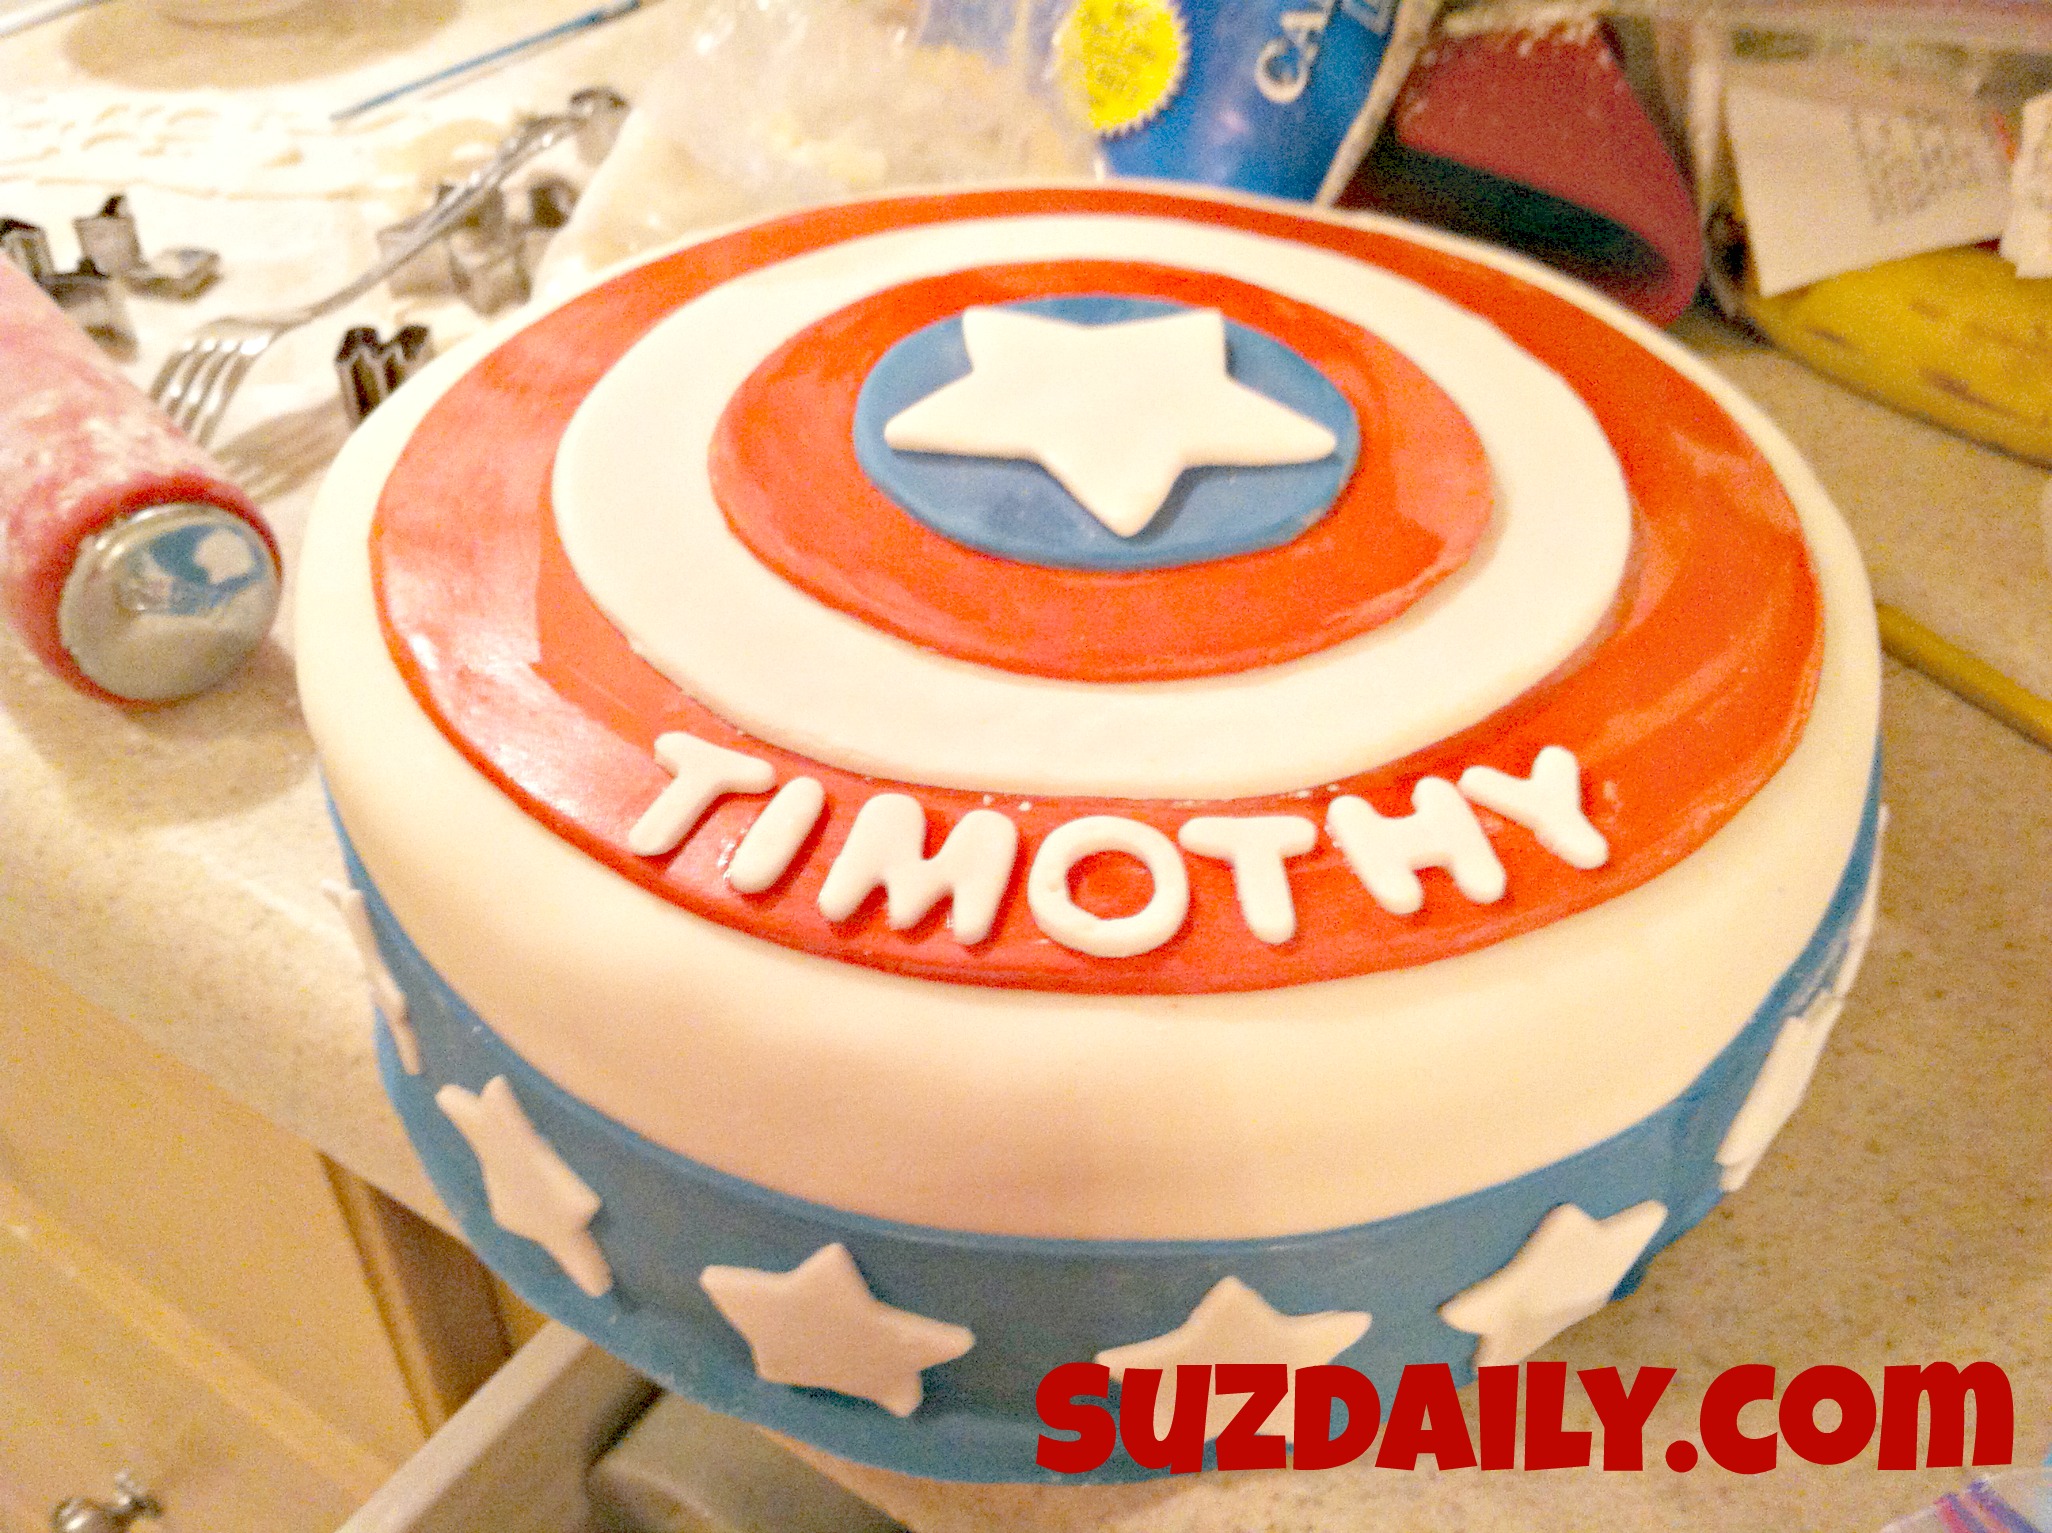
Roll out a large piece of white fondant to cover the entire cake. Carefully wrap the piece of fondant around a rolling pin and transfer on top of the cake. Use a fondant smoothing tool to get the surface as flat as possible. Do not look too closely at my photos – my cake is not completely smooth. Next, using the Wilton star shaped fondant cutters make one large white star for the center of the cake. Roll out some of the blue fondant. Place the star on top of the blue fondant to check the size of the first circle. Use a protractor to trace a circle slightly bigger than the white star.
Roll out more sheets of red and white fondant. Continue to make circles using the protractor, each about 1/2 inch larger than the next. I printed off a large Captain America shield to use as my guide and to see about how large the radius of each circle should be. In the end you will have four circles, in order of smallest to largest, blue, red, white and red. Carefully stack the circles and place on top of the white cake. I used a little bit of corn syrup to “glue” my pieces together.
Step 4 – How to Make a Captain America Cake – Add border and final details
Last, I roll out a long piece of blue fondant and use a fondant ribbon cutter to make a long strip to go around the base of the cake. This would be very hard without the Wilton tool. My border was about 1 1/2 inches wide. Next cut out small stars using the same Wilton star cutters shown above. Use corn syrup or a bit of water to “glue” the stars on the border. With a bit of white rolled fondant, cut out the child’s name. In order to use these ABC fondant cutters make sure the fondant is slightly dry or it will be difficult to remove the shapes. Place the name on the cake… and that is it!
With this type of project it is all about the tools. Whenever I make a cake for one of my kids I buy myself one small decorating tool to make the job easier. If you have never made cakes for kids, please try!!! There are so many fun ideas online that can work for just about any birthday theme. Kids love helping and watching the process from start to finish. It is much better than an episode of Cake Boss.


Hello, I think this cake is awesome! How did you get the cake to have such a glossy look to it? My stepson asked me to make him a Captain America Cake and I would like to follow your steps to do so.
April,
Sometimes when I roll out fondant I use powdered sugar (if it is too sticky). If it seems rather dry I use just a think layer of shortening on the work space. The shortening is what makes it look glossy. It is so little that you can not taste it. (actually we don’t really eat the marshmallow fondant – i usually peel it off before serving).
I wish I had more details as to this cake. Just make circles and stack them that’s it! Also the star cutters and a fondant ribbon fondant really helps.
Thanks for looking!
Suzanne 🙂
Great! Thanks so much for your reply. I’m making the cake right now!
Hi! I am going to give this a try using your fondant recipe. Will one batch of your fondant be enough? Thanks!