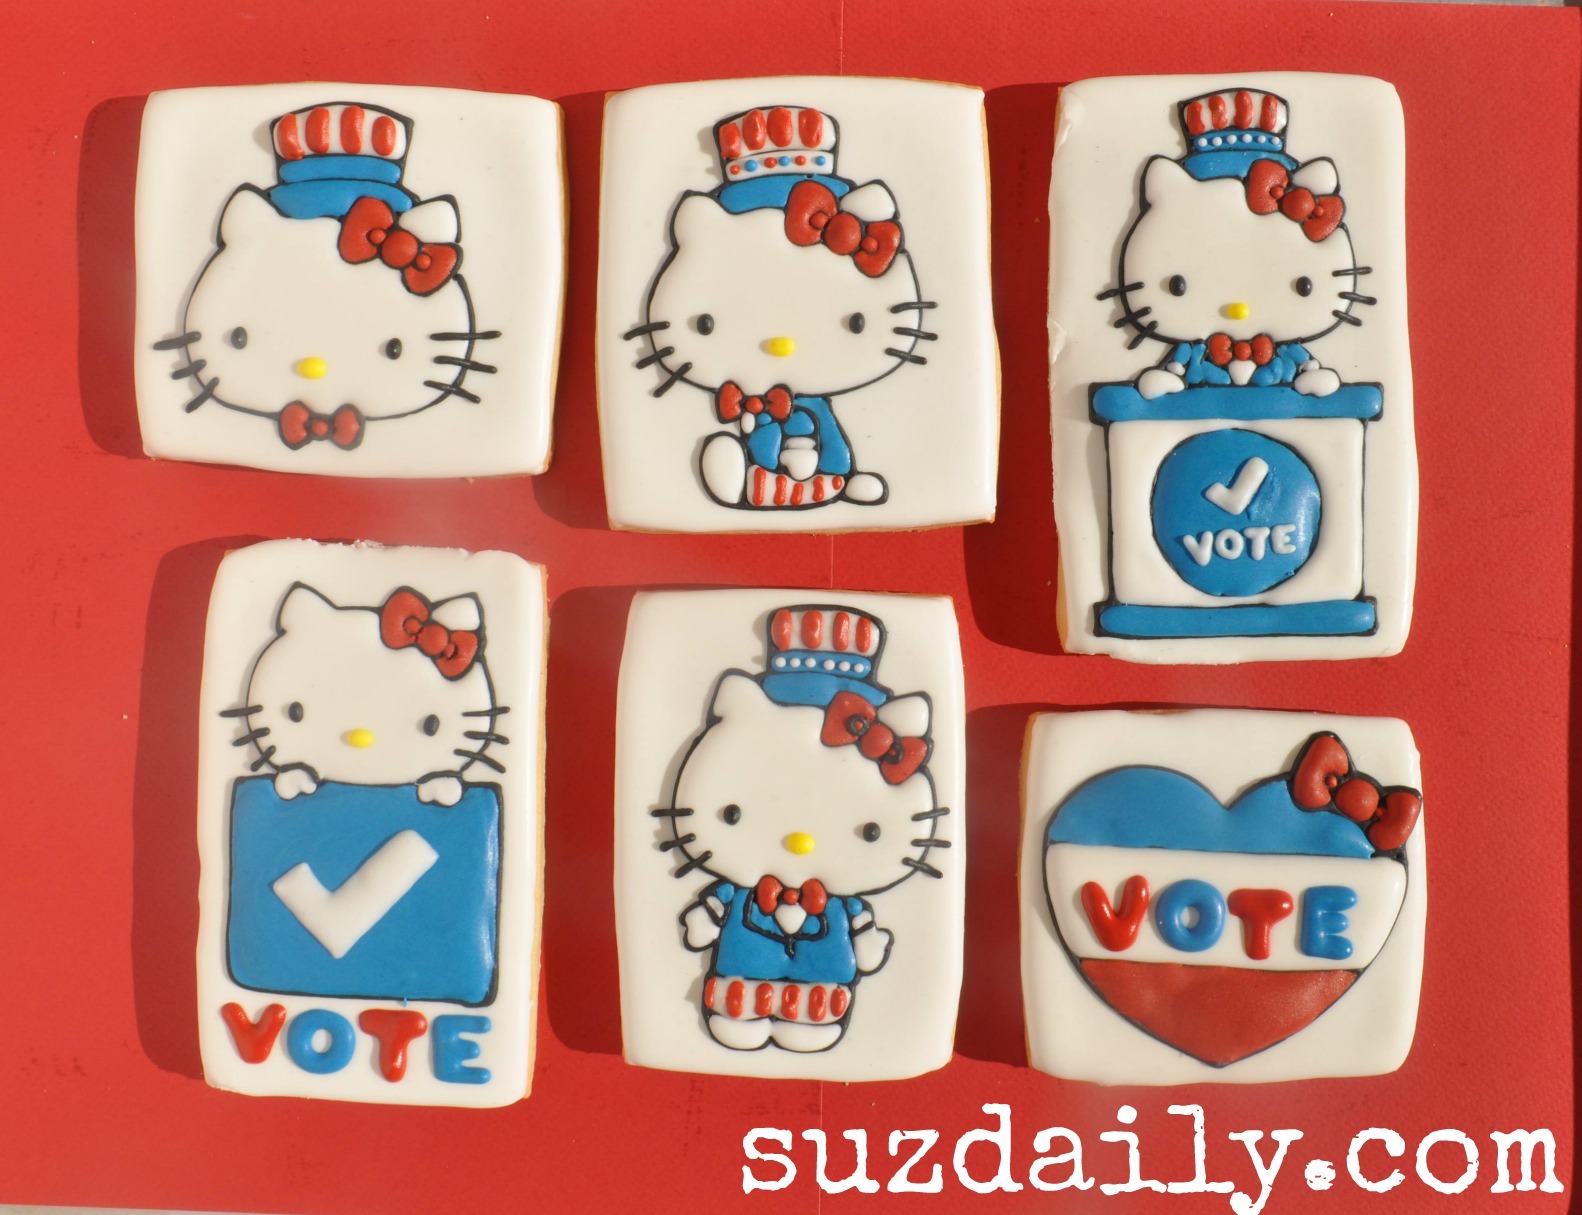
Patriotic Hello Kitty Cookies

Happy 4th of July from suzdaily.com. I hope you are enjoying your break as much as we are. Here are some patriotic Hello Kitty Cookies I made last Fall for the presidential election. They would also be great for a 4th of July celebration. You can never go wrong with Hello Kitty Cookies.
Keep reading for a long overdue tutorial on how I made these patriotic Hello Kitty cookies.
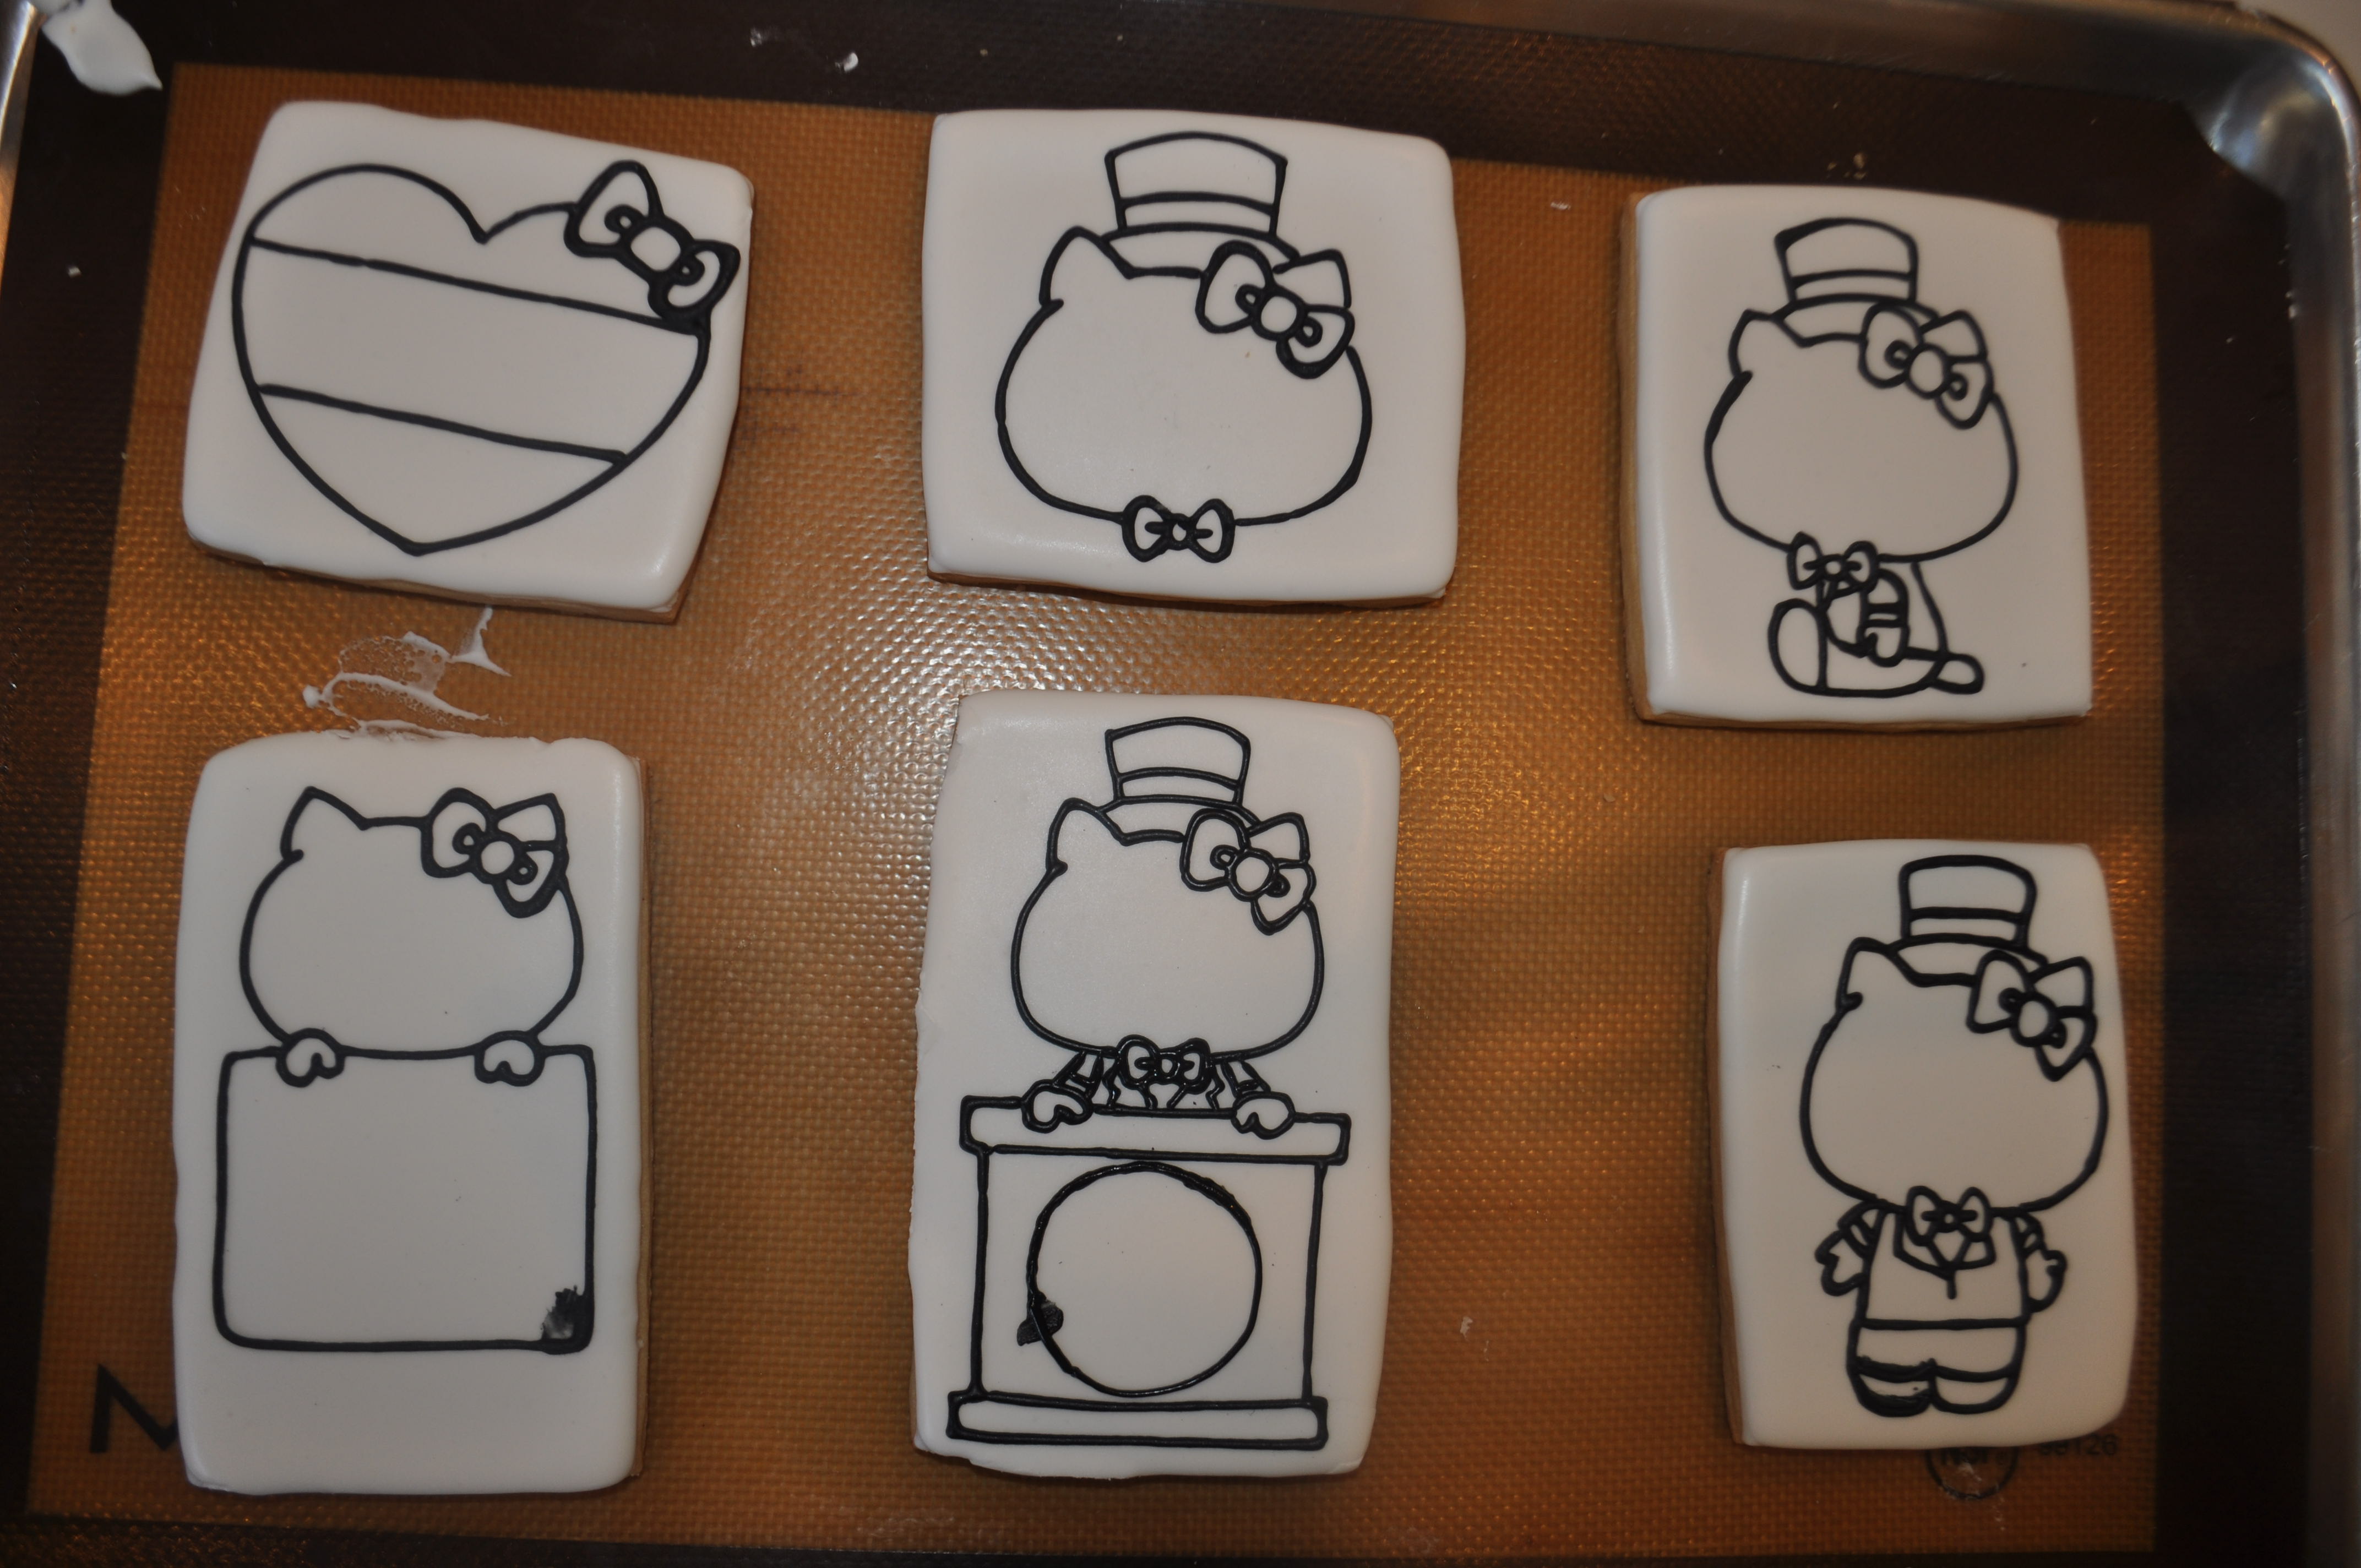
I started off with sugar cookies using my favorite recipe found here. I found some cute Hello Kitty images on the internet and scaled them to be about the same size. I cut these images into rectangles and used this for sizing my cookies.
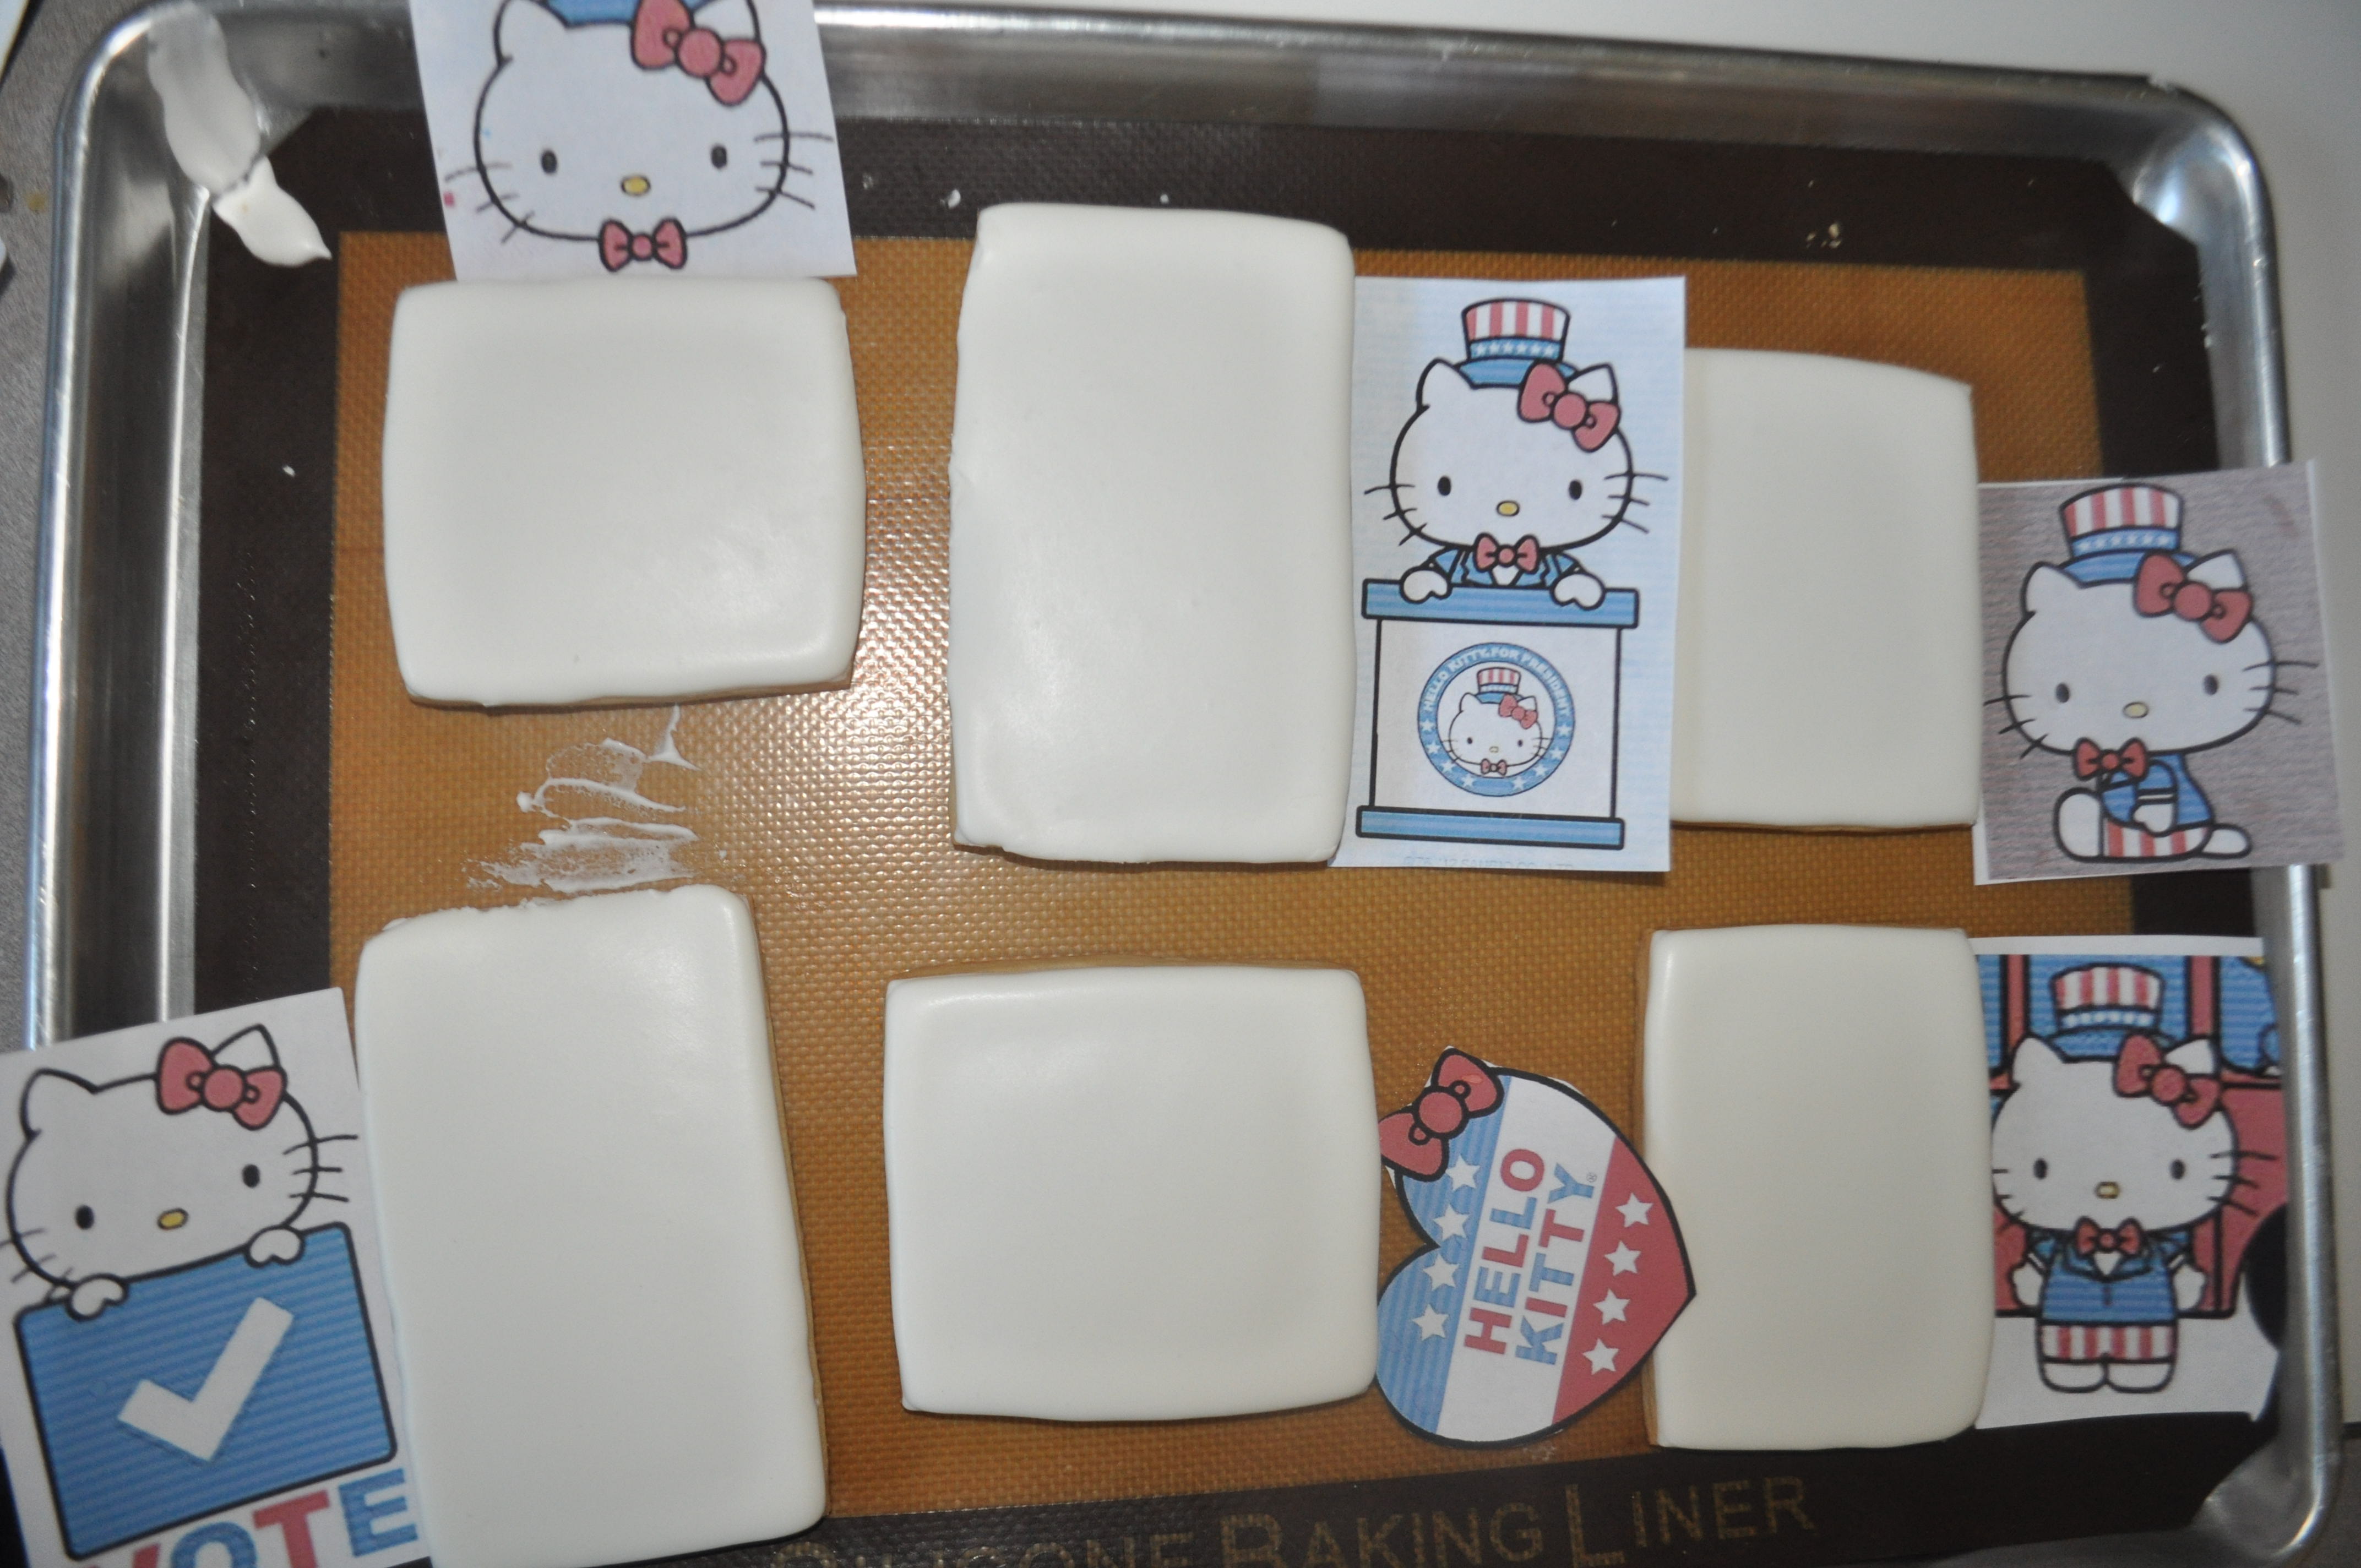
After baking the cookies I outlined and flooded the cookies with white royal icing. You can find out more about how I make and decorate with royal icing here. As you can see above, the printed images will be the guides for decorating these cookies.
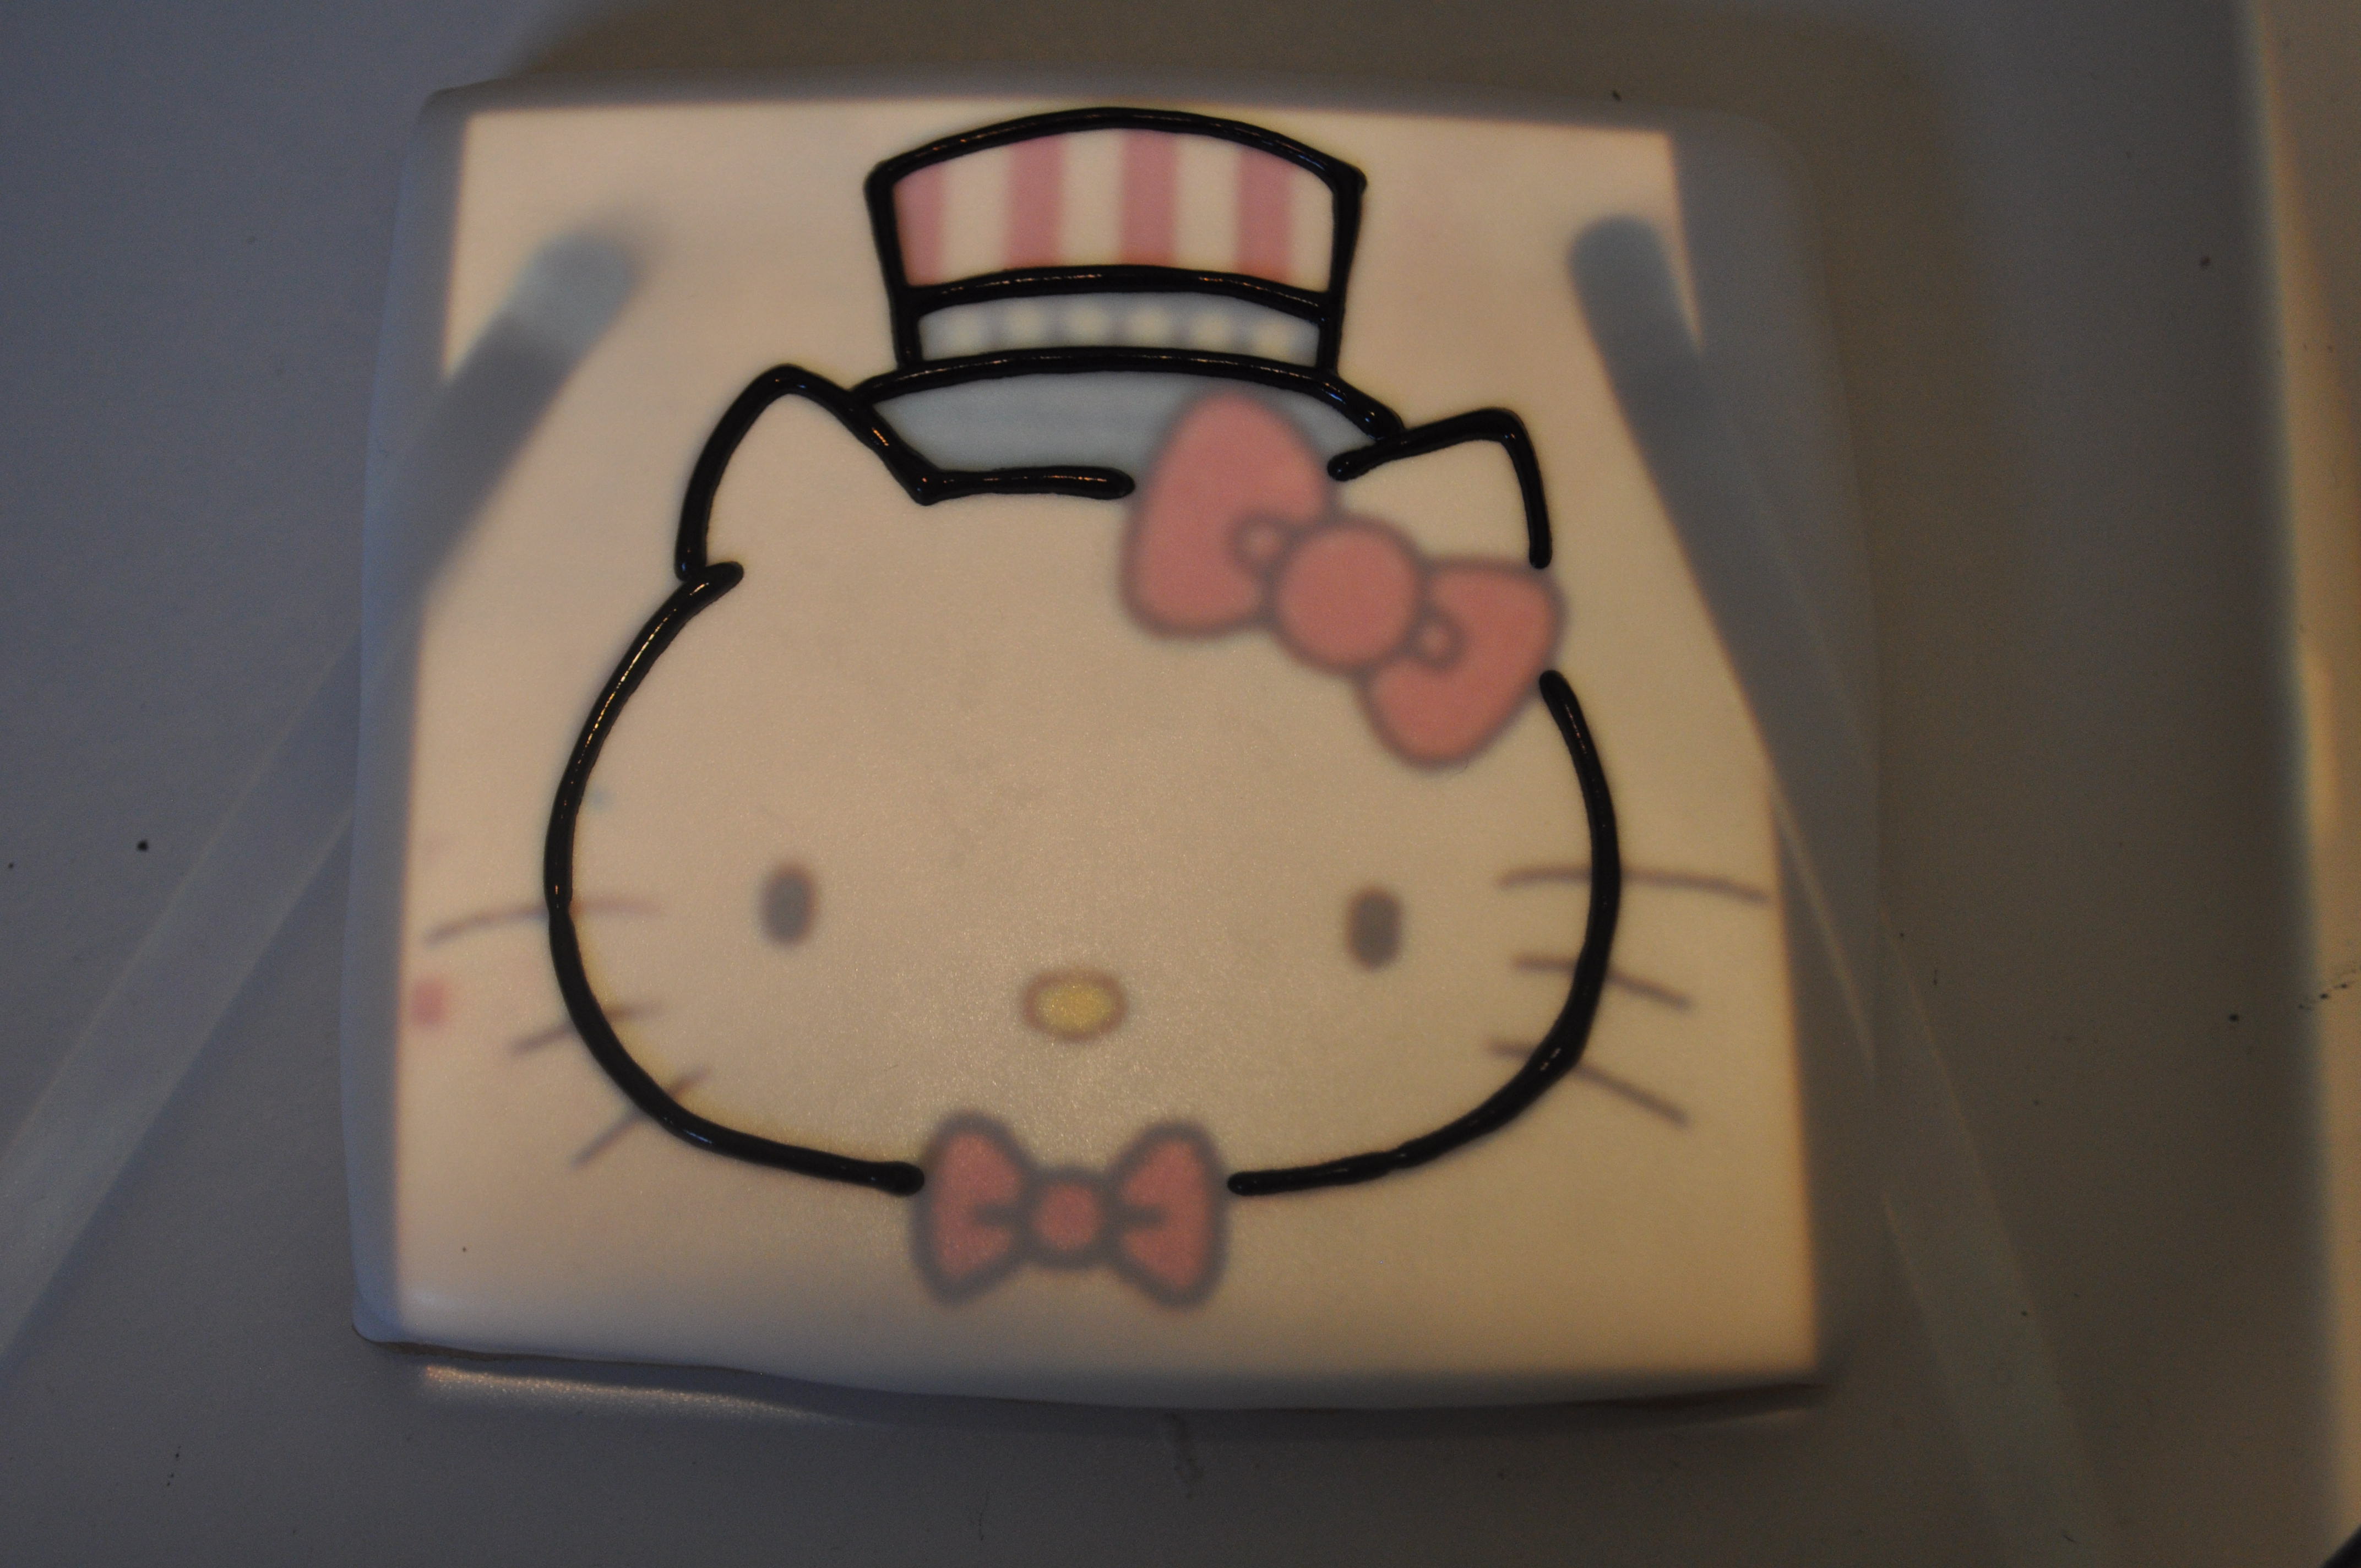
I then use the kopykake 300xk cake decorating projector to project the printed image on to the Hello Kitty cookie. From there I outline the image using black royal icing. As always, make black royal icing days in advanced and color with Americolor gels to a dark charcoal. As the icing sits it will turn to black. This allows you to use as little food dye as possible. The icing should be to a piping consistency and form soft peaks when lifted with a spoon.
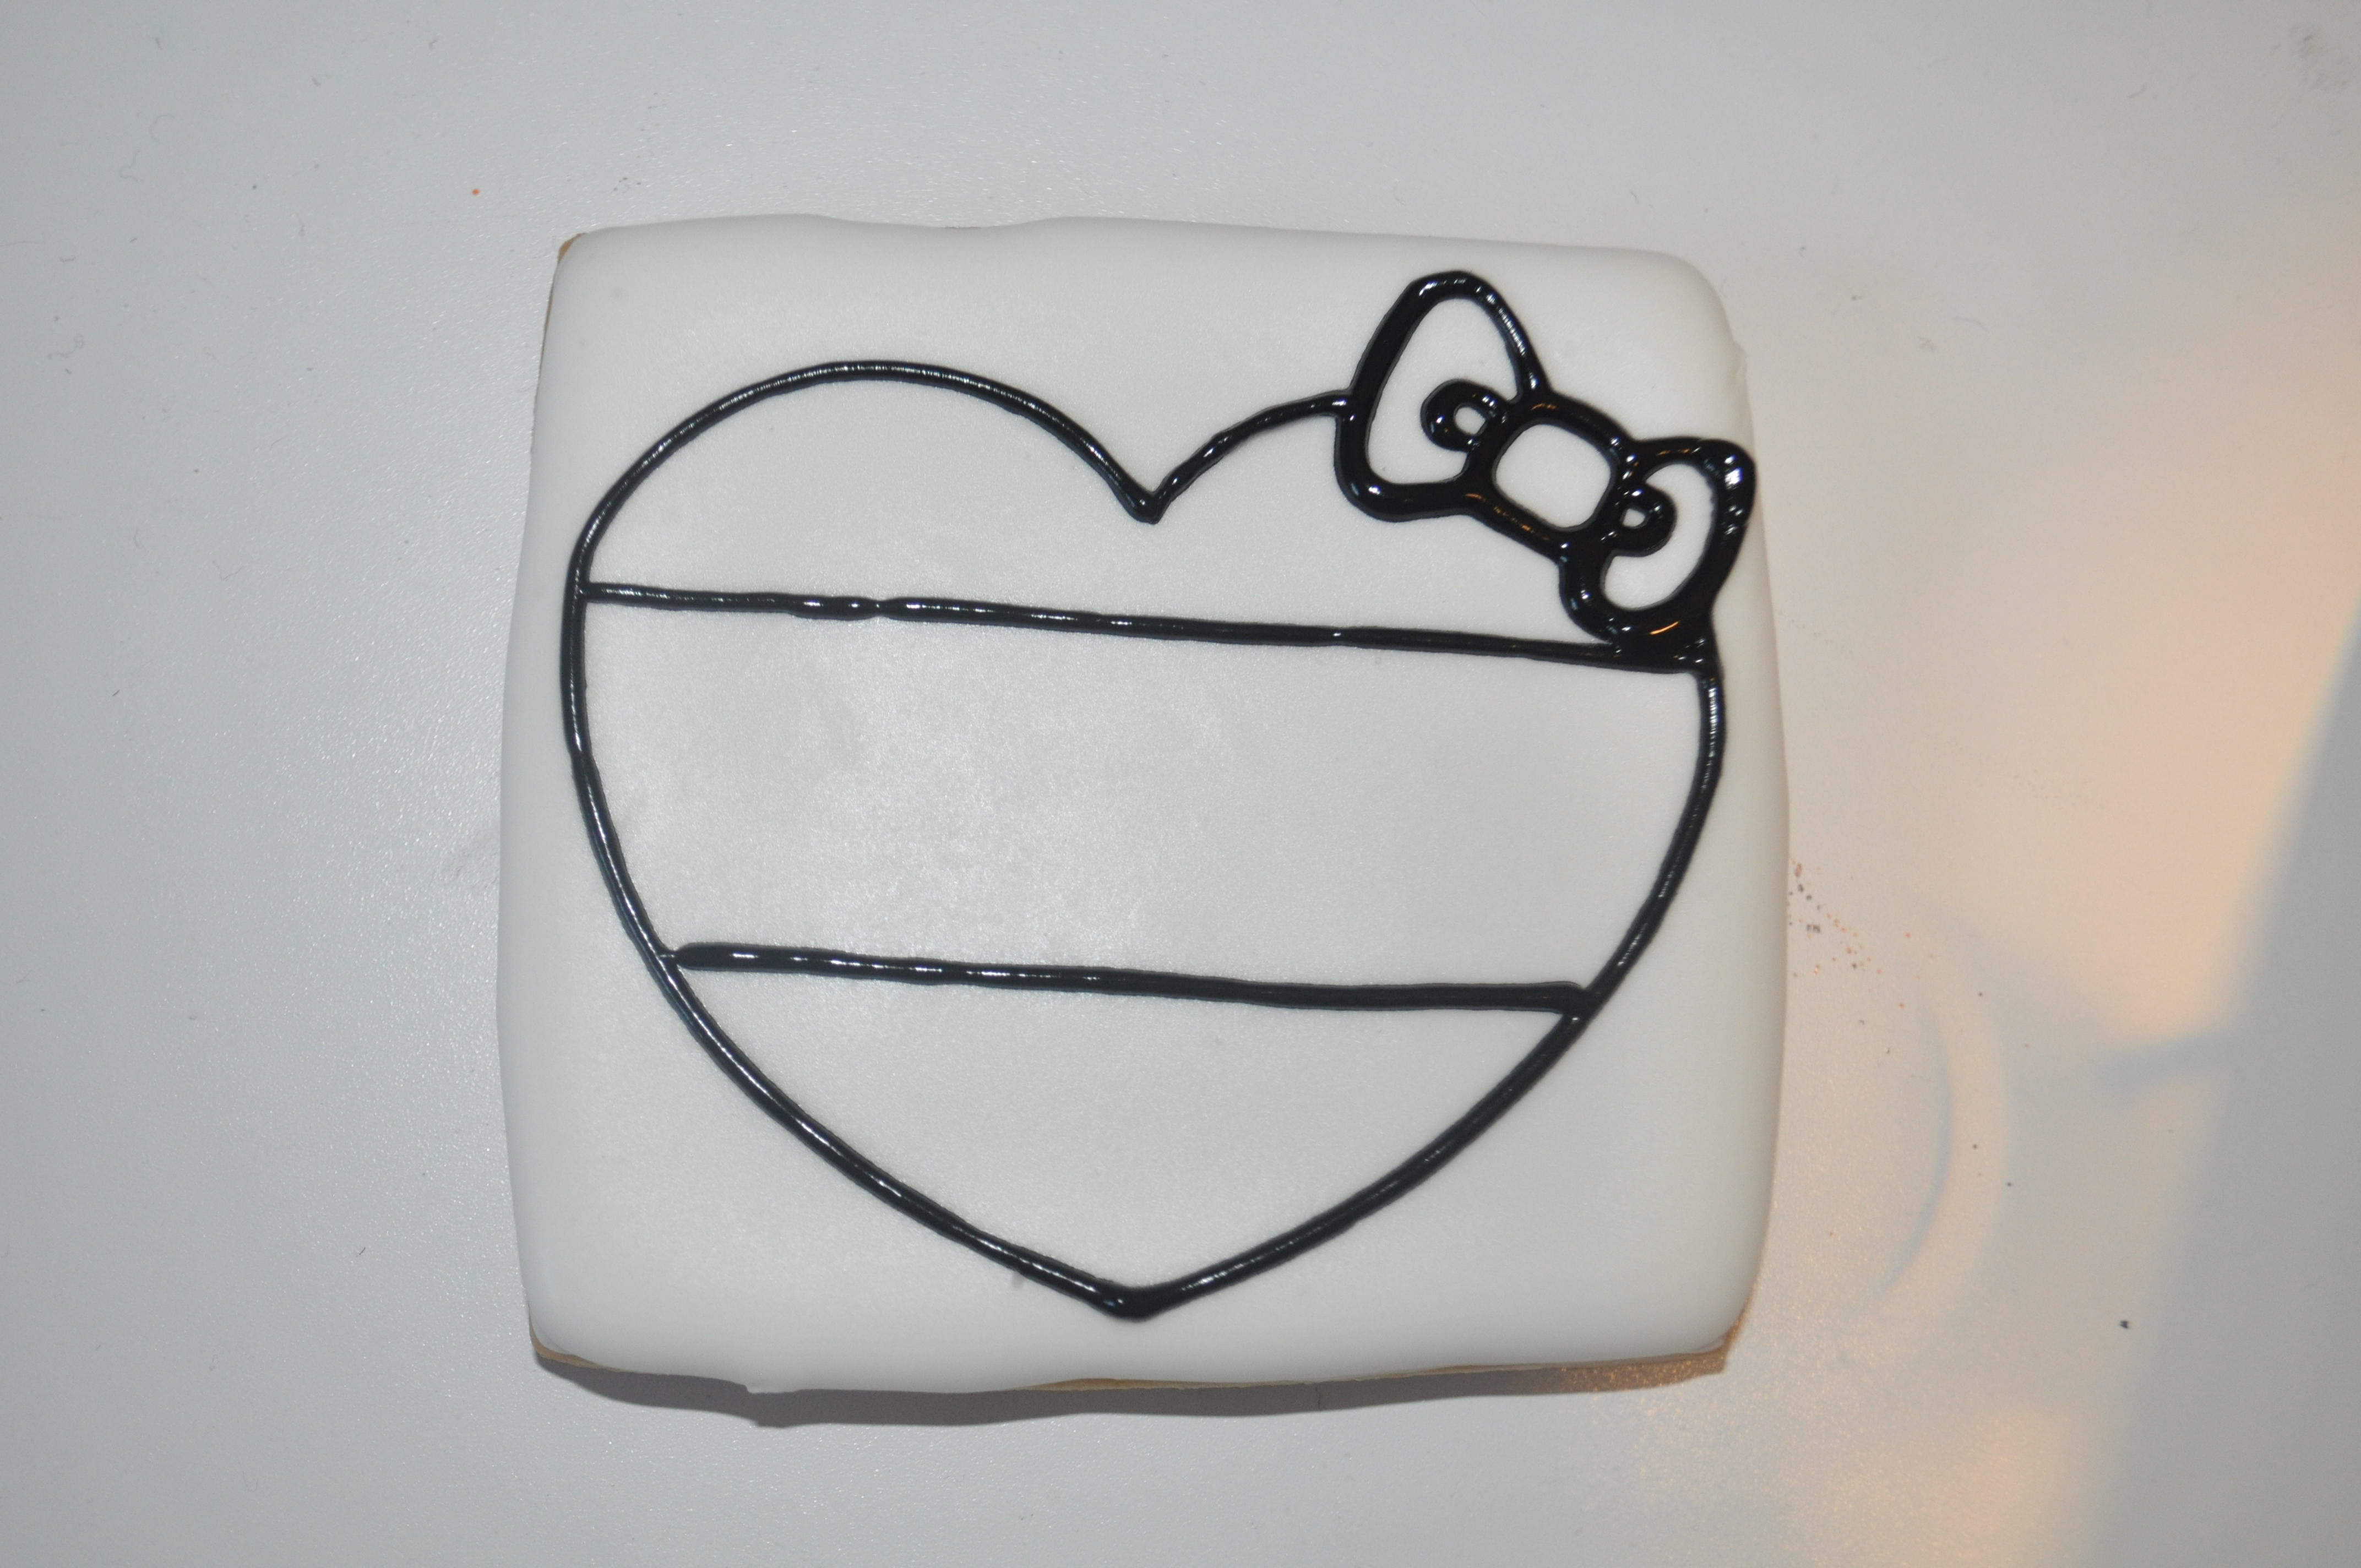
I prefer to use a PME #1.5 tip to outline the image with black royal icing.
All the images have been outlined on to the Hello Kitty cookie. From here, fill or flood individual sections with thinned royal icing. For this project I will be using white, red, blue and just a bit of yellow royal icing for the individual sections. The thinned royal icing is the consistency of honey or corn syrup.
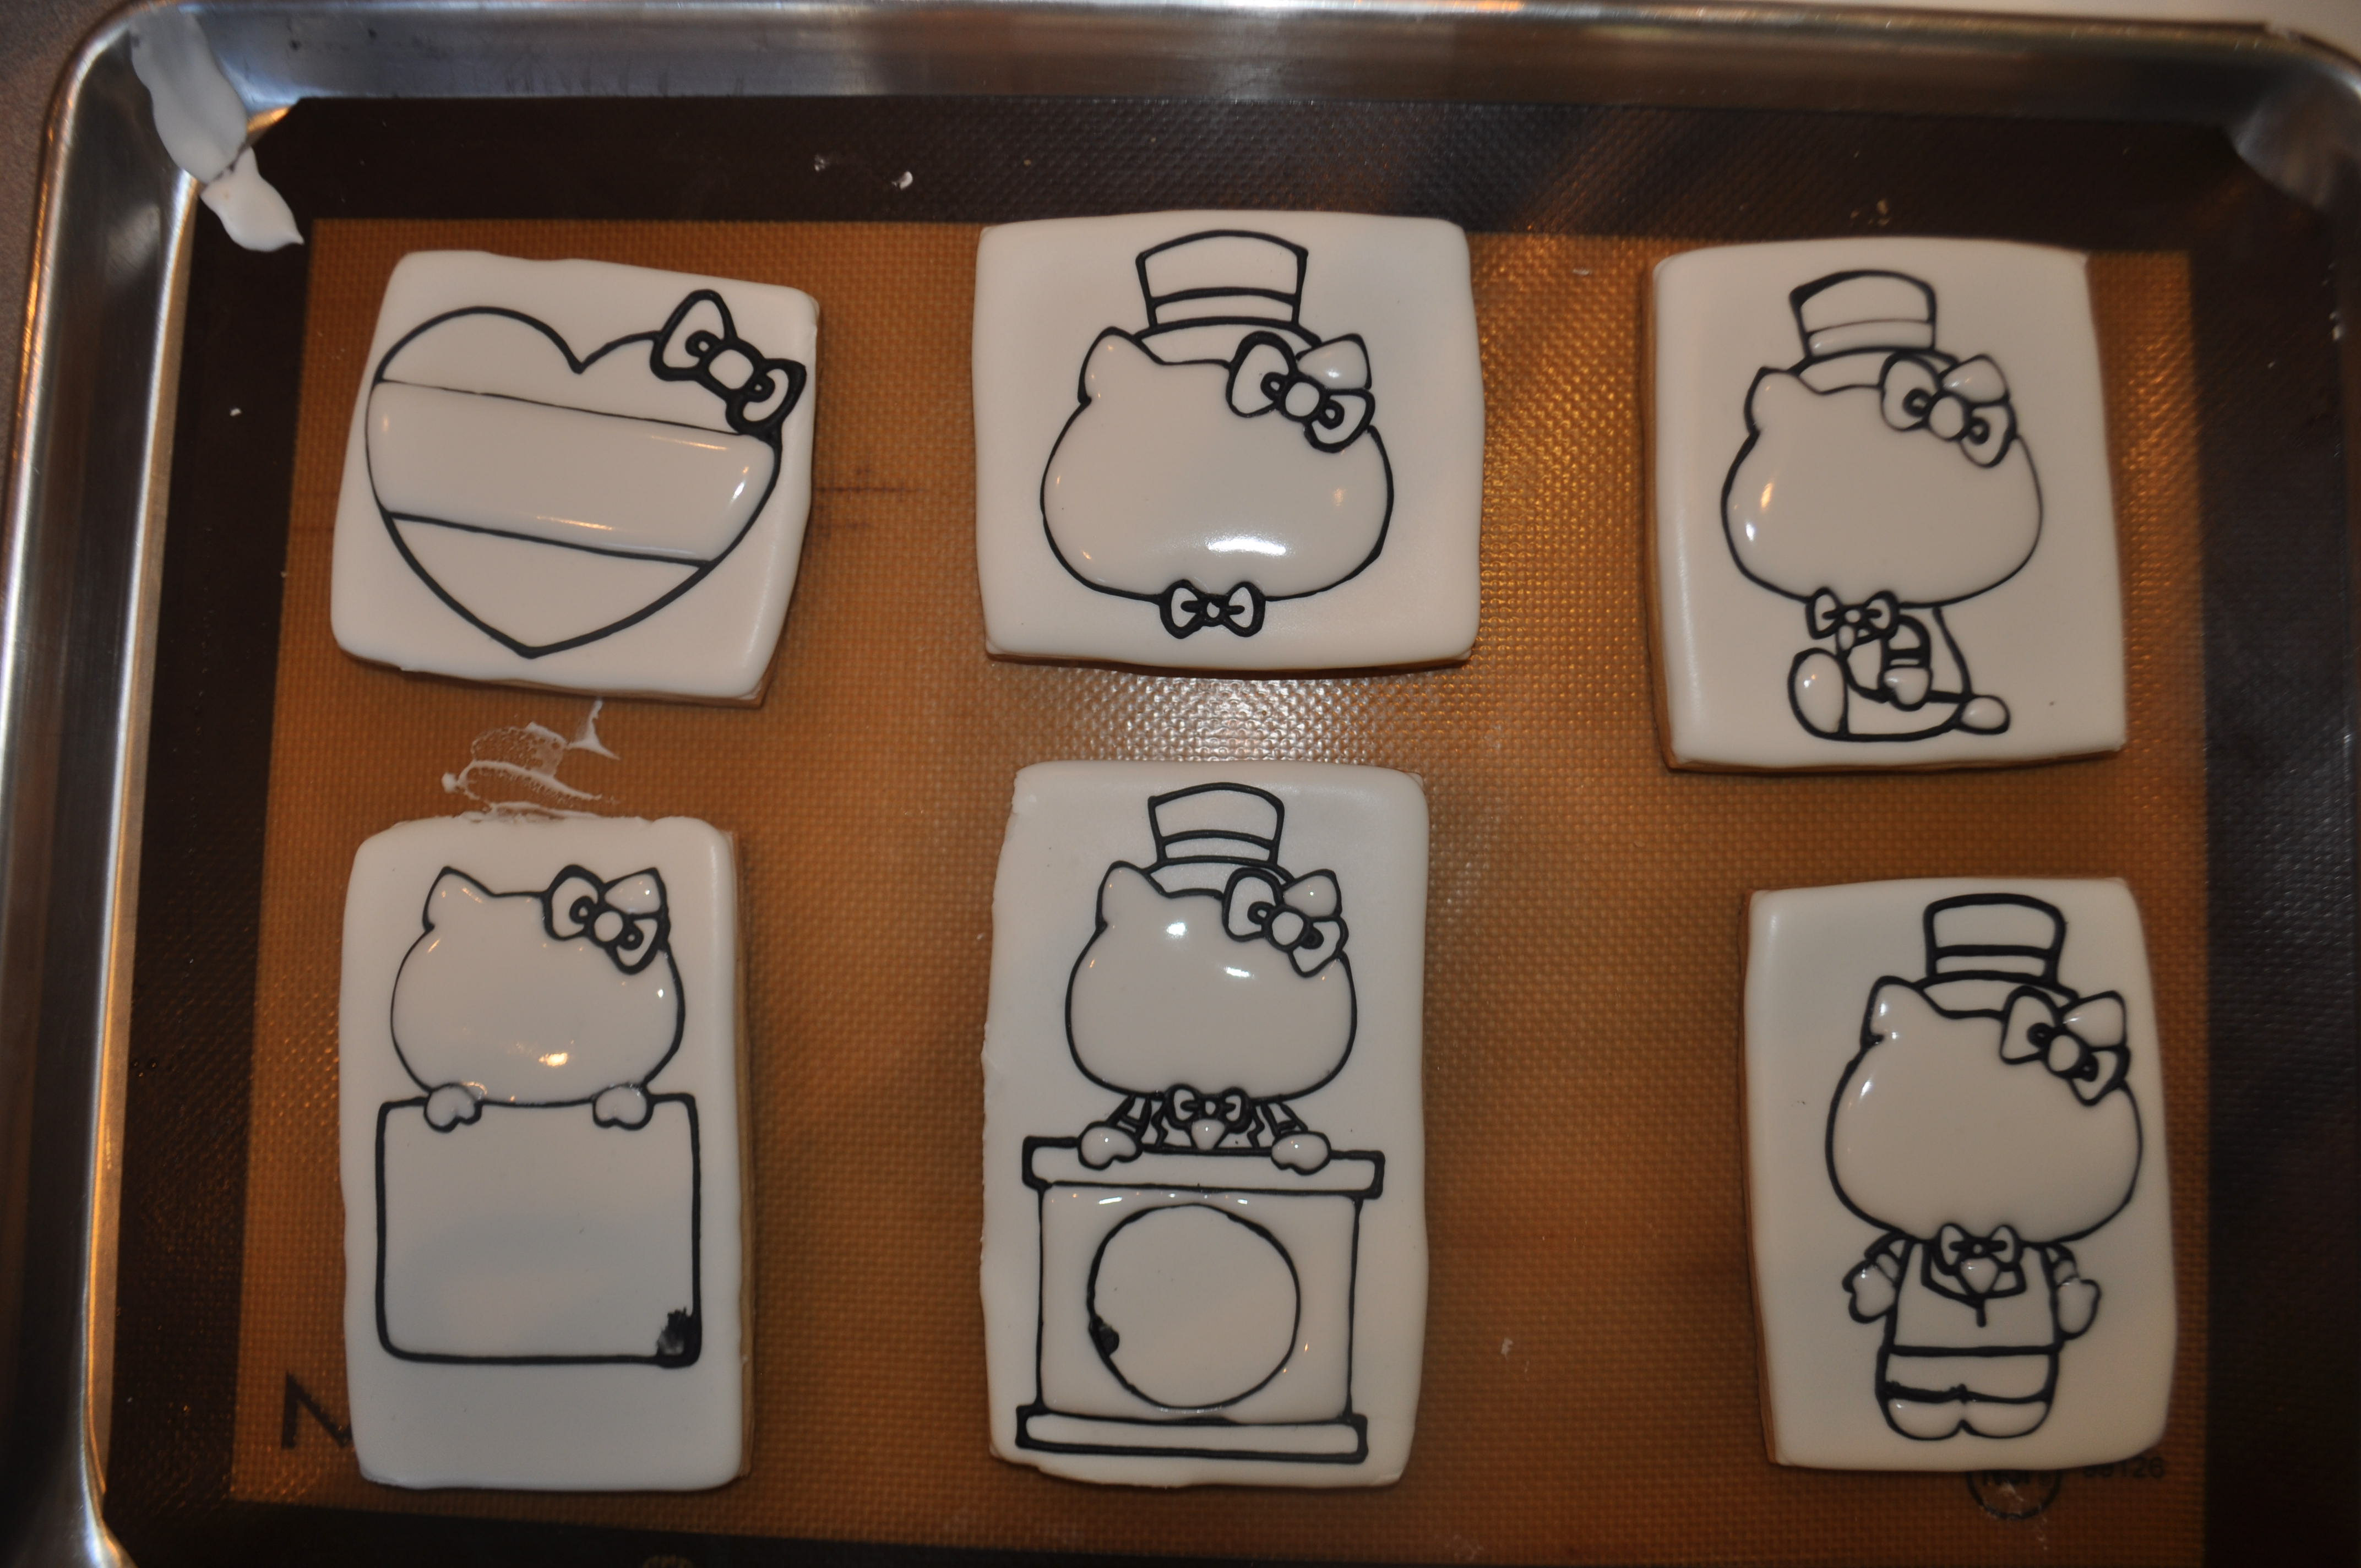
I continue to fill in sections with royal icing. As you can see in this photo, I am starting with white royal icing. It doesn’t matter where you start, you just have to be sure to not fill two sections that are close to each other. I allow this to set for 20-30 minutes before adding more icing.
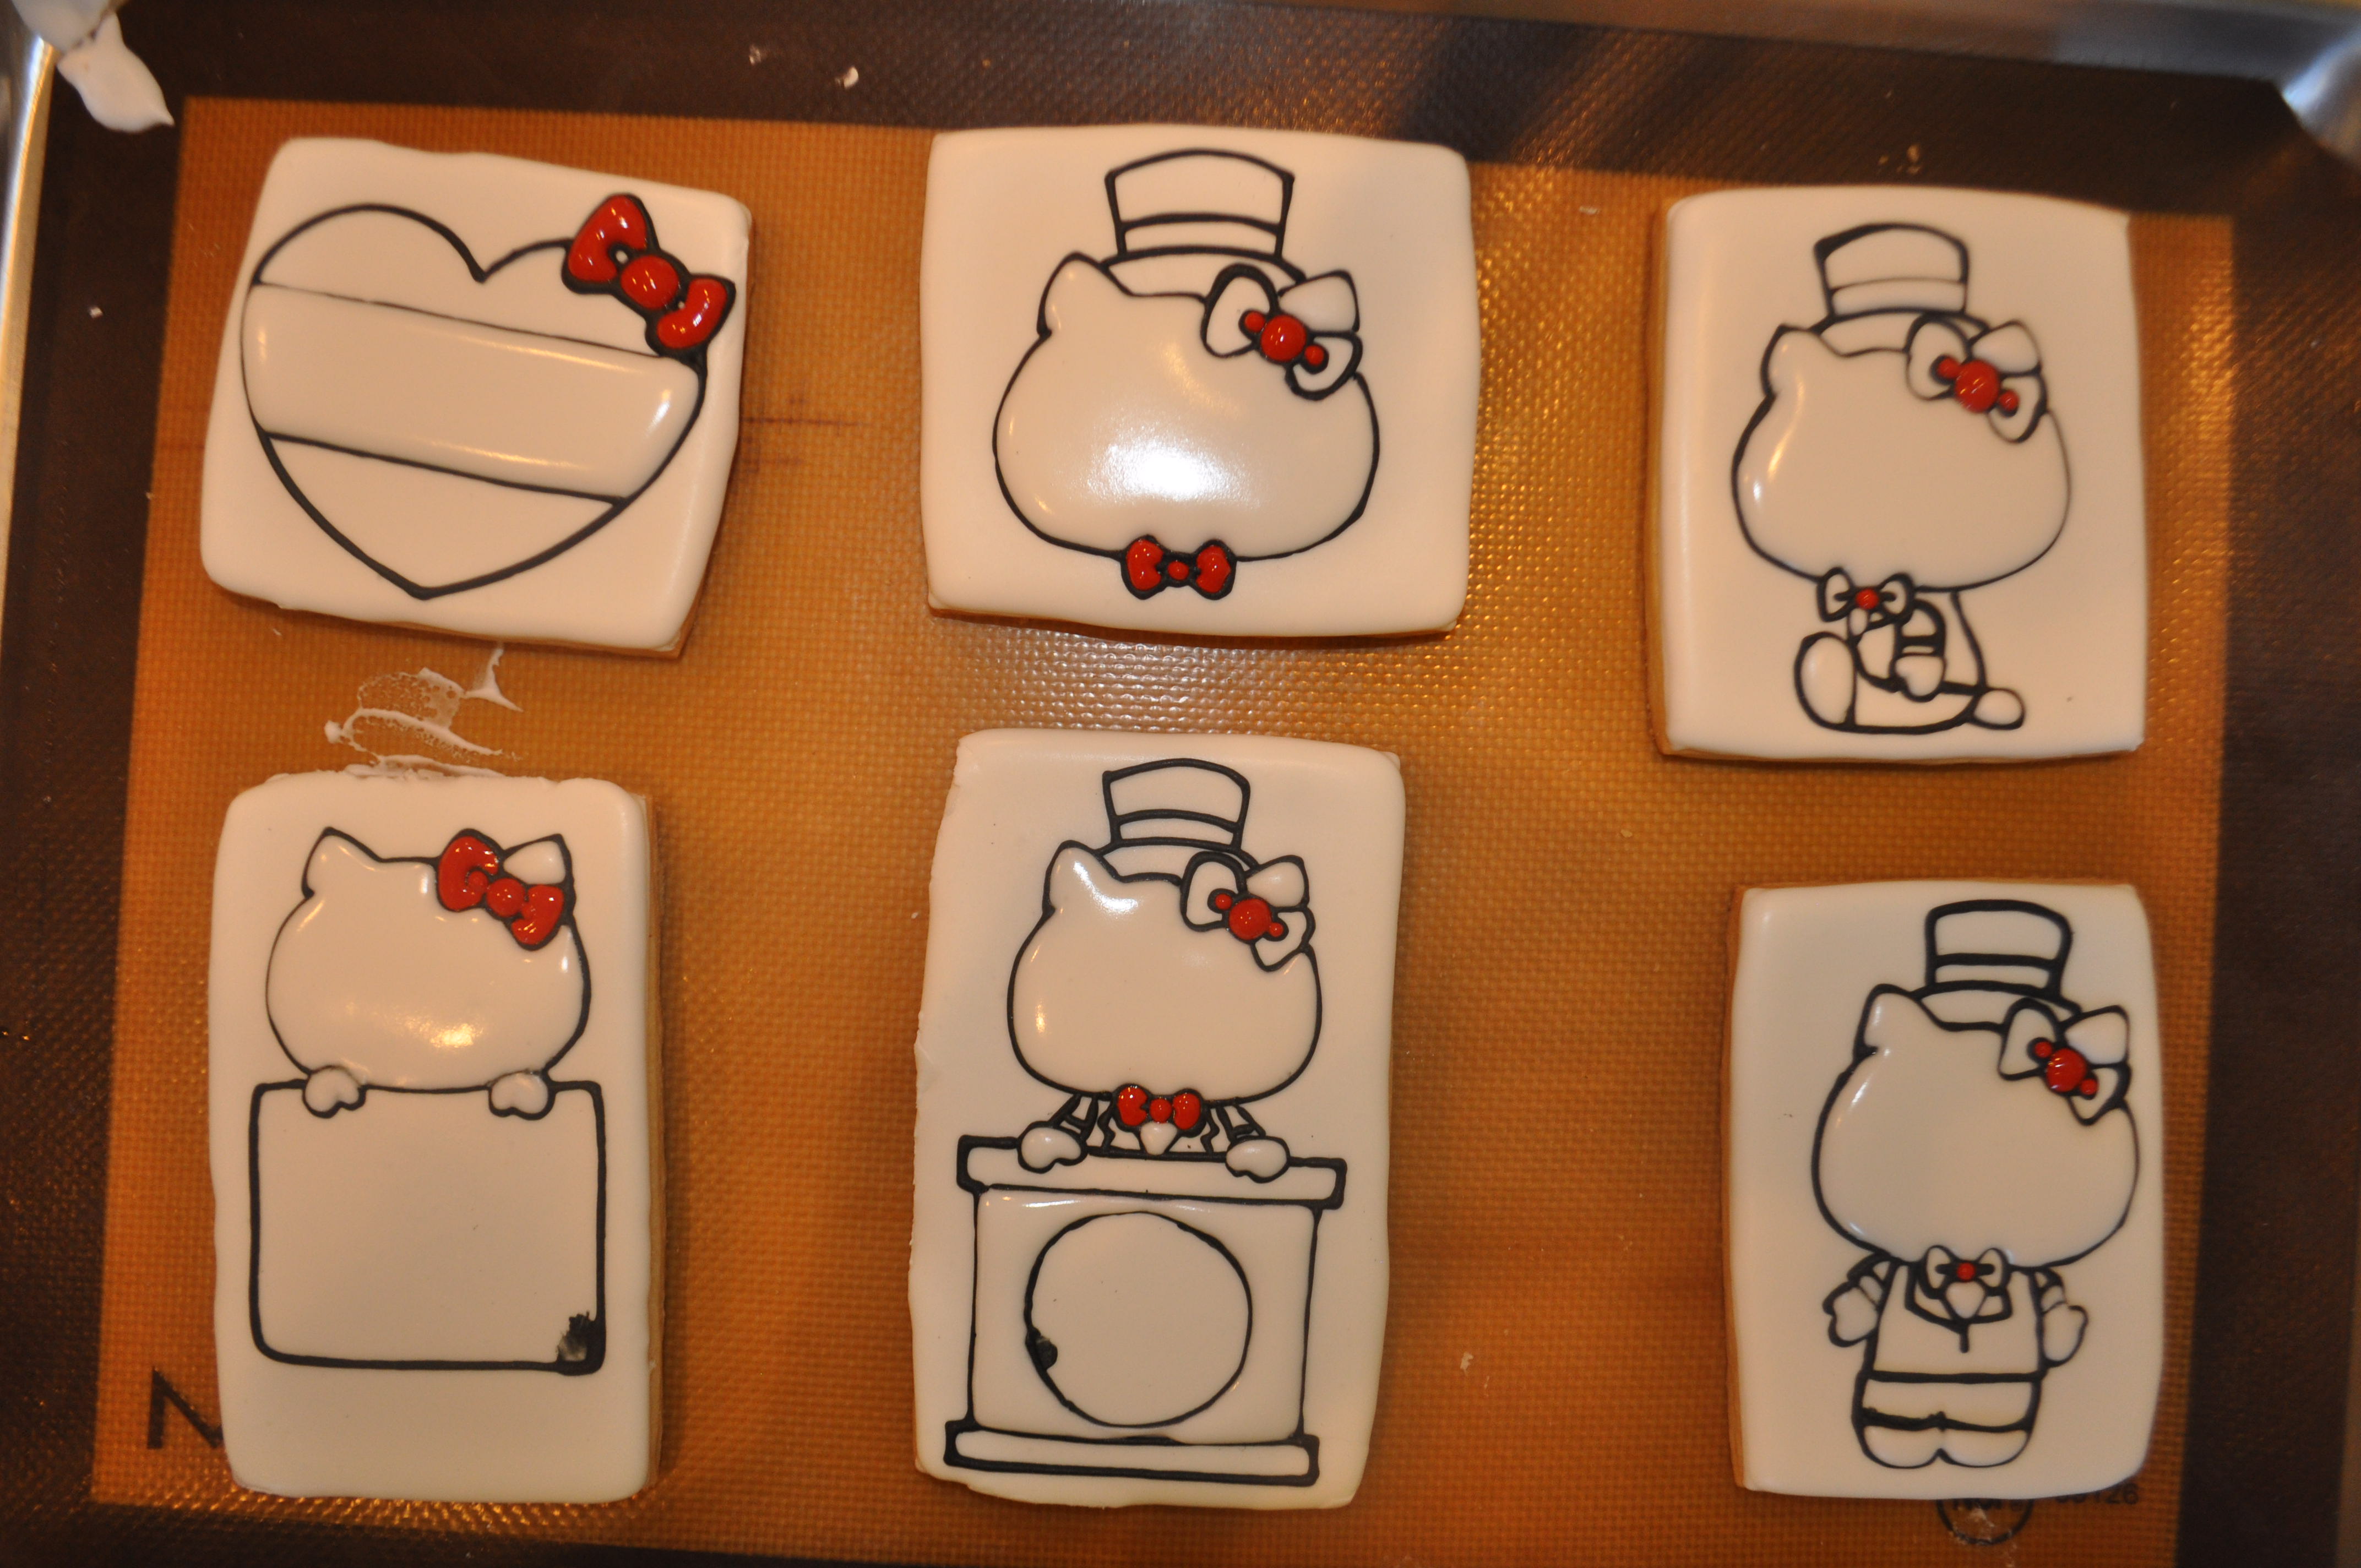
Next I am filling small areas with red royal icing. As with black royal icing, always make your red royal icing days in advanced. The color will turn from a dark orange into a true red. I am using a very small piping tip – a round PME #1 tip to fill the small areas with royal icing.
As you can see, the decorating of these Hello Kitty cookies is done in stages. Here I have added additonal red royal icing.
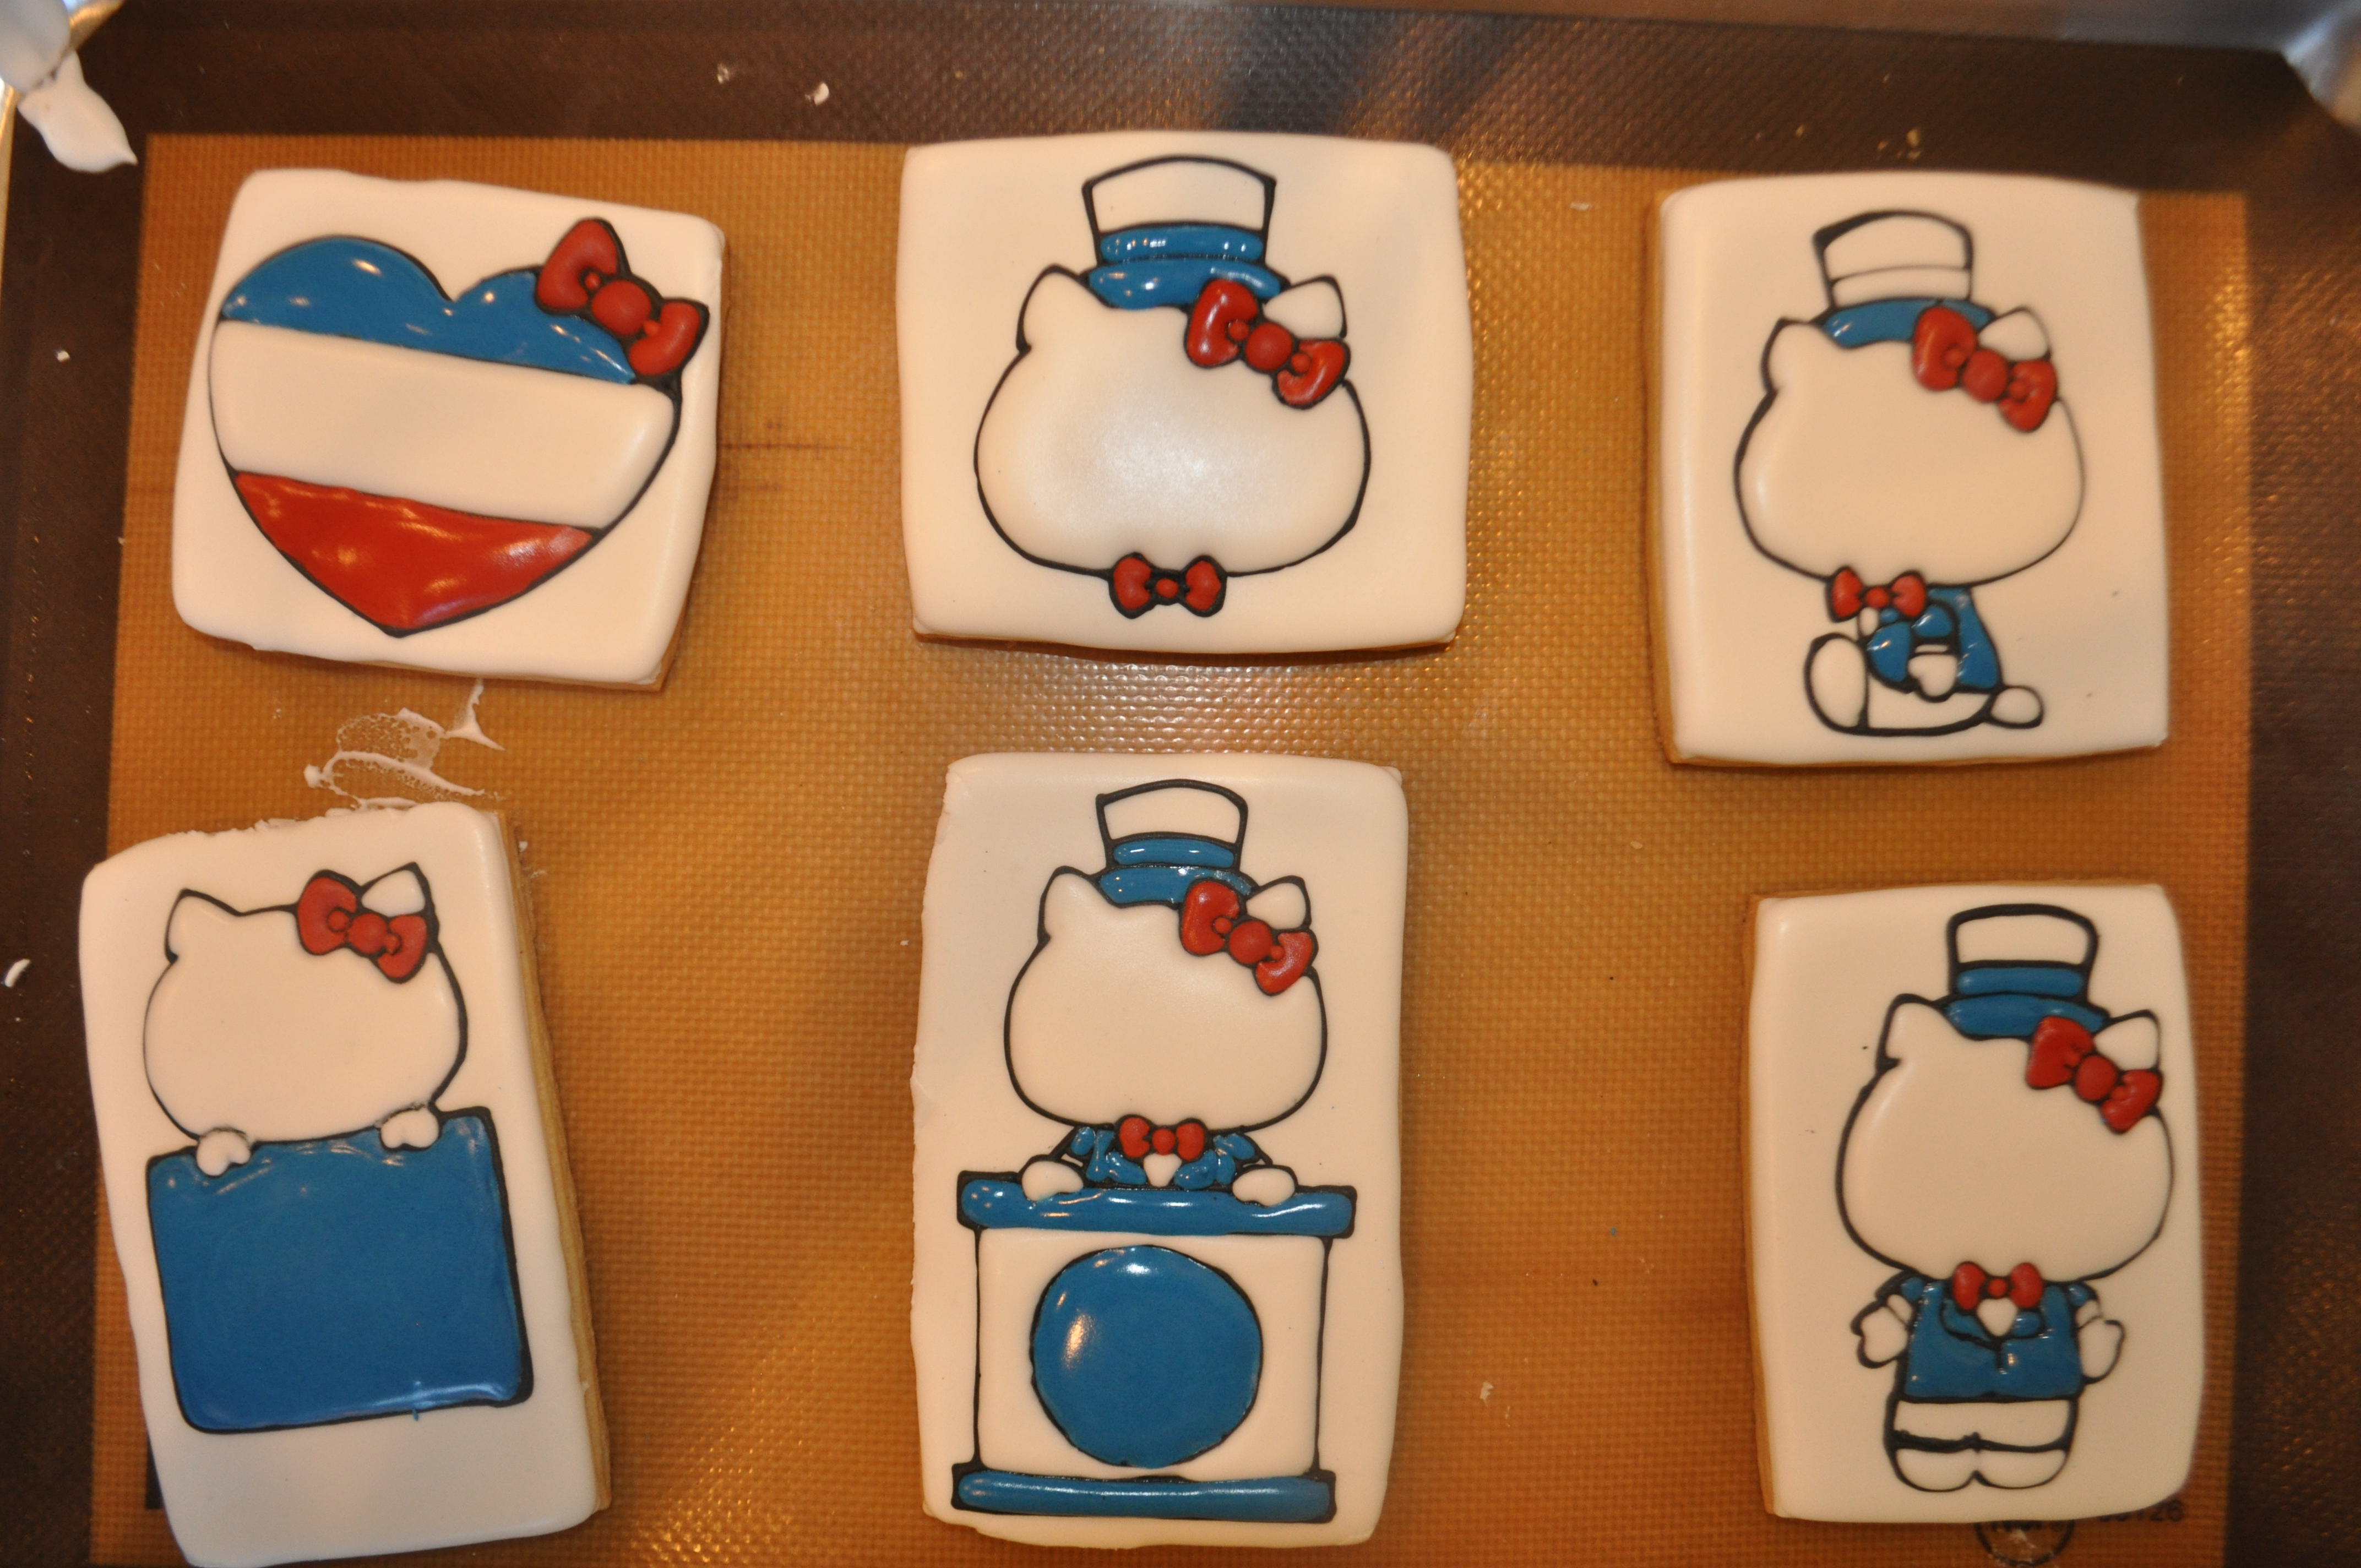
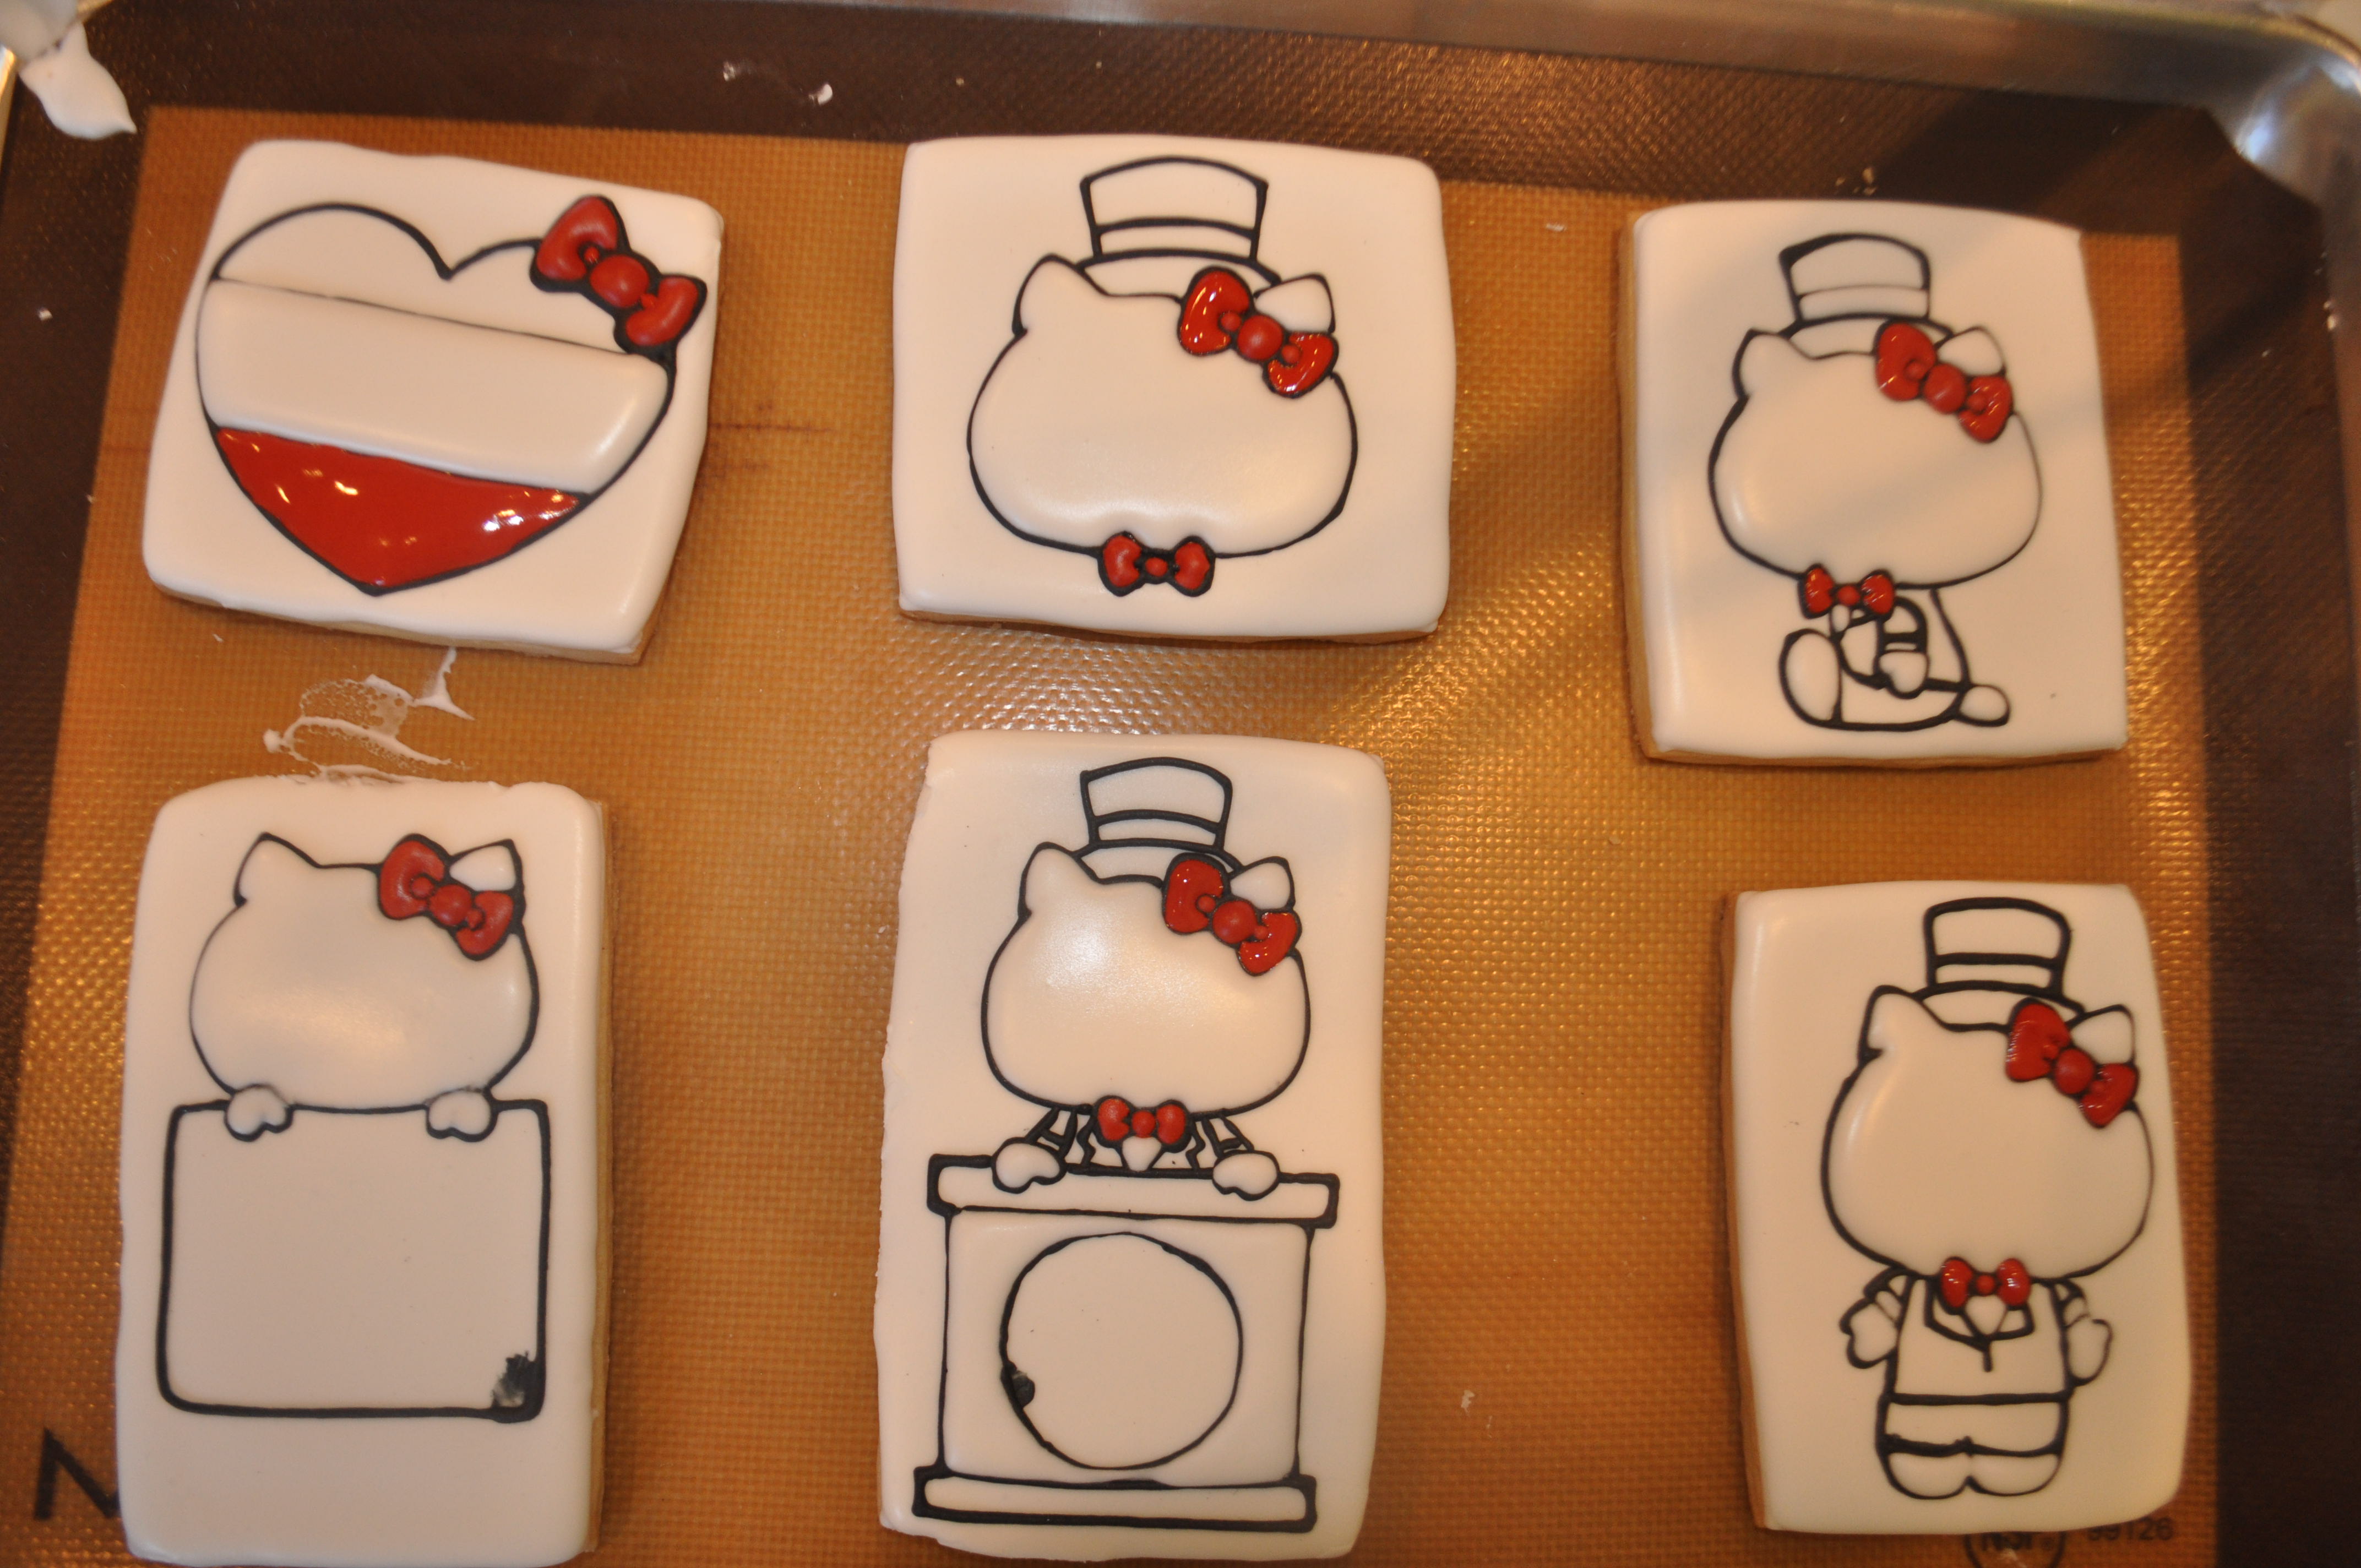
Next I am adding blue royal icing to my Hello Kitty Cookies. Blue is another color that should be made in advanced to limit the amount of food dye added.
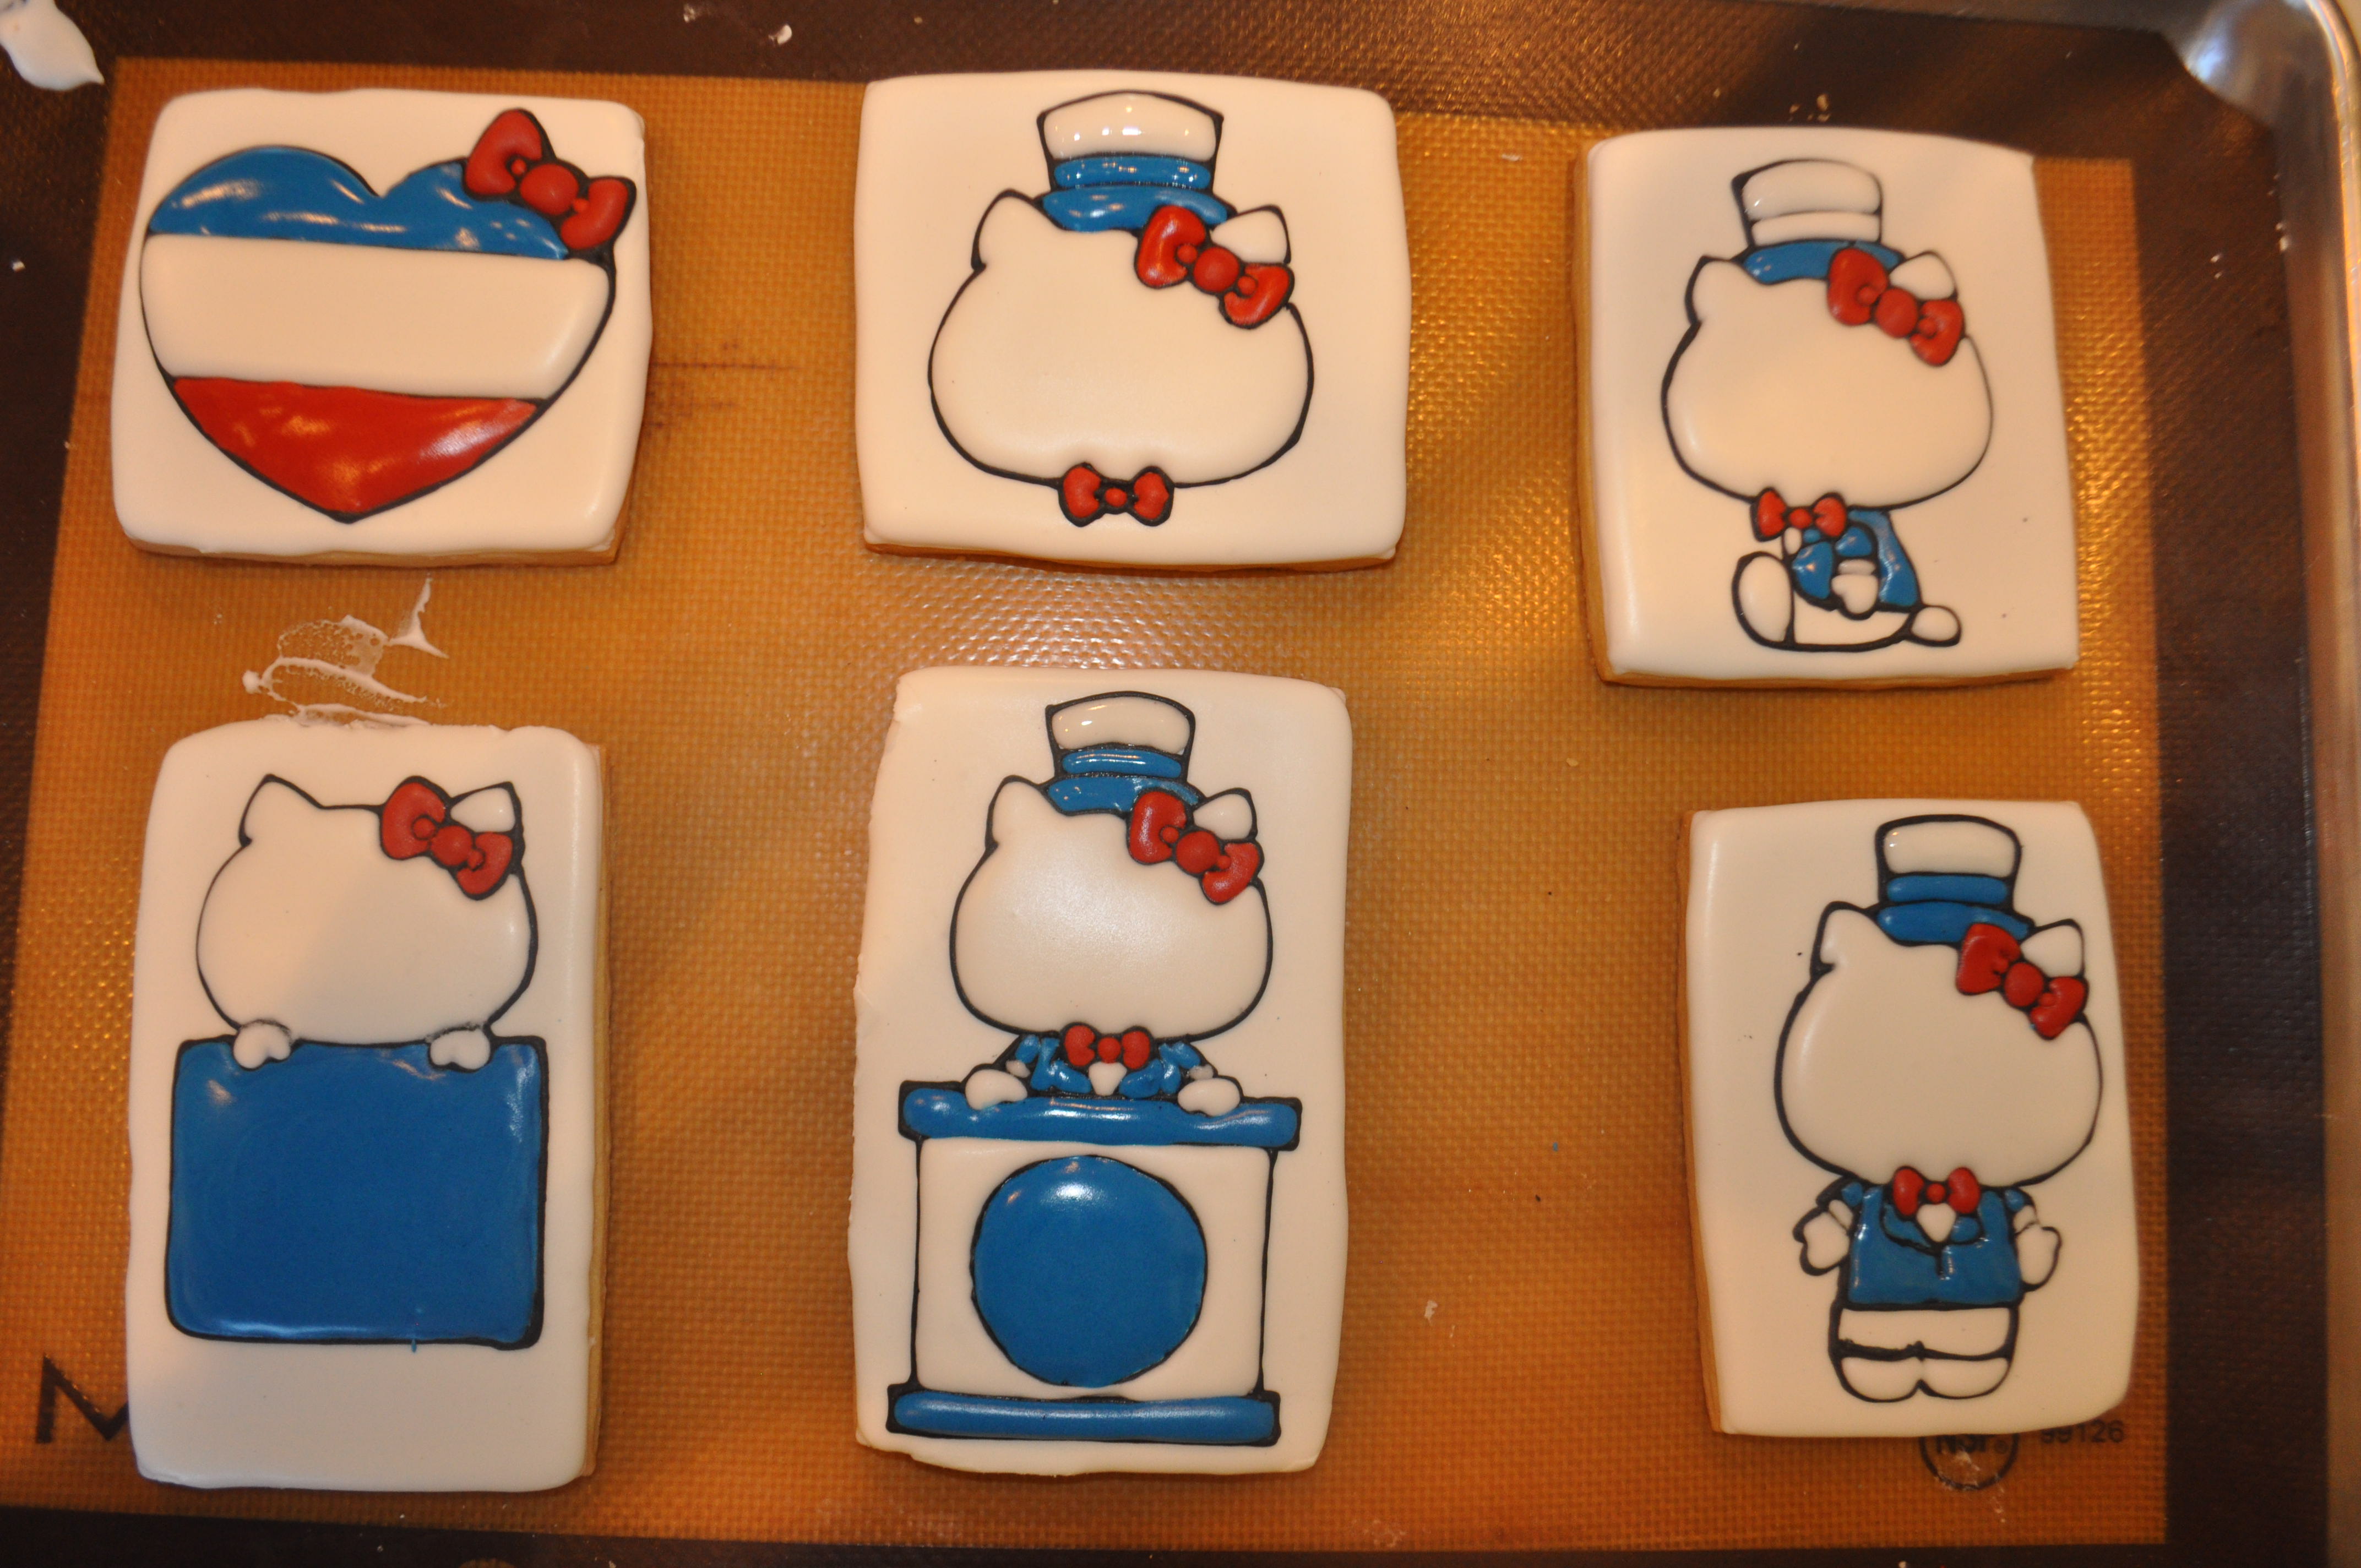
After the blue has set I add the last sections of white and red. Soon I will be able to add the final detail to the Hello Kitty cookies.
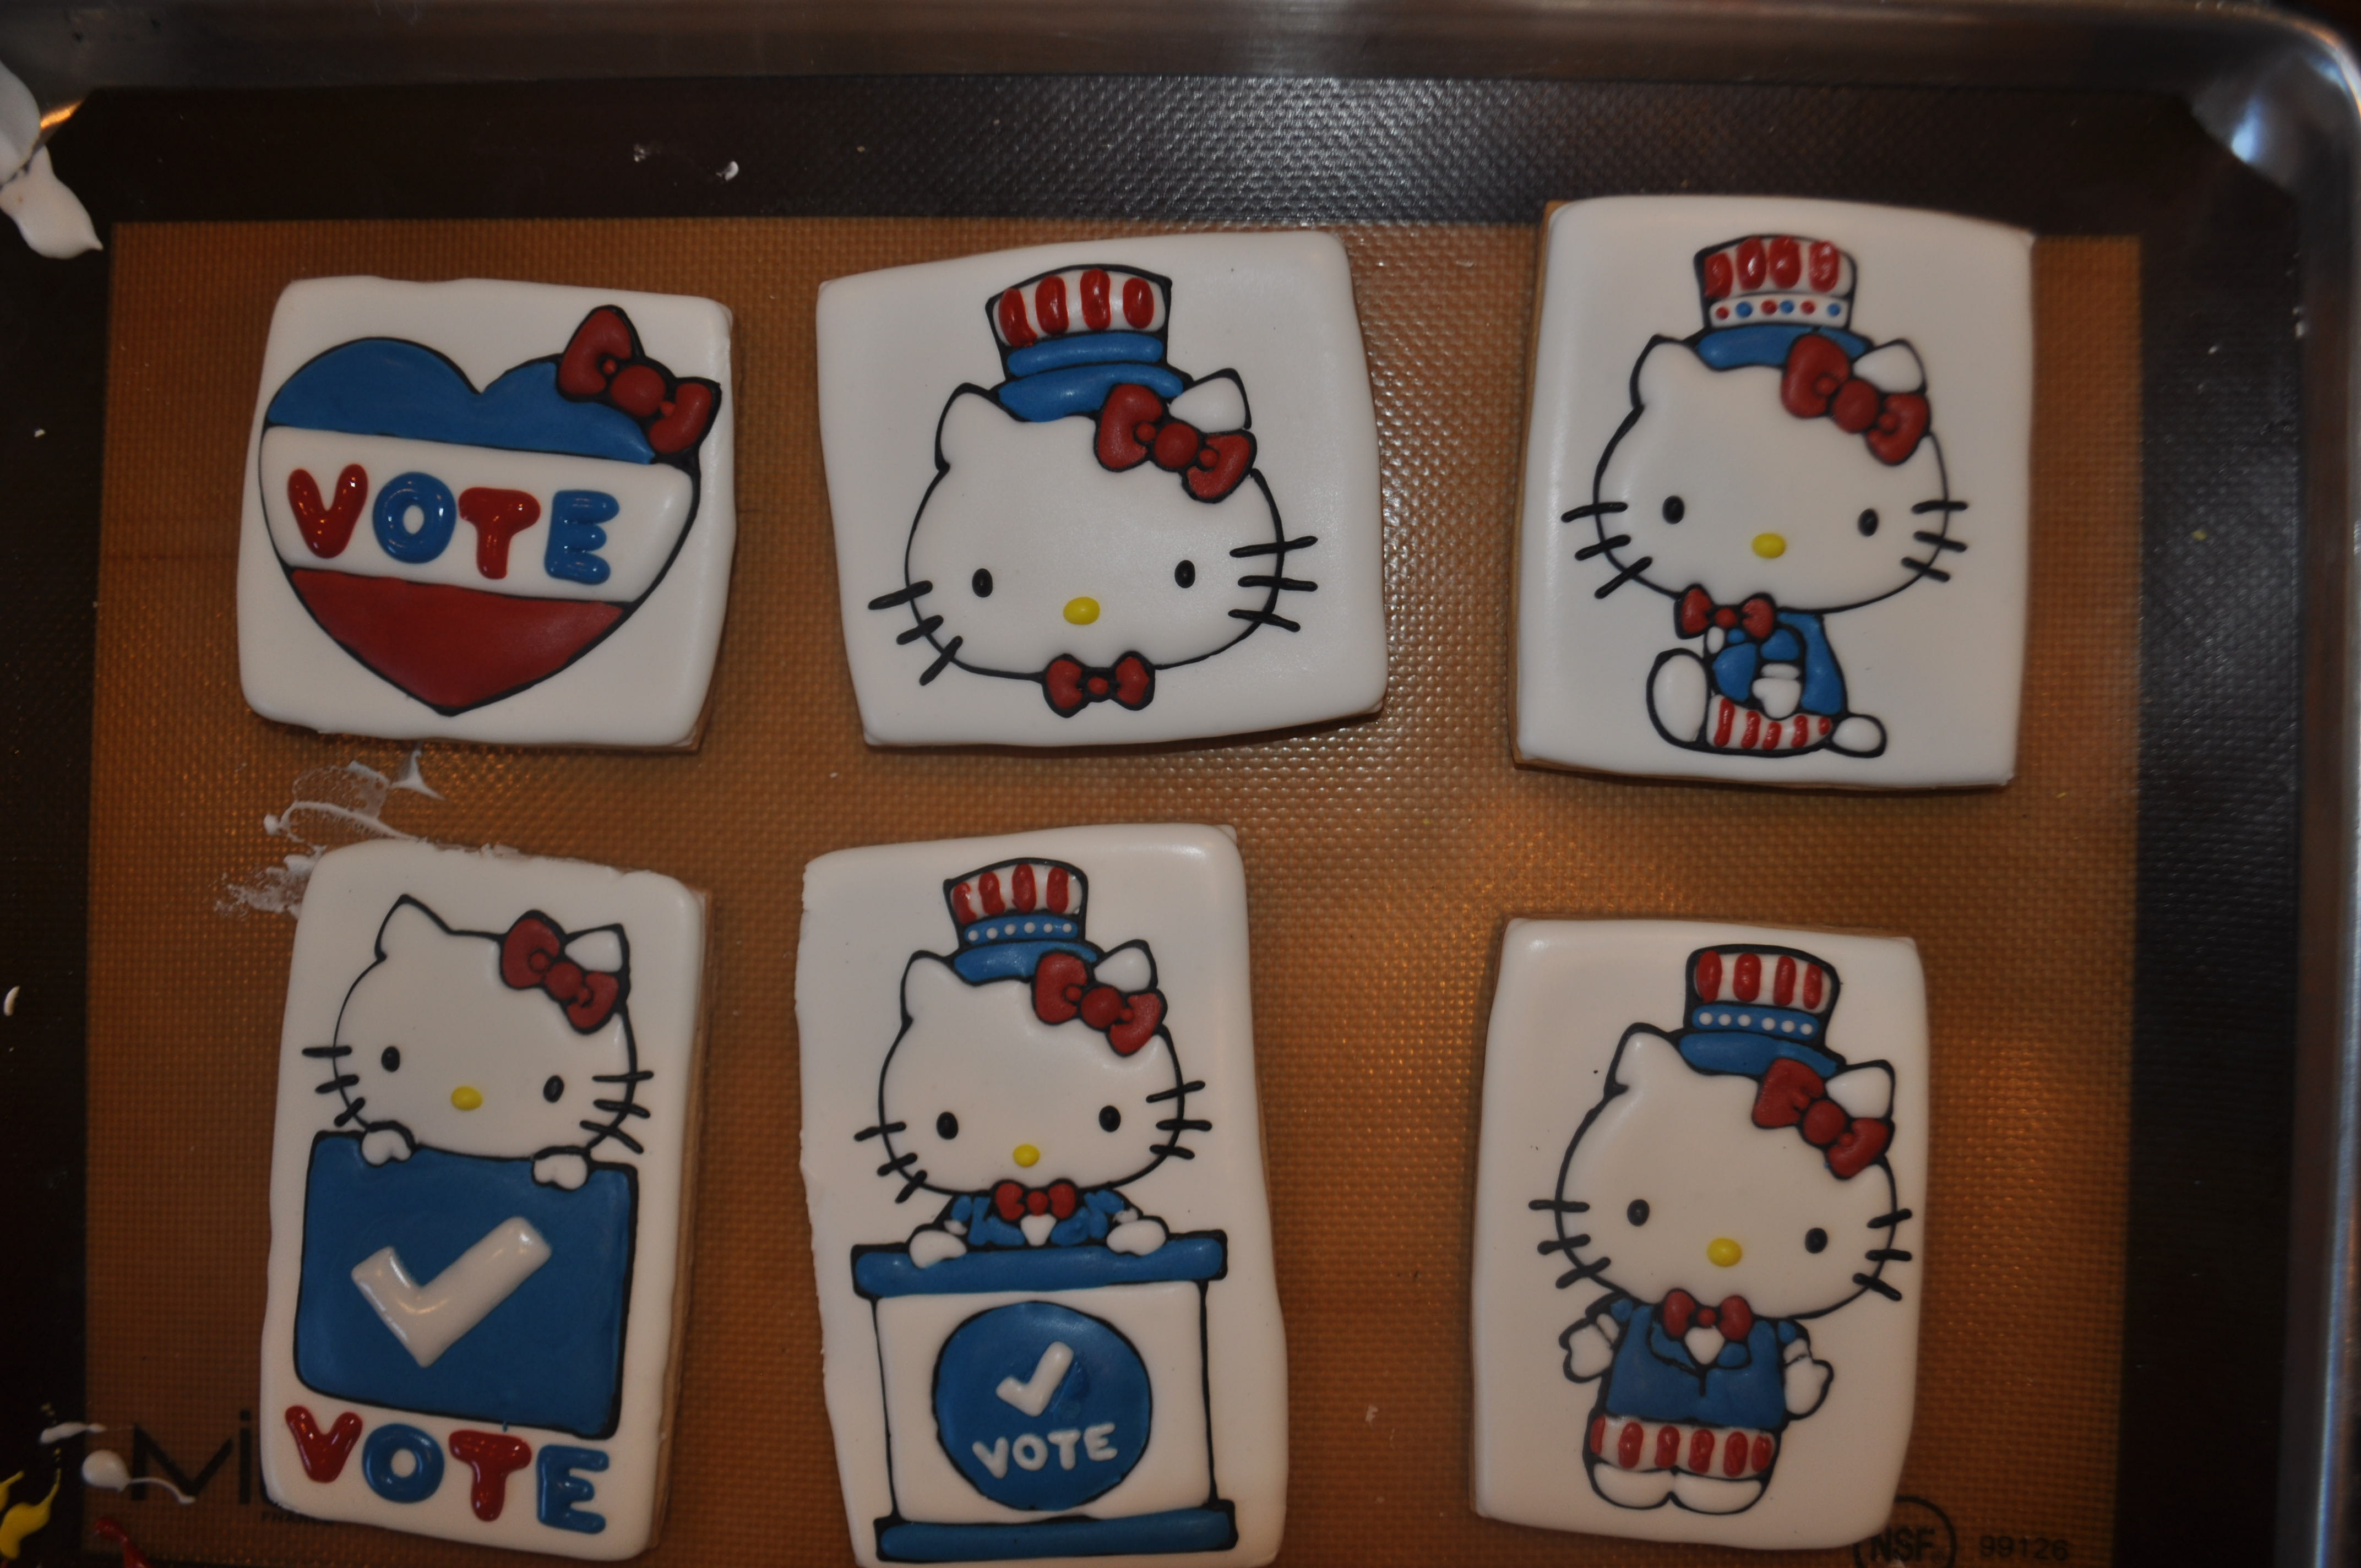
The final details have been added and the Hello Kitty cookies will dry for a final 20-30 minutes. I try to make very detailed cookies like this throughout the day staggered with other cooking projects. For a simple tutorial on how to make hello kitty cookies click here.

Happy 4th of July.


