Mother’s Day Cookies

Mother’s Day Cookies – 2014. What a busy time of year – school is coming to an end, the kids keep handing me piles and piles of paperwork to fill out. They all have Spring fever and are tired of doing homework, practicing spelling words and getting up early in the morning. Just a few more weeks and school will be out! So yes there was very little time to make Mother’s Day cookies. What finally forced me into making these Mother’s Day cookies was a swap with some dear friends in my facebook cookie group. No turning back! We all made 24 Mother’s Day cookies, sent them to a central location, and received 24 Mother’s Day cookies in return. So much fun to receive a package of Mother’s Day cookies from dear friends. Let’s face it – moms sometimes are forgotten and it was nice to feel special by receiving such beautiful cookies from such wonderful cookie artists. For my Mother’s Day cookies I decided I wanted mine to look like something my kids would make and give me. I prepared several brightly colored icings and went to work on these. If I made these again I would make just one of these Mother’s Day cookies (they took a LONG time) and pair them with simple brightly colored hearts, stars or flowers. Happy Mother’s Day!

Keep reading to see how I made these Mother’s Day cookies:
Step 1 – Mother’s Day Cookies – Prepare cookie dough and bake cookies
Use whatever sugar cookie dough that you love when making Mother’s Day cookies. If you have to buy refrigerated cookie dough, or a cookie dough mix. Today I didn’t want to have any issues with my dough spreading so I used a delicious recipe from Pam, at www.cookiecrazie.com. You can find Pam’s original recipe HERE. I changed the flavoring slightly – I like vanilla, almond and citrus in my cookie dough. This has become a favorite cookie dough recipe. Give it a try!
Sugar Cookies with Sour Cream
- 1 cup salted butter, softened to room temperature
- 1.5 cups white sugar
- 1 egg
- 1/2 cup sour cream
- 2 teaspoons vanilla
- 1 teaspoon almond extract
- 1 teaspoon lemon extract
- 4 3/4 cups all purpose unbleached flour
- 1/2 teaspoon salt
- 1/2 teaspoon baking powder
- 1/4 teaspoon baking soda
Cream together the softened butter and the sugar. Beat in the egg, vanilla extract, almond extract, lemon extract and sour cream. Scrape the bowl carefully and mix the dough again. Add two cups of the flour to wet ingredients. Carefully sprinkle the salt, baking powder and baking soda on top of the two cups of flour. Make sure to crush any small bits of baking soda and baking powder before adding it to the flour. Mix on low speed. Add the remaining 2 and 3/4 cups of flour and blend into the wet ingredients. Scrape the sides of the bowl again and mix one last time. Roll into desired thickness and chill sheets of dough. Cut into shapes. Place on a cookie sheet and bake for 10-15 minutes at 375. (or for 20 minutes at 350). This makes about two dozen three inch cookies. *If you have problems with the dough spreading freeze the cut shapes for 10-15 minutes before baking. You can also leave the cut shapes out at room temperature for 30-45 so they “dry-out” on the edges, preventing the cookies from spreading.
Step 2 – Mother’s Day Cookies – Prepare Royal icing
You really don’t have to use any specific type of icing when you make Mother’s Day cookies, but I chose to make Royal Glaze Icing – a combination icing that always dries soft. I did learn the hard way – if you plan on shipping cookies, royal icing holds up better than royal glaze icing. It’s up to you! This Mother’s Day cookie can be created with just about any decorating icing.
I am using my favorite royal glaze icing, THE RECIPE IS FOUND HERE. I thinned some of it to the soft peak stage to be used for outlining and for lettering on the Mother’s Day cookies. I then mixed up six colors to make the Mother’s Day cookies look bright and colorful just like a Mother’s Day card one of my kids would bring home from school. 🙂 I used Americolor gels to get nice bright colors on my cookies. You will also need very thin white royal icing for flooding the entire cookie.
Icing checklist:
Outlining consistency ( royal glaze icing thinned to soft flowing peak stage)
-white, red, orange, yellow, green, light blue, and purple.
Flooding consistency (royal glaze icing thinned to a honey consistency)
-white
Step 3 – Mother’s Day Cookies – Decorate the cookies
Here is where the fun starts! Putting it all together!
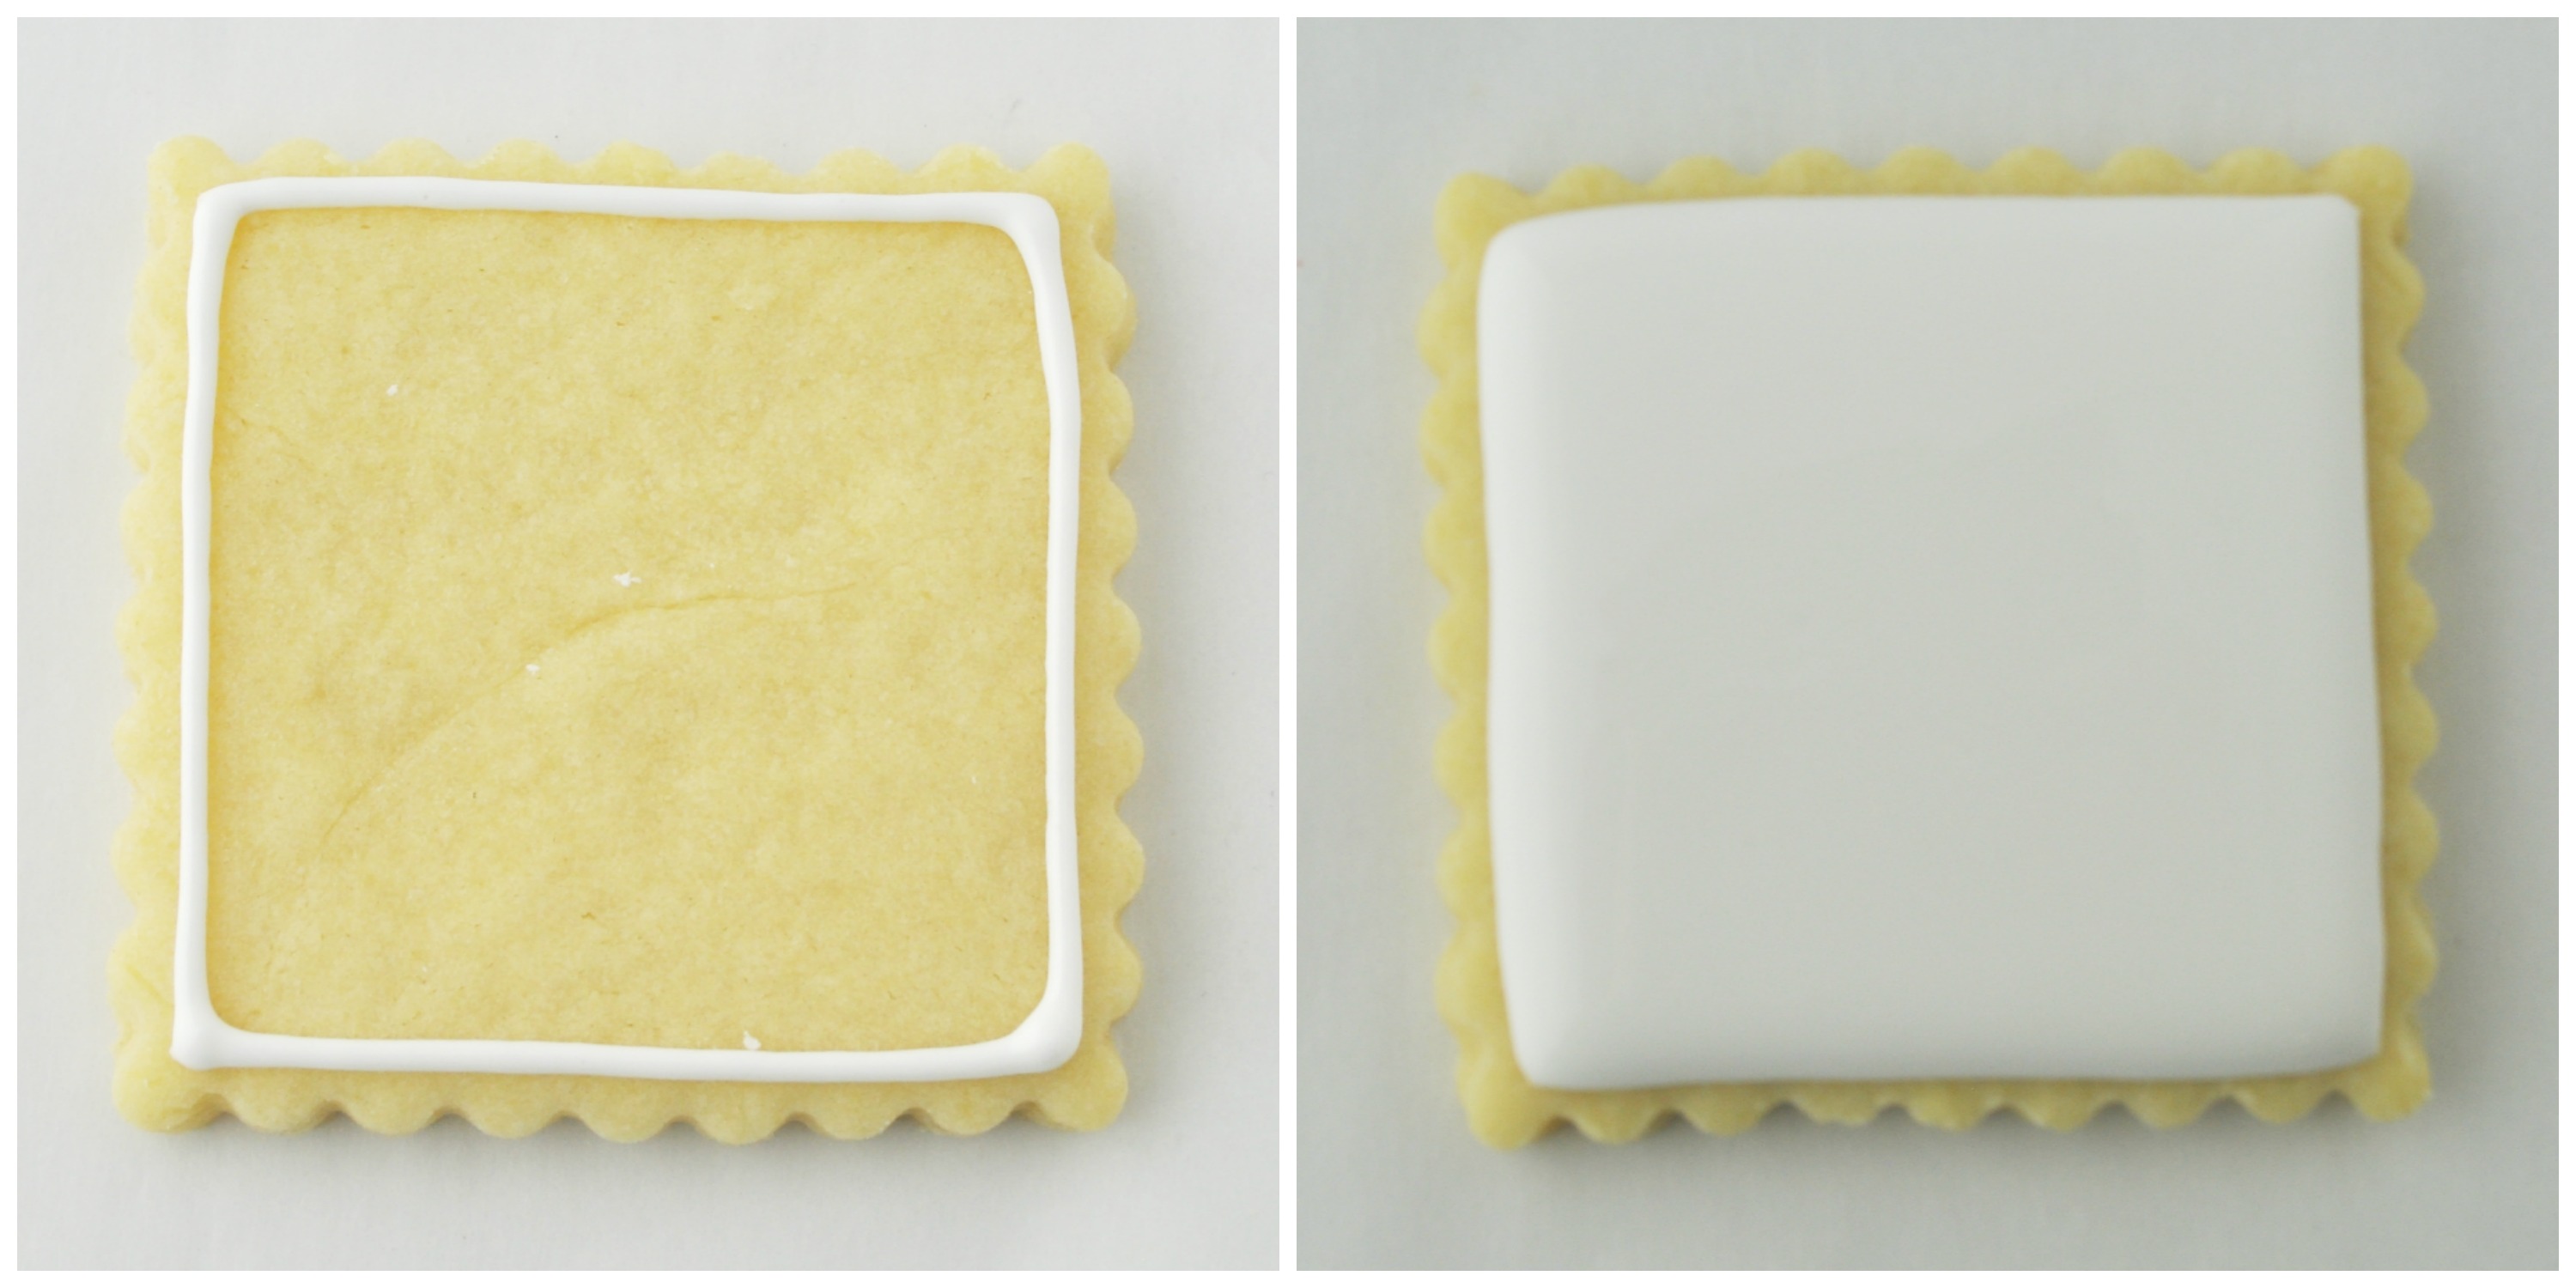
Start by outlining the cookie with white. Immediately flood, or cover the entire cookie with thinned white royal glaze icing. Allow this icing to set for at least an hour so that the letters stay on the top of the cookie and do not sink into the icing.

Now for the really really fun part! Add the letters to the cookies. I was surprised that it took me several hours to make two dozen Mother’s Day cookies with this design. I thought it would be much faster – but switching colors over and over takes a lot more time than you would think. If I did these again I would make a mother’s day set with simple hearts, stars or flower shapes to coordinate with this Mother’s Day cookie. Allow the cookies to dry over night, or at least 10-12 hours before packaging. Be careful because the letters will be very fragile. Enjoy!

Happy Mother’s Day to all the amazing moms out there! 🙂


I made these cookies just a few days back and have to say these were the best ever!! The Lemon Flavor really works well. I accidentally doubled the baking soda so these turned out more like shortbread cookies and were an instant hit.
Thank you so much for this recipe. This is going to be my “go to” recipe .
I’m so glad you liked these!!! This is my go to sugar cookie recipe now!
My go to recipe for sure!!! And I have tried just about every sugar cookie recipe!