How to Draw on Cookies
I was so excited when I first realized how easy it is to draw on a cookie! What could be more fun than creating a little edible masterpeice and EATING it! Or in my case, trying to draw, realizing it didn’t work, then shoving the whole thing in my mouth at once. Problem solved! Art consumed! It is so easy to write or to draw on cookies. Imagine the applications. Birthday parties, mother’s day, father’s day, holidays… I could go on and on with what you can do with this. But really, the absolute best part about this is how little of a mess decorating a cookie this way makes. No frosting mess, no sprinkles, nothing of the sort. The kids have just as much fun making their little cookies with edible ink markers and there is no huge mess! Also, a young child really doesn’t have the motor skills to make what they want with a butter knife and a pile of lumpy frosting. They love writing on cookies because they have much more control with a marker. In this case I tought a group of kindergartners how to draw on cookies. They loved it! Each made a unique Mother’s Day cookie card. This activity was a success! Keep reading to learn exactly how to draw on a cookie.
Step 1 – How to Draw on Cookies – Bake cookies
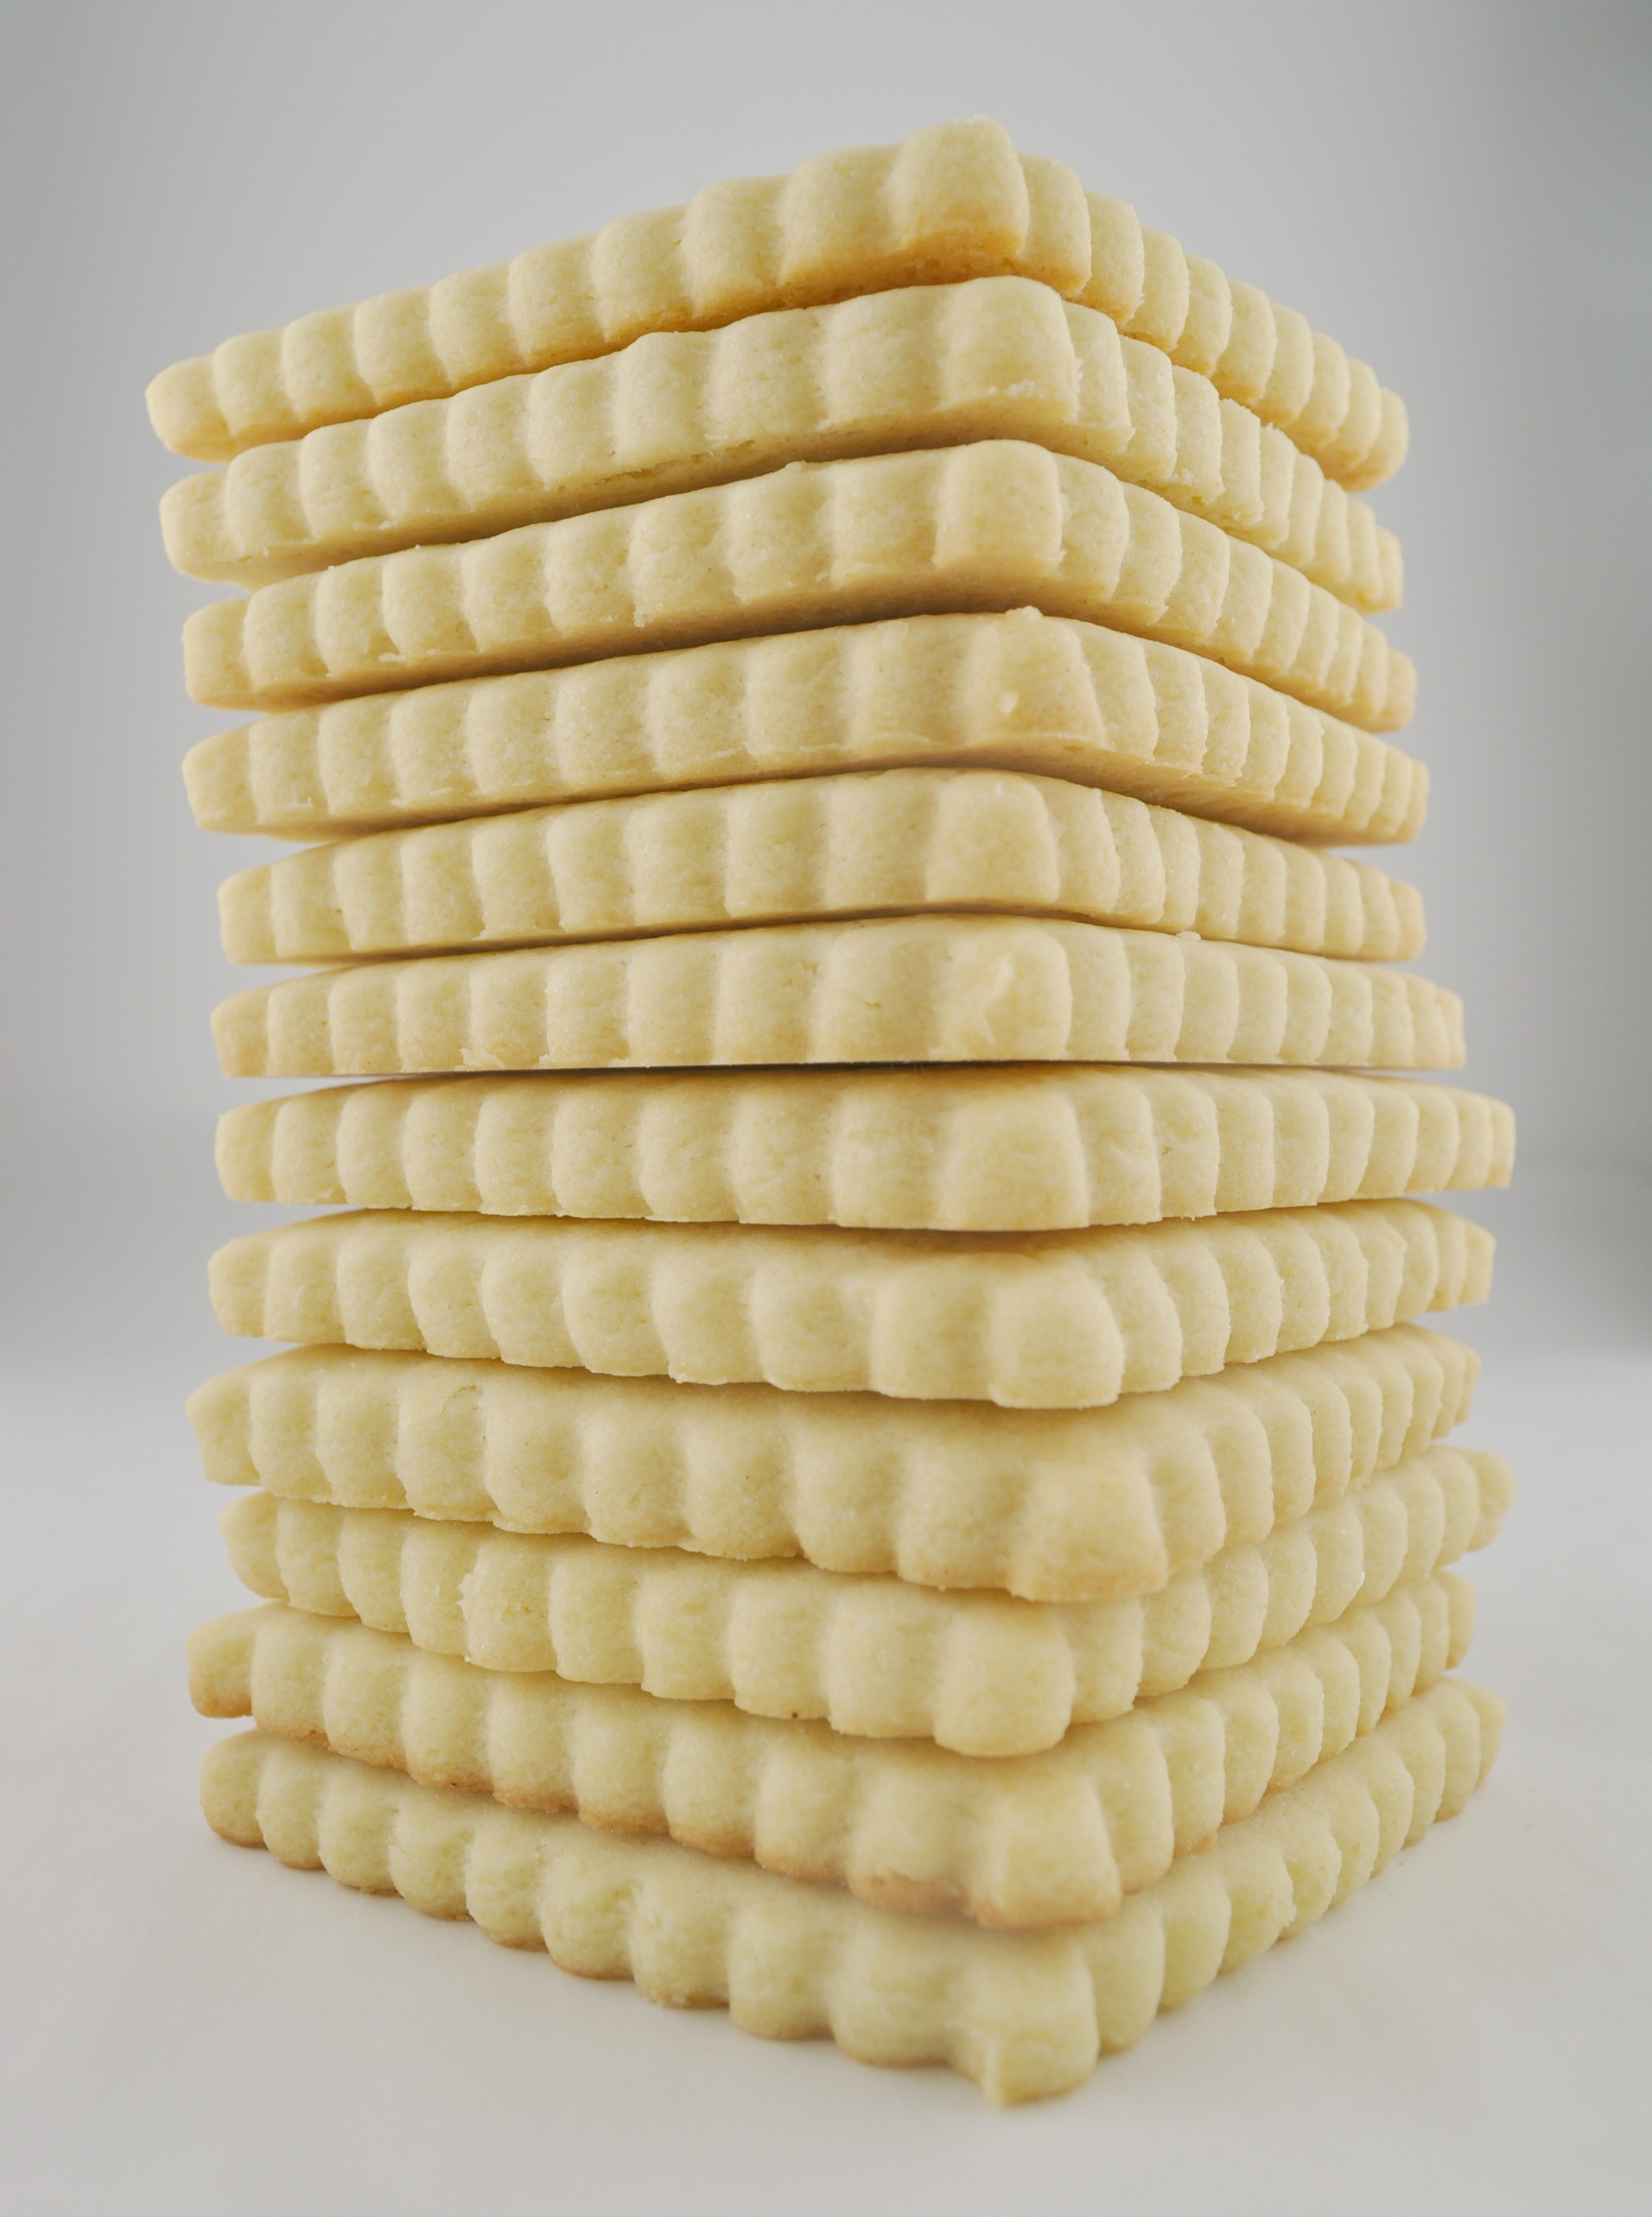
To start you need to make your little edible canvas. I like to use basic shapes such as circles or triangles. If you want, you could make shaped cookies like flowers, stars, neckties, hearts or other shapes to go along with the party or lesson theme. I have even made individual letters to reinforce what preschoolers have learned.
I use this recipe when I make sugar cookies. Use my recipe, or whatever is your favorite go to sugar cookie. Of course you could use any type of rolled cookie dough that will hold a shape when baked. Make sure to bake more than you think you will need – just in case you eat them. Just kidding. It’s always nice to have extras when working with kids.
Step 2 – How to Draw on Cookies – Dip the cookies in thin royal icing
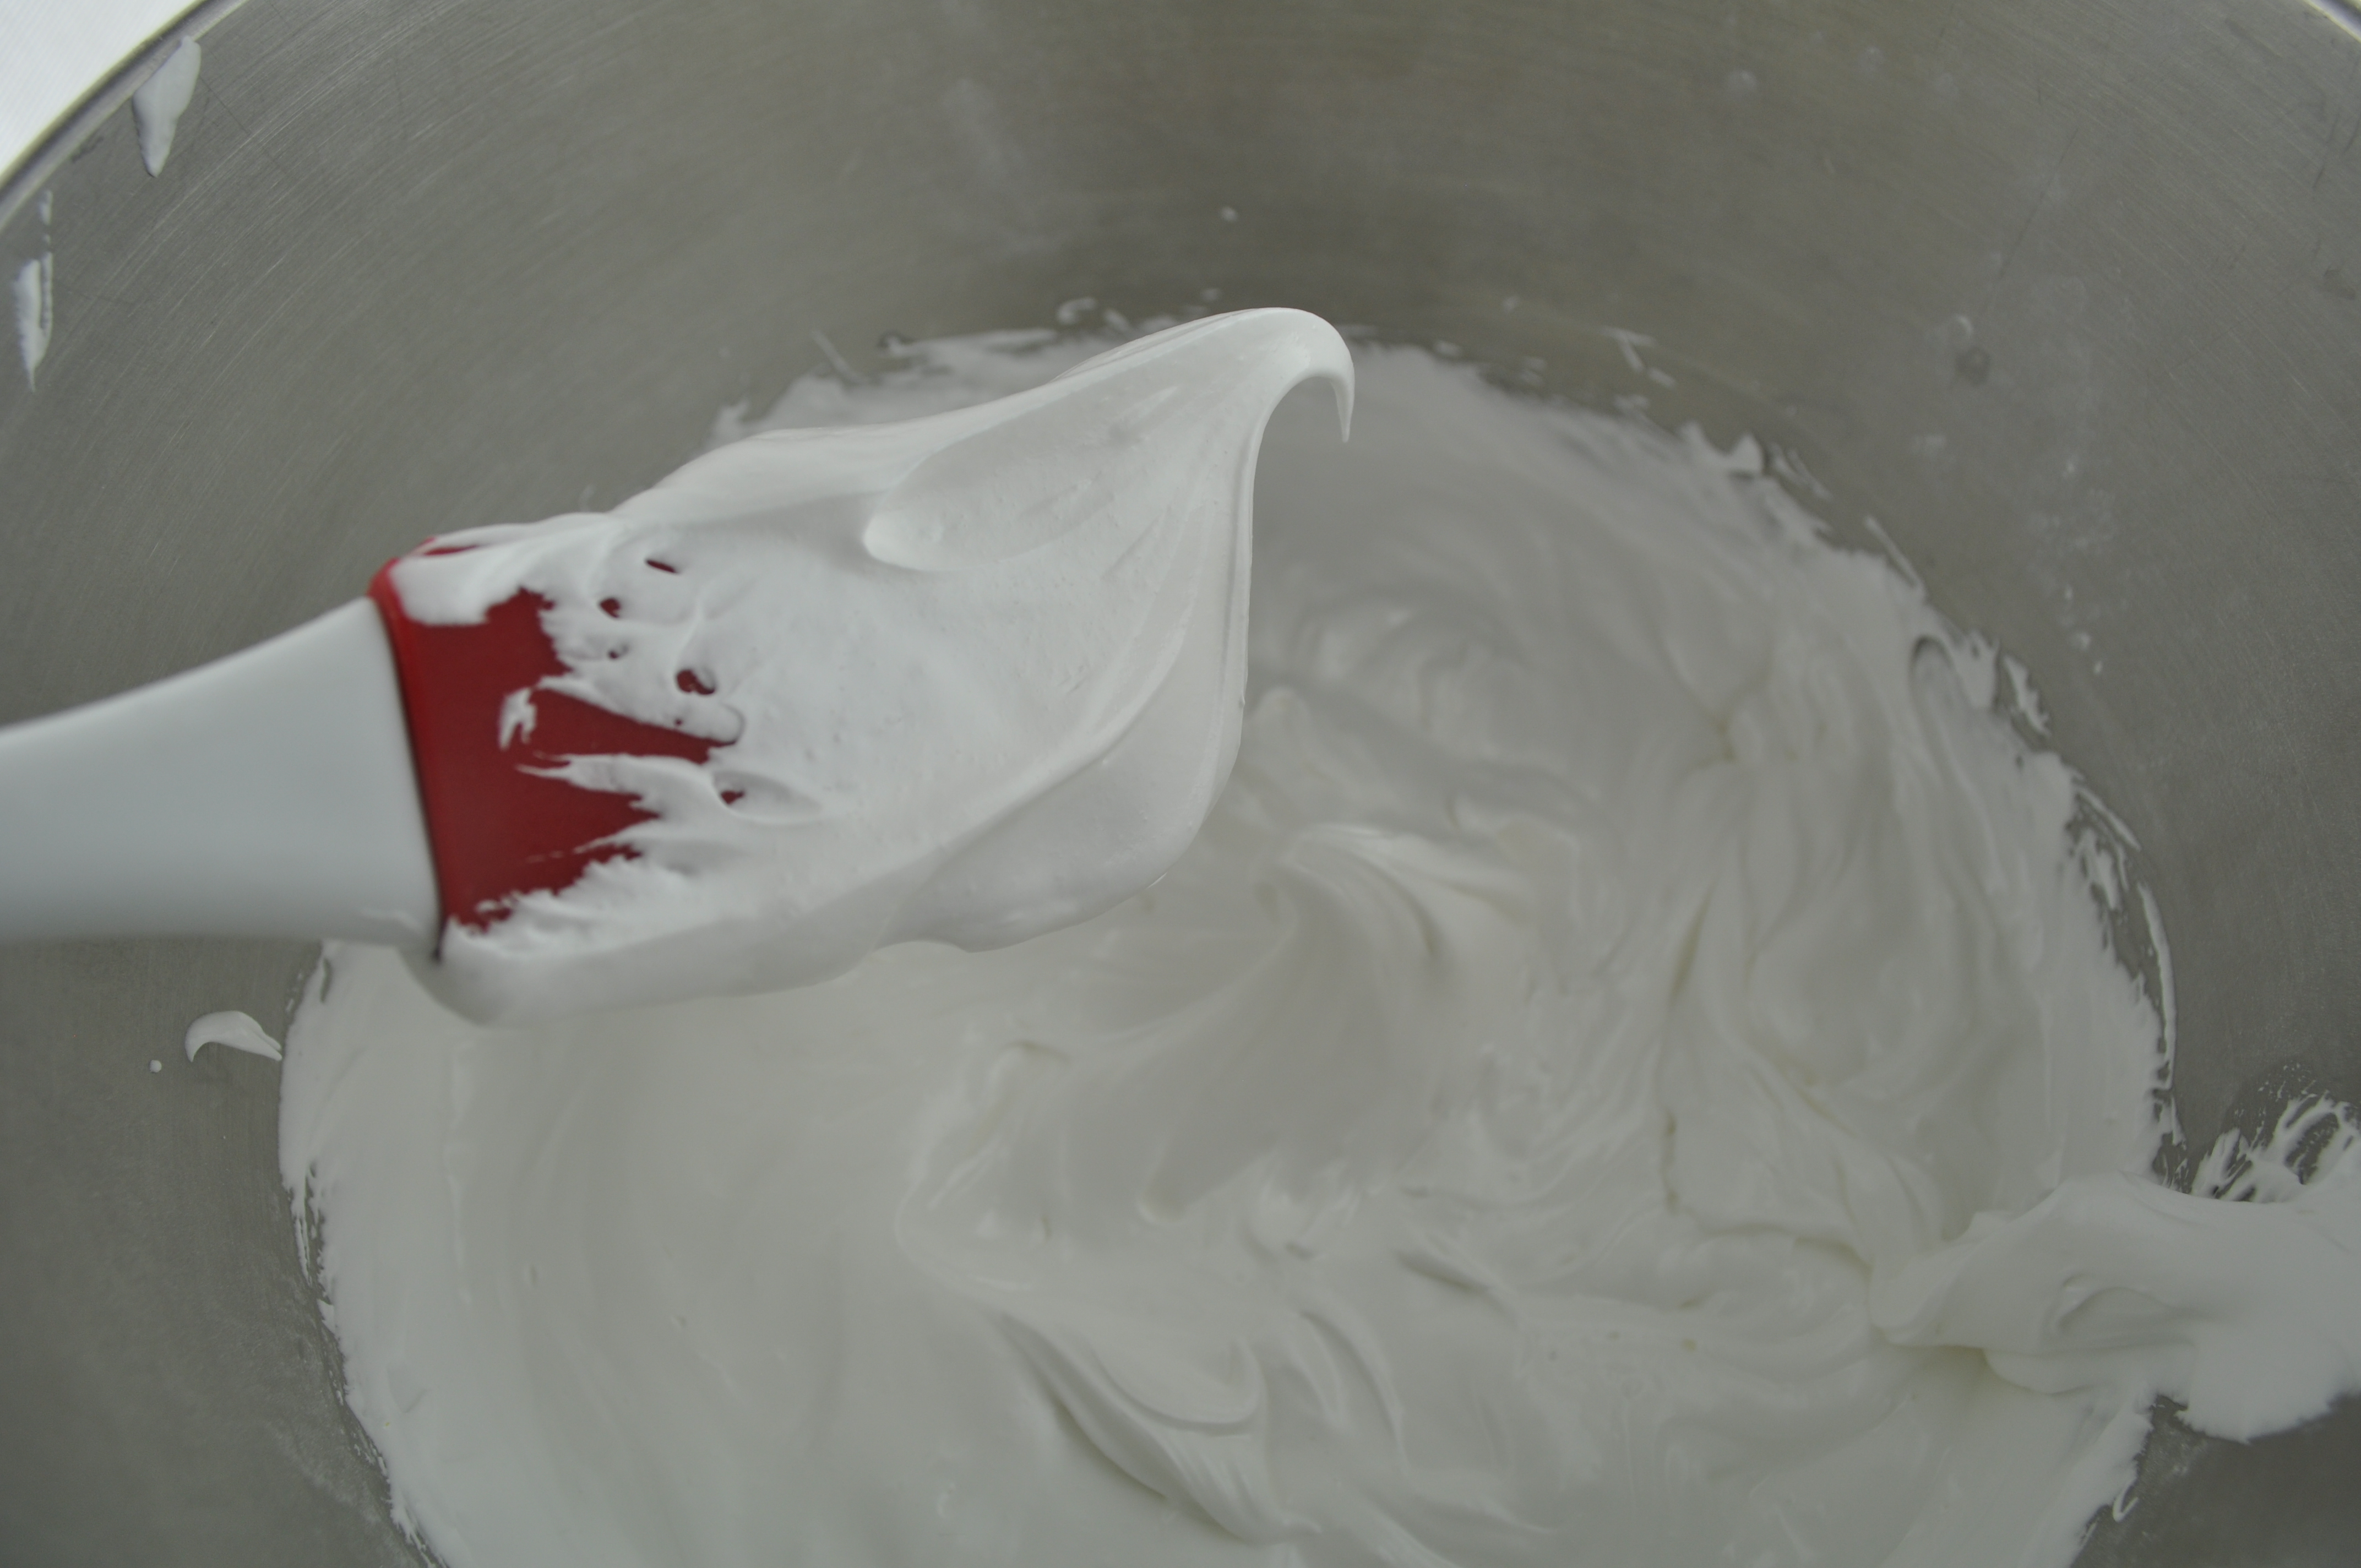
Prepare royal icing as usual. For this project I used my favorite royal glaze. Recipe found HERE. You could also use my basic royal icing. Recipe found HERE. Each is fine. Use what ever recipe you are comfortable with. Because the icing will be thin it is hard to mess up on the icing prep.
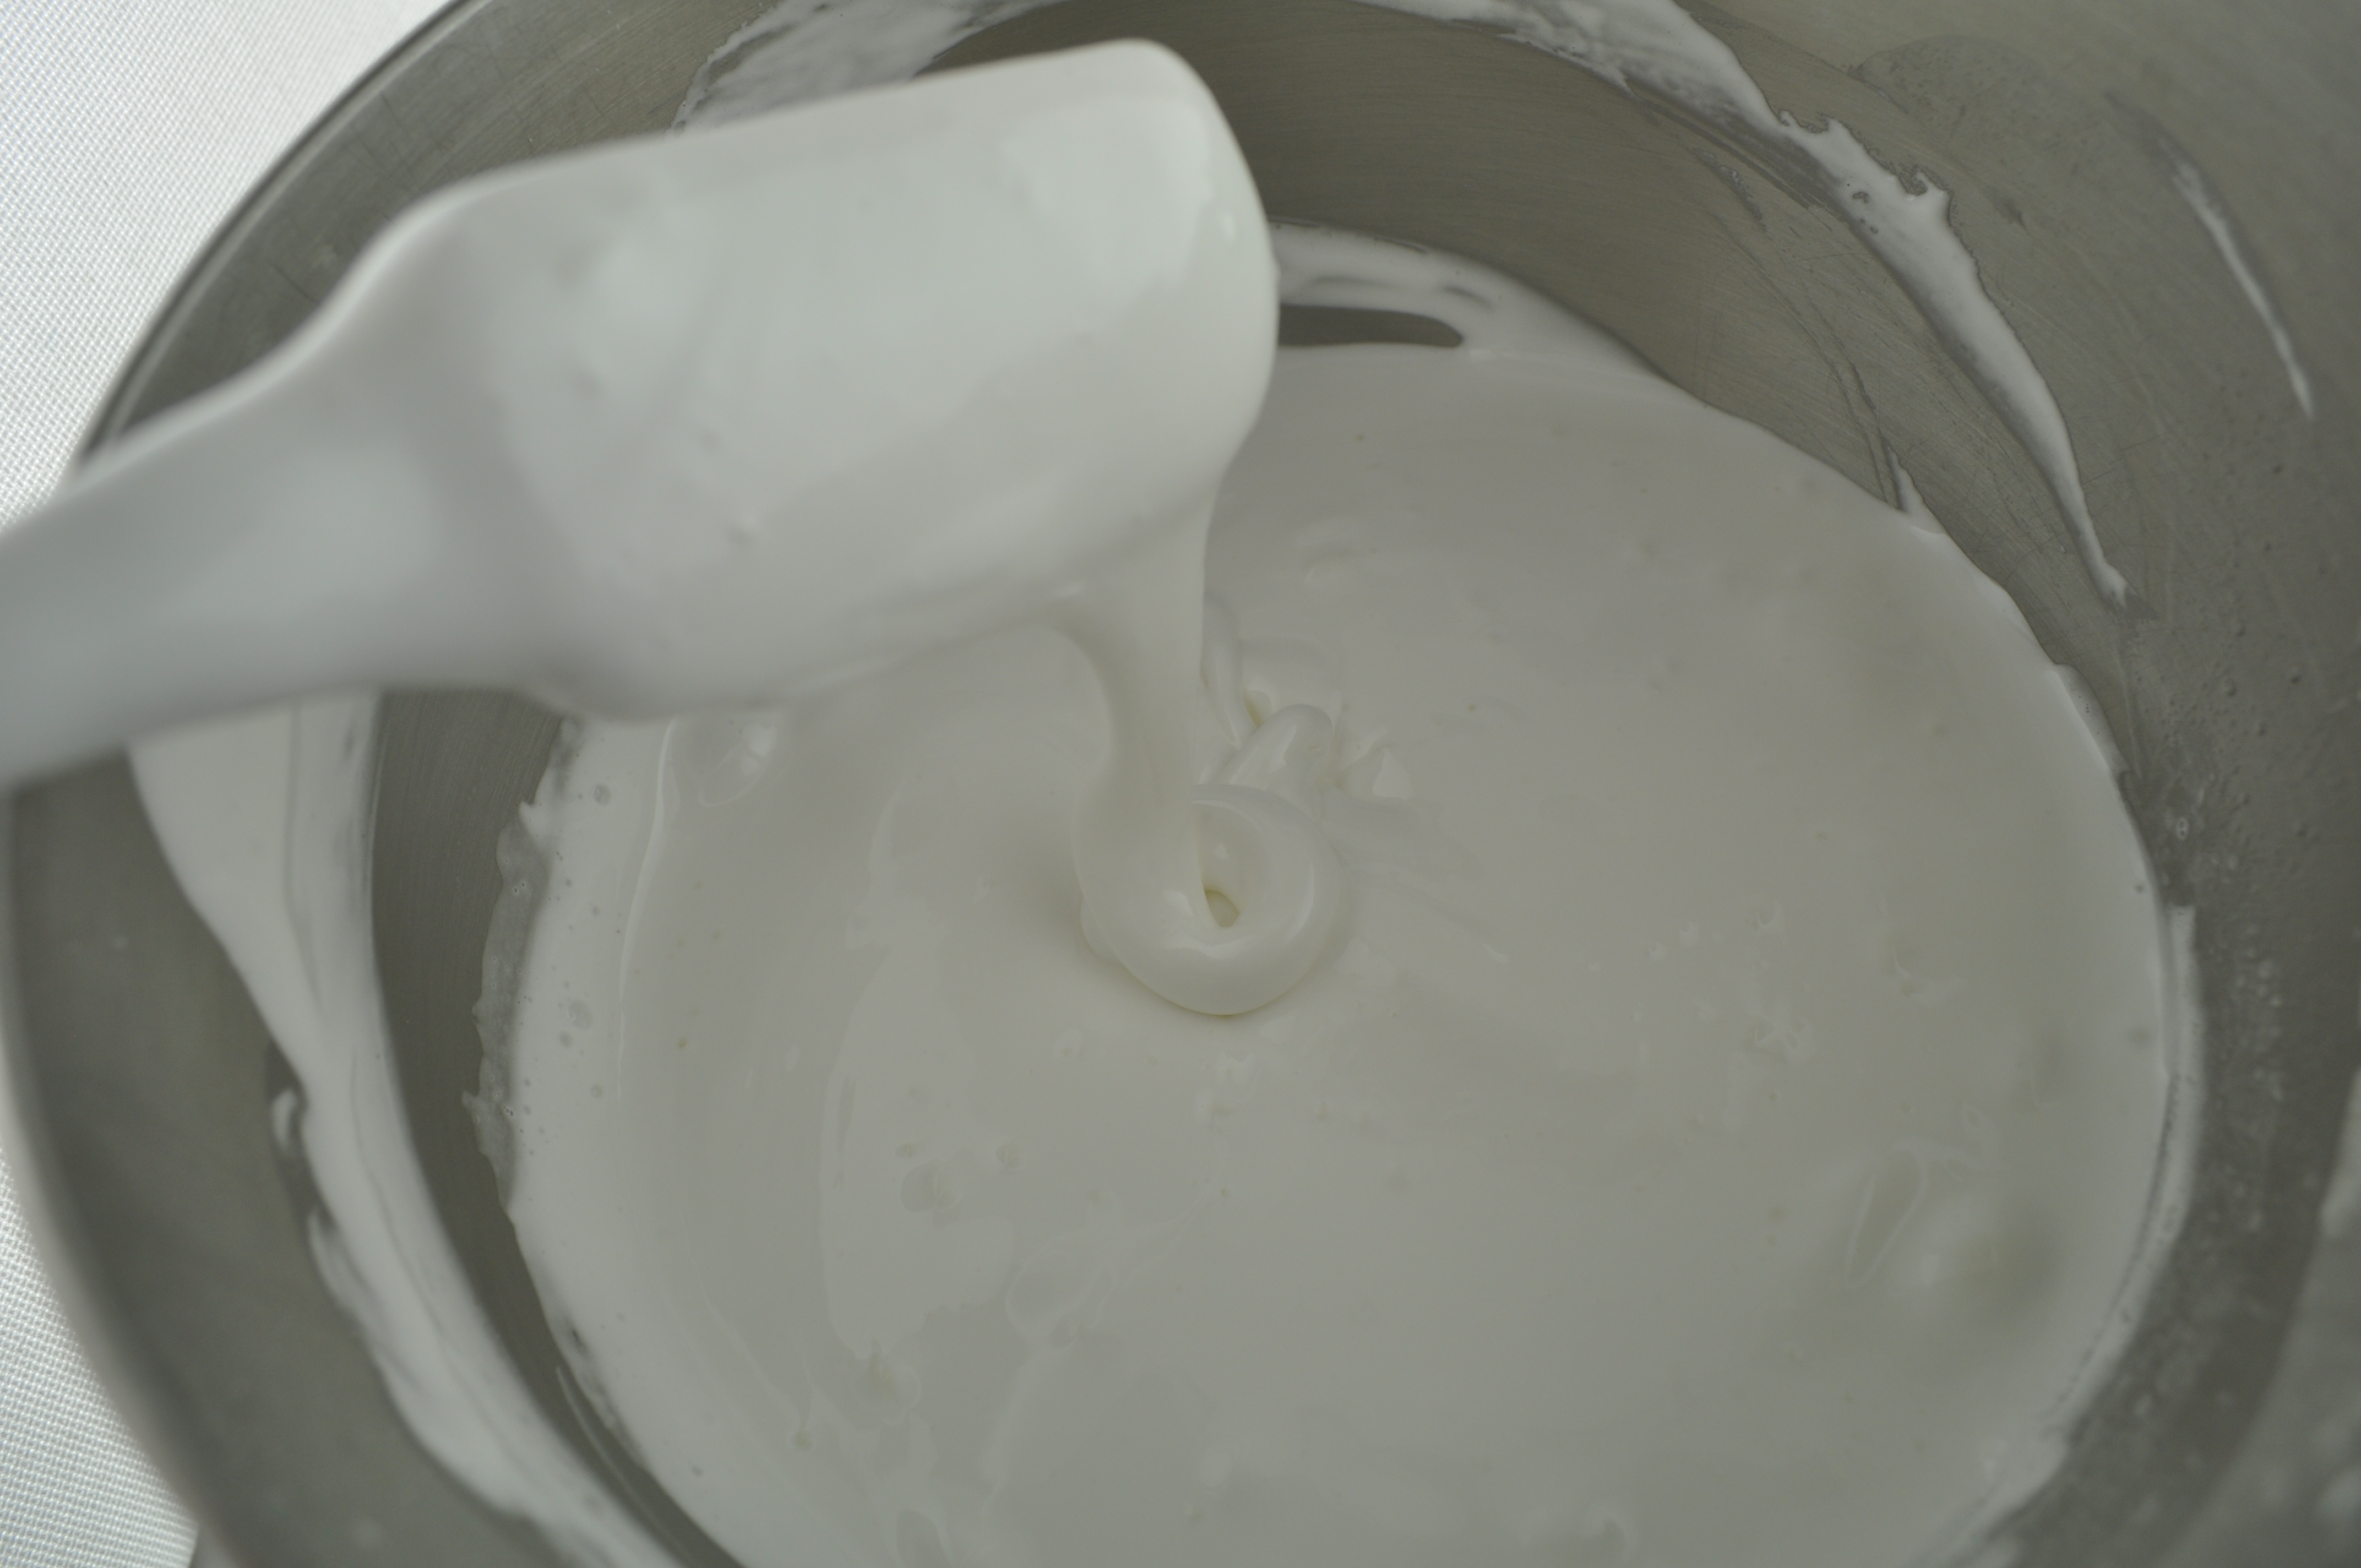
After you have prepared the icing, you must thin a portion of the icing so you are able to dip the cookies into the thinned royal icing. This thin royal icing really helps to create a nice thin surface so you can later draw on the cookie. The icing should be very runny. When you put a spoon through the thinned icing it should not hold a peak. Any mark in the icing should smooth out in less than five seconds. Once the icing is thin, move a portion to a small shallow container to prepare for dipping the cookies in royal icing. You can find more details and photos using this technique by referring to this old post. These were fancier cookies we made by simply drawing on the cookie.
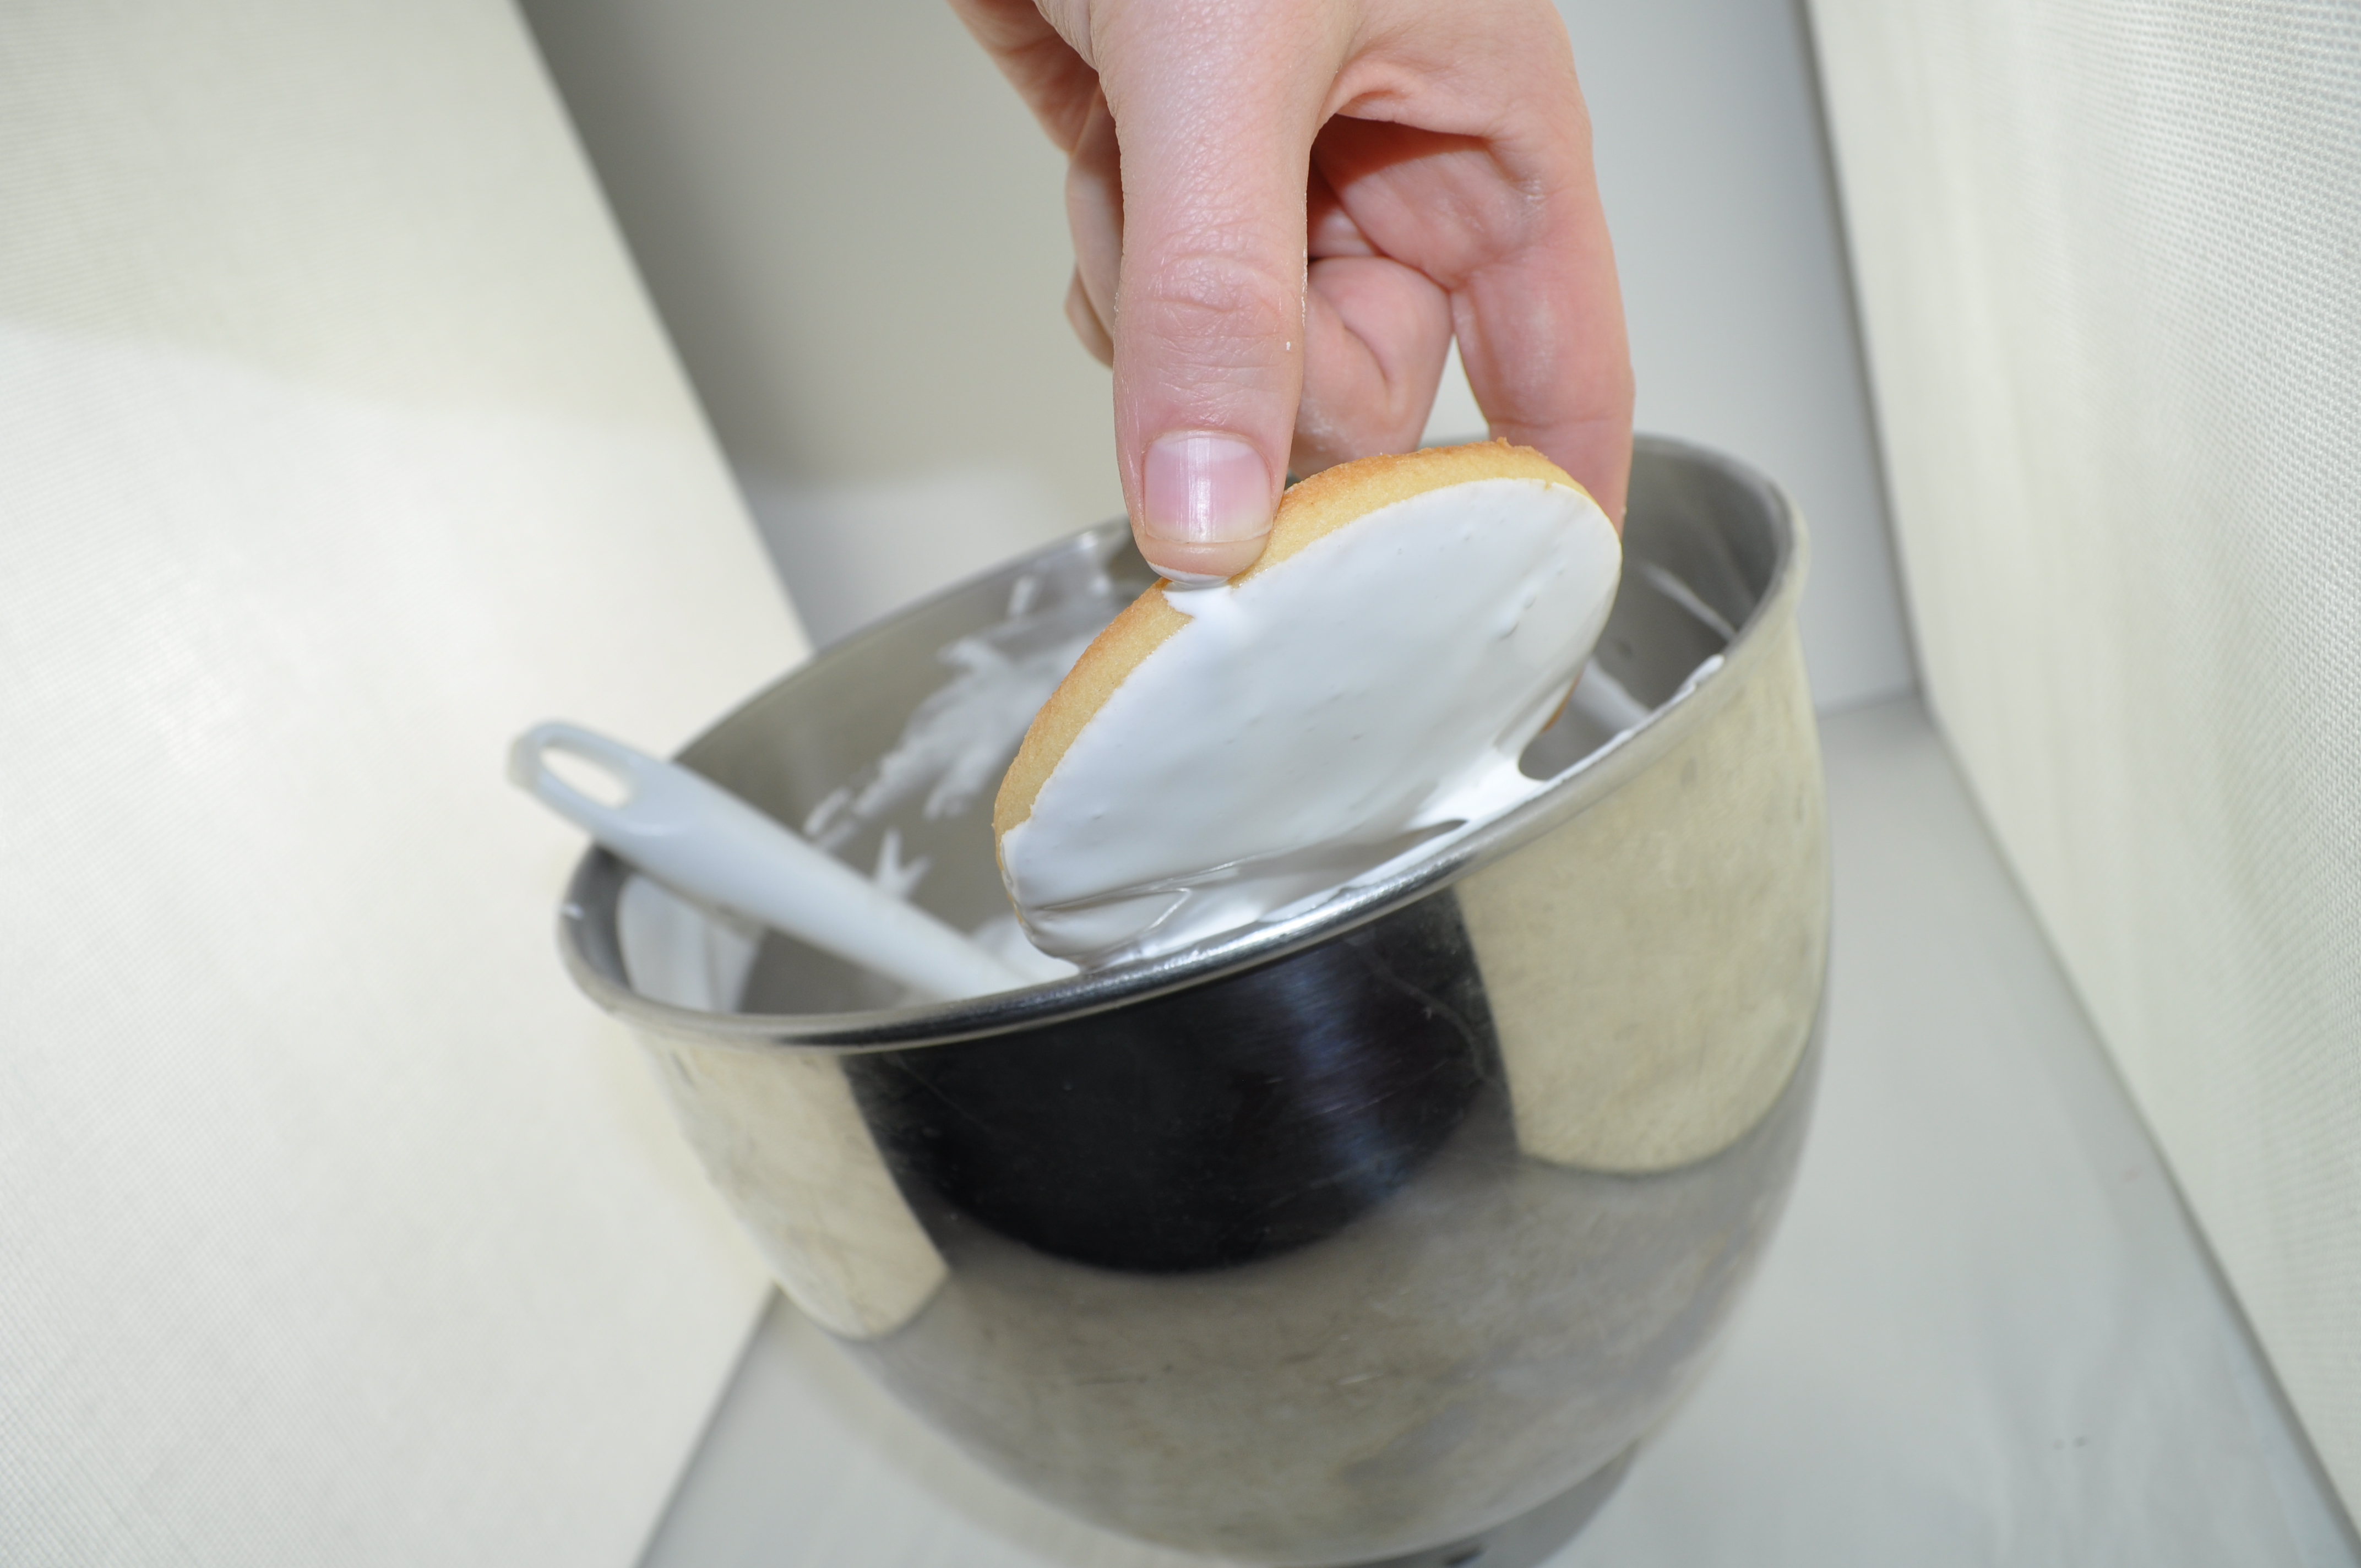 Dip the cookies in the thin royal icing. Use a swirling motion to get rid of any peaks in the icing. Allow the cookies to dry over night so they are ready to be decorated with edible ink markers.
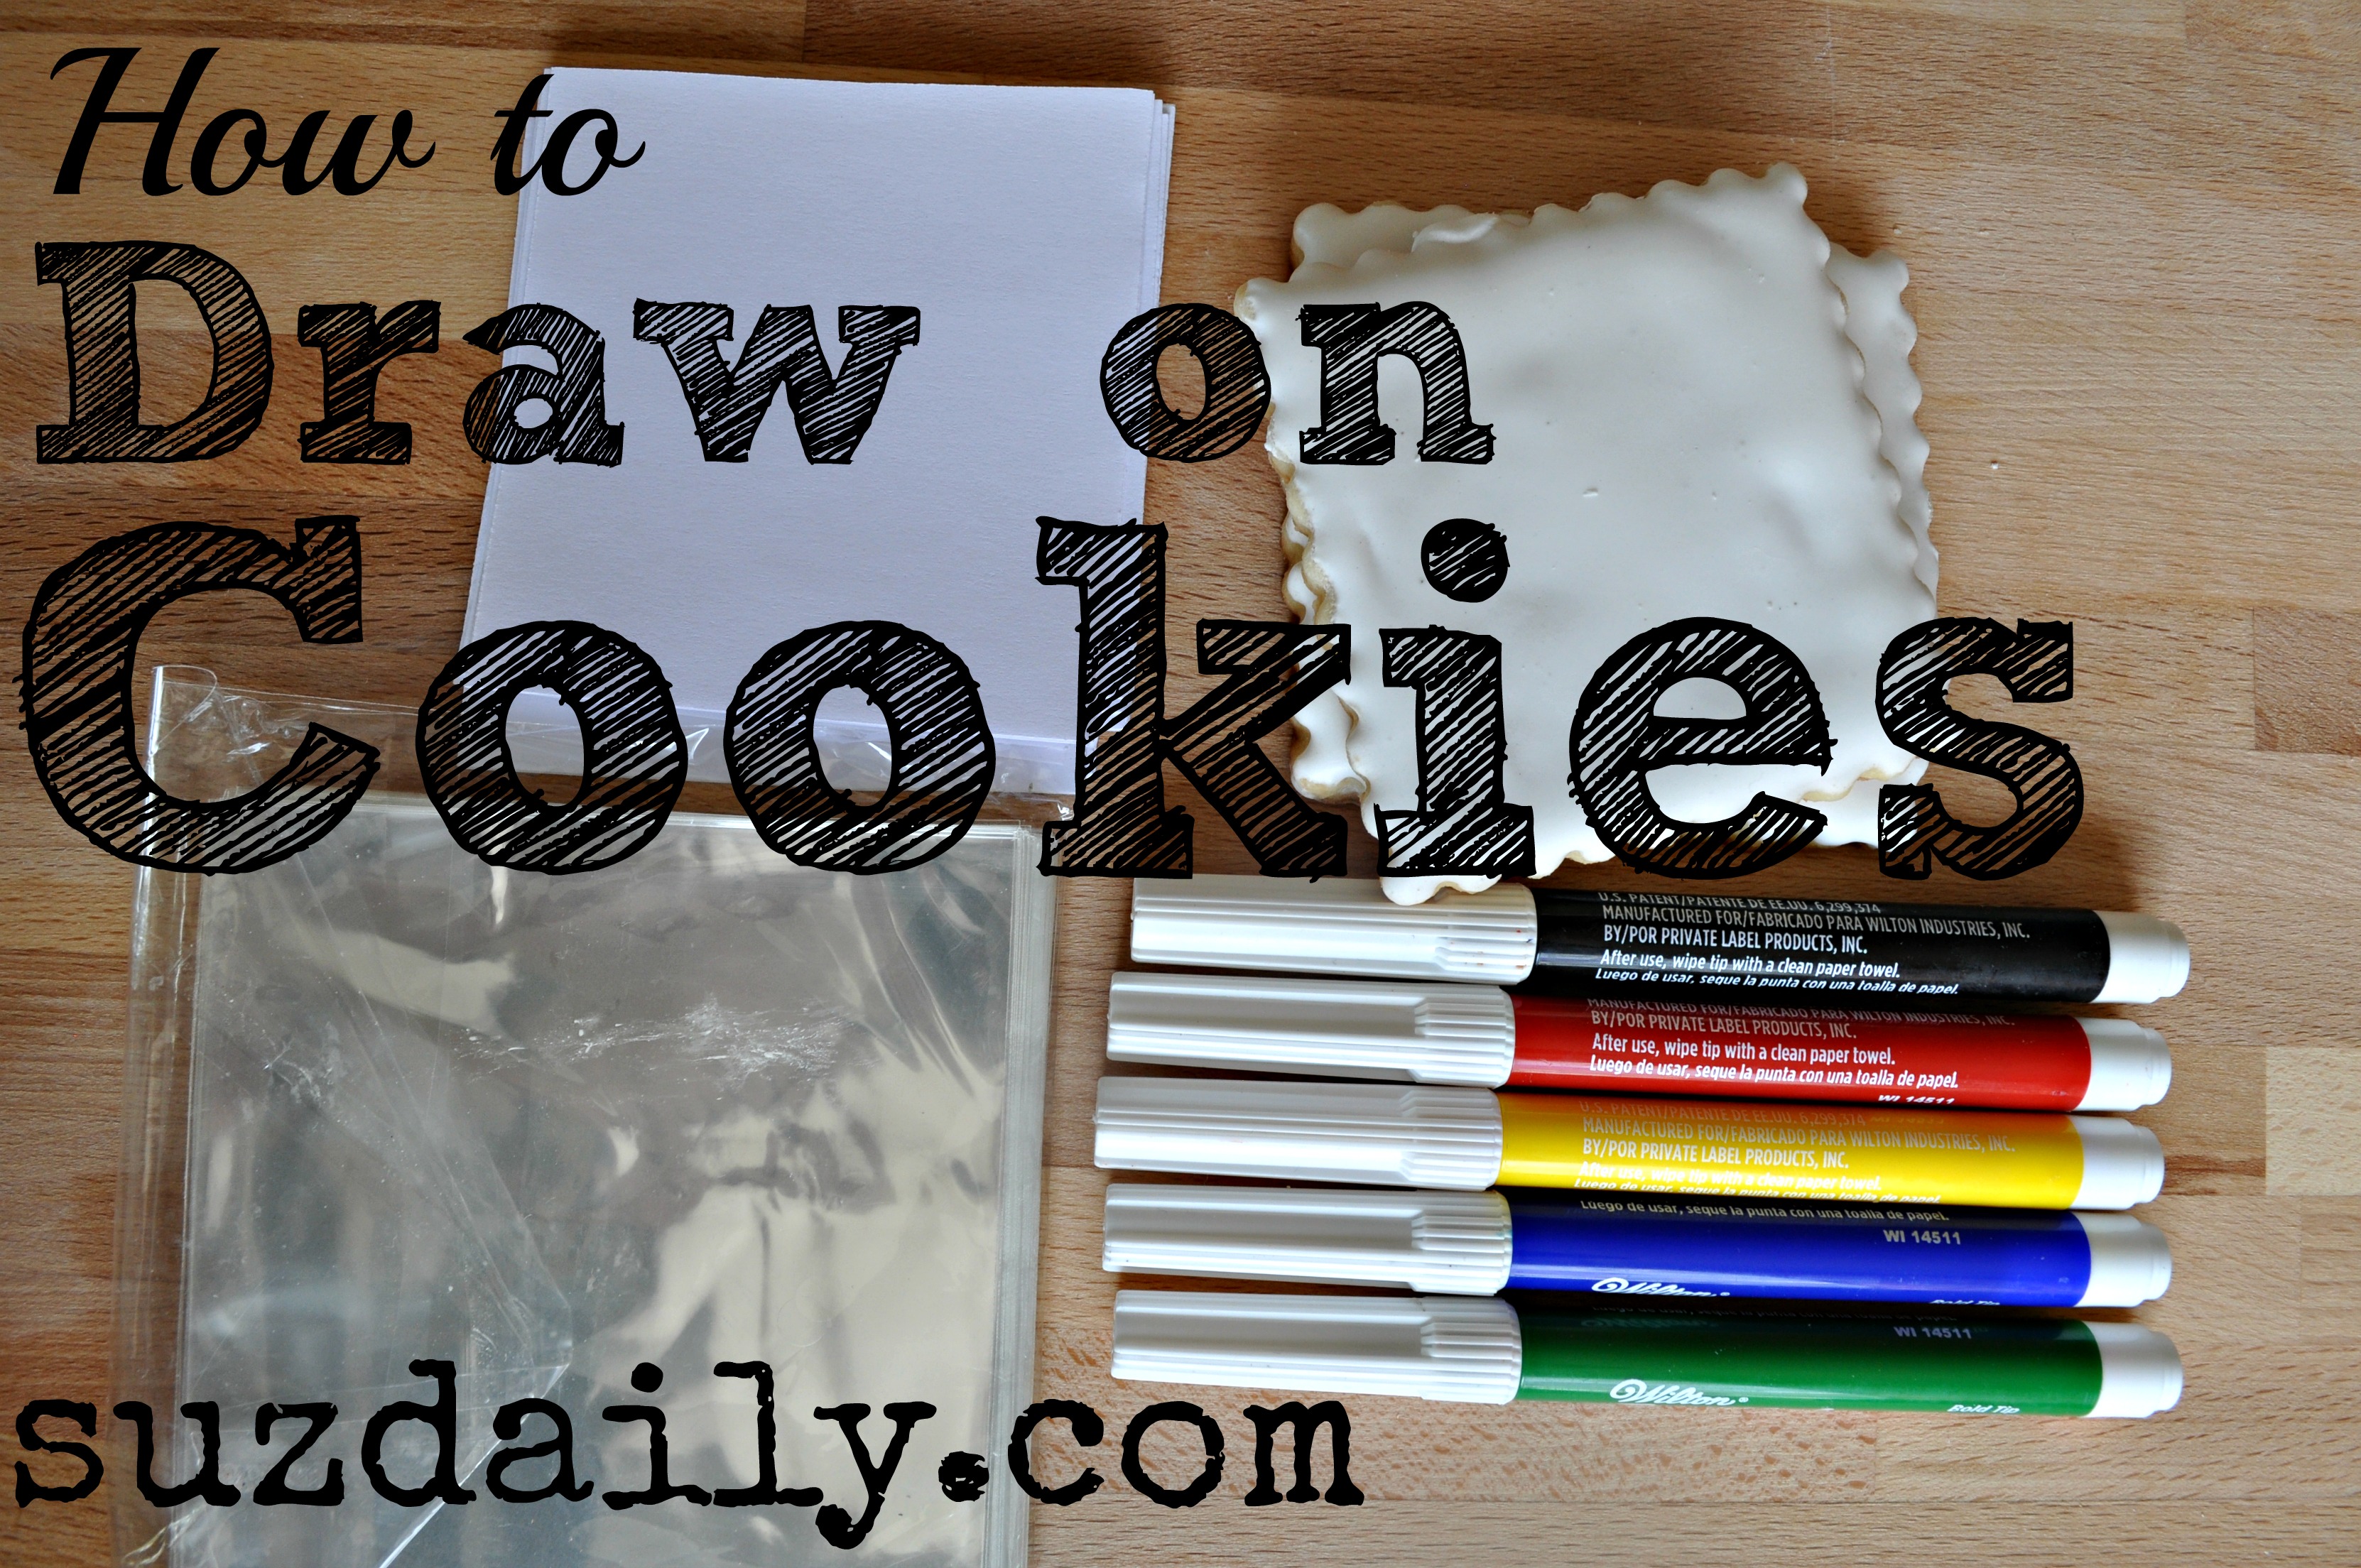
Step 3 – How to draw on cookies – gather supplies needed to draw on the cookies.
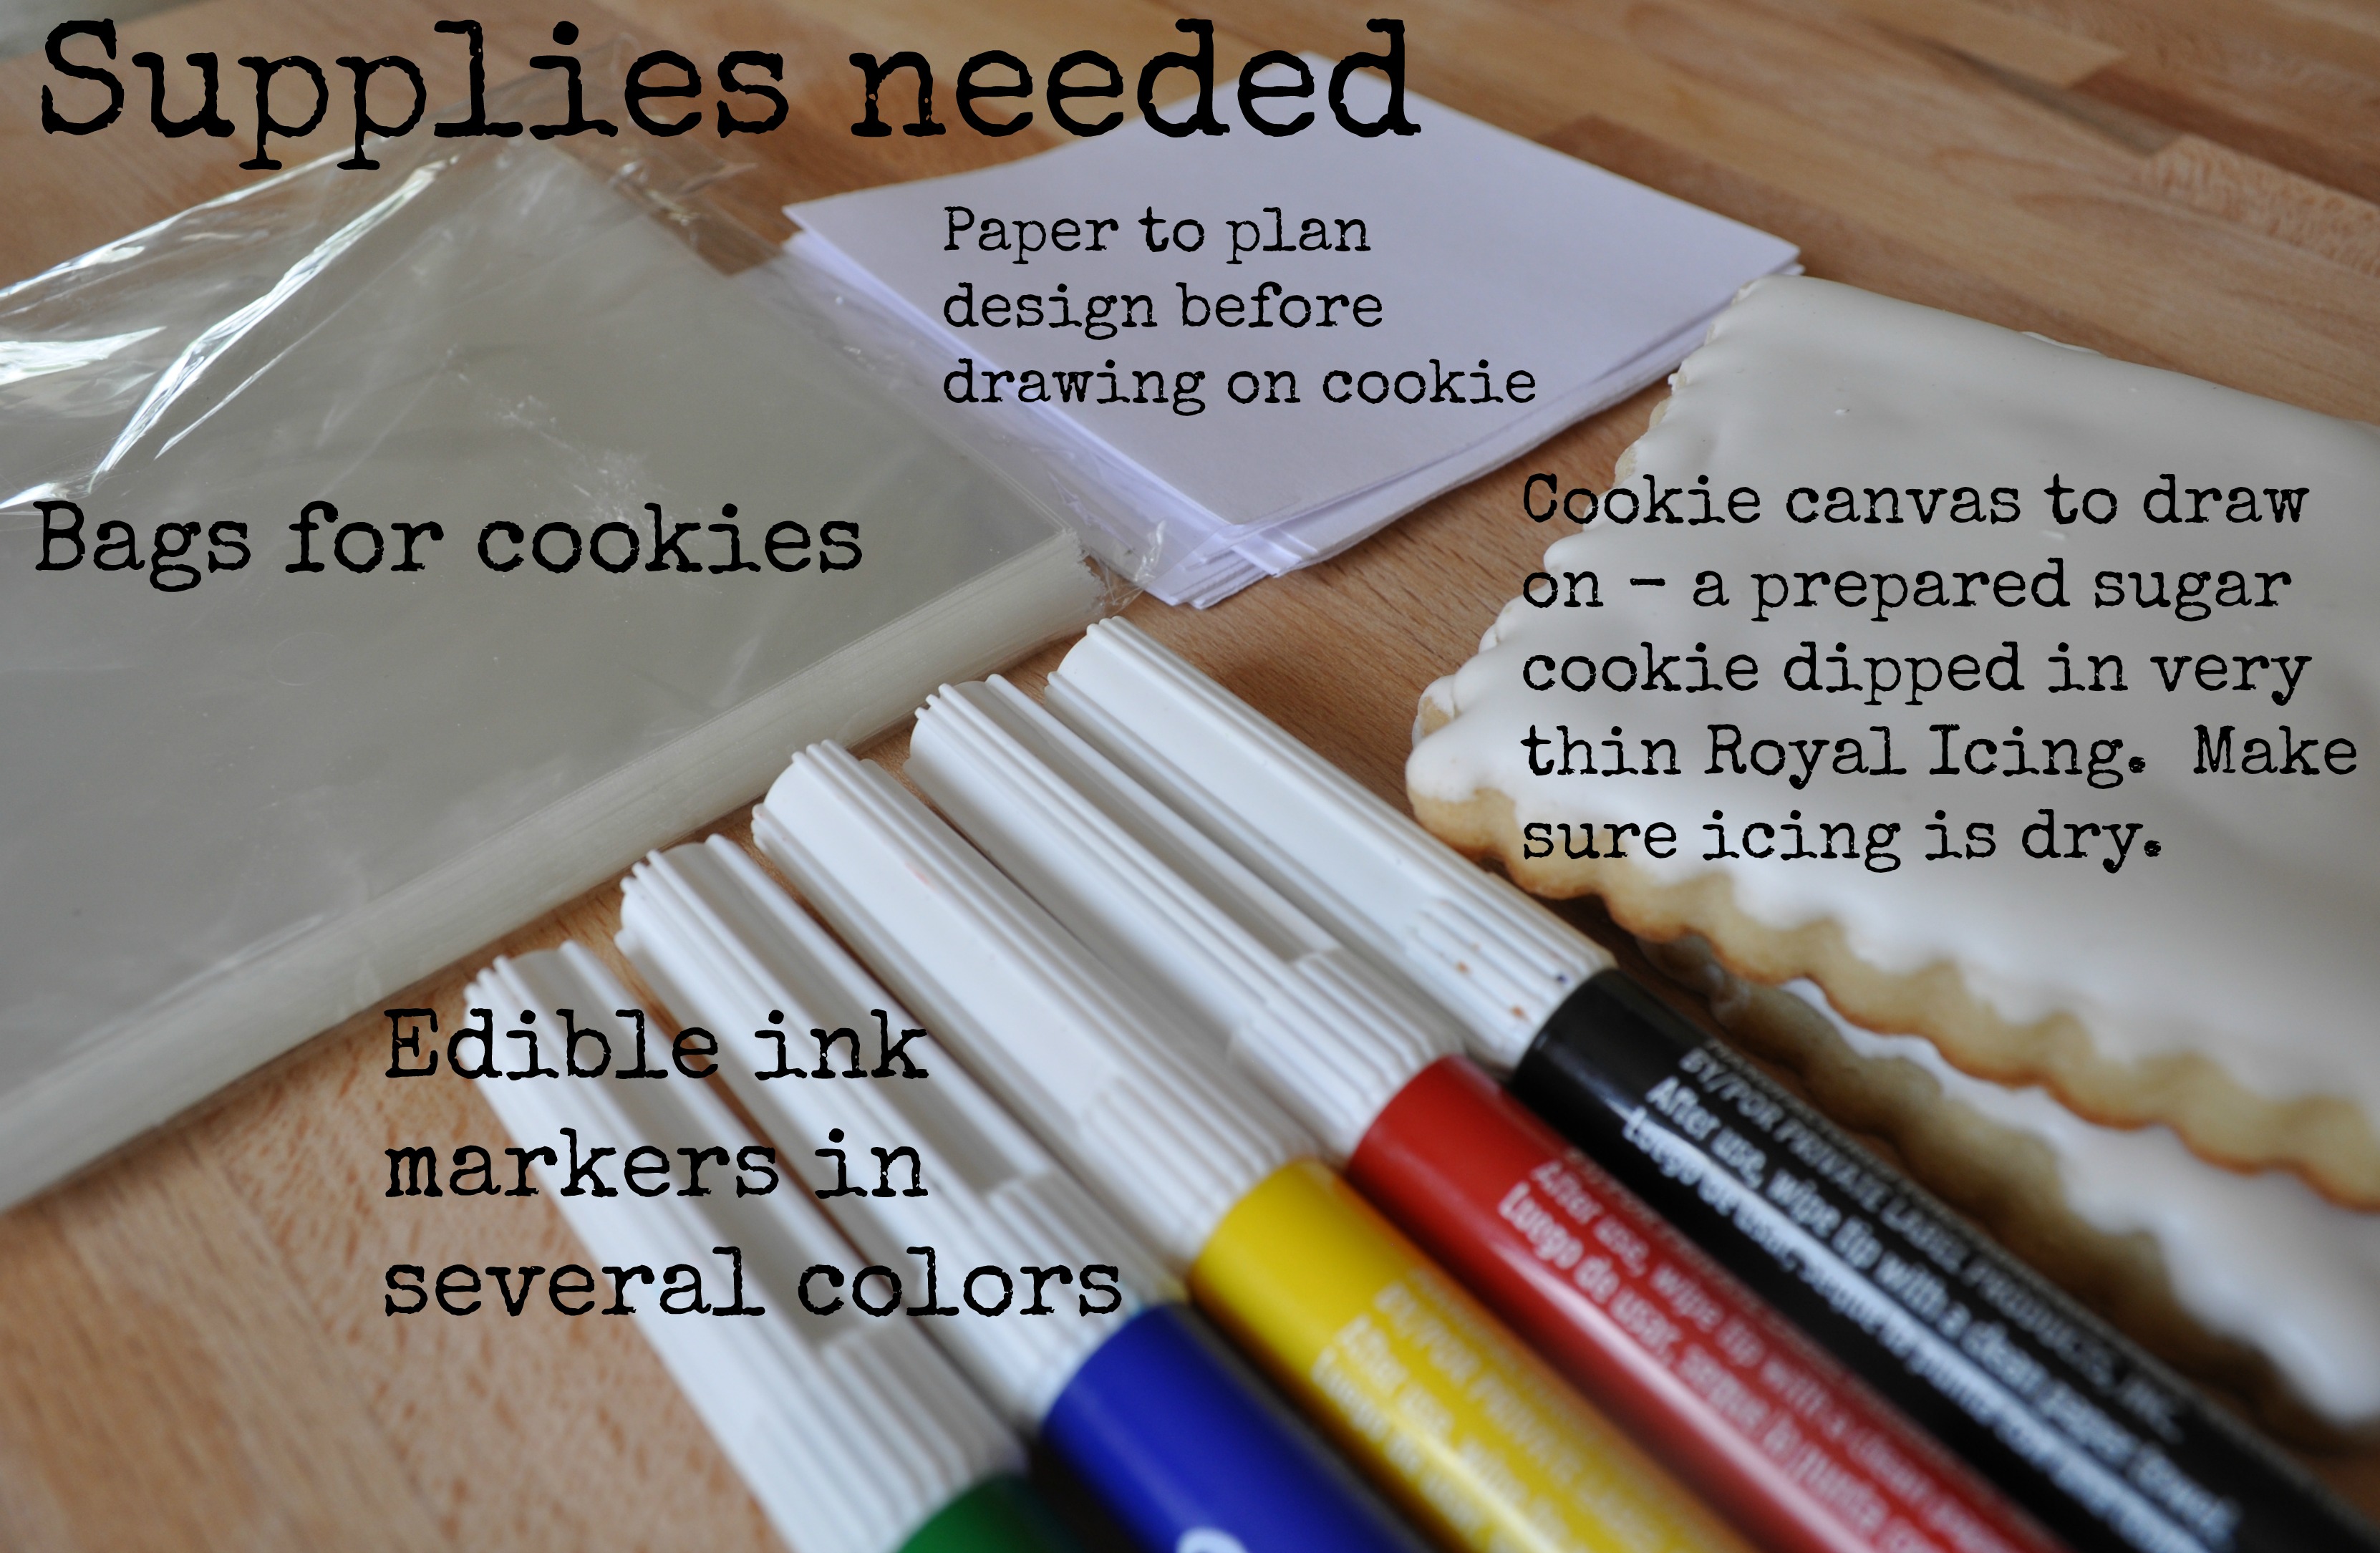
All you will need to complete this project are 1) the cookie canvas dry, and covered with royal icing as described above, 2) bags for packing the cookies, 3) scratch paper to plan the design and 4) edible ink markers to draw on the cookies. These can be found at most craft stores, super centers and of course online. I brought everything to the classroom in a large Tupperware. I also packed paper plates for the kids to work on. I came prepared with extra cookie canvases just in case one of the kids dropped a cookie and needed a new one.
Step 4 – How to Draw on Cookies – plan design on scratch paper and then draw on the cookies with the edible ink markers.
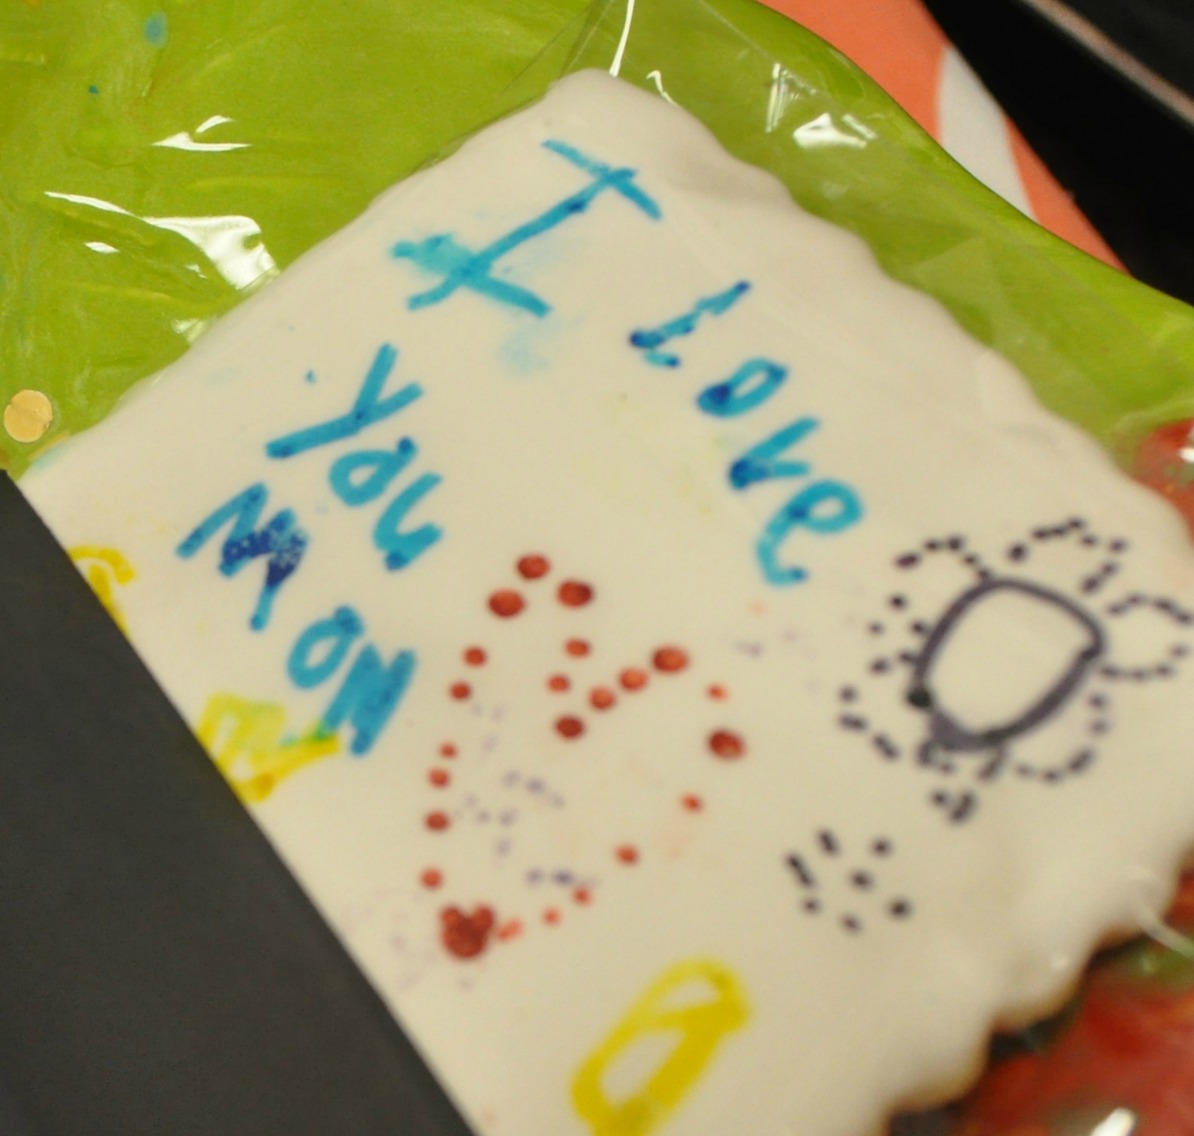
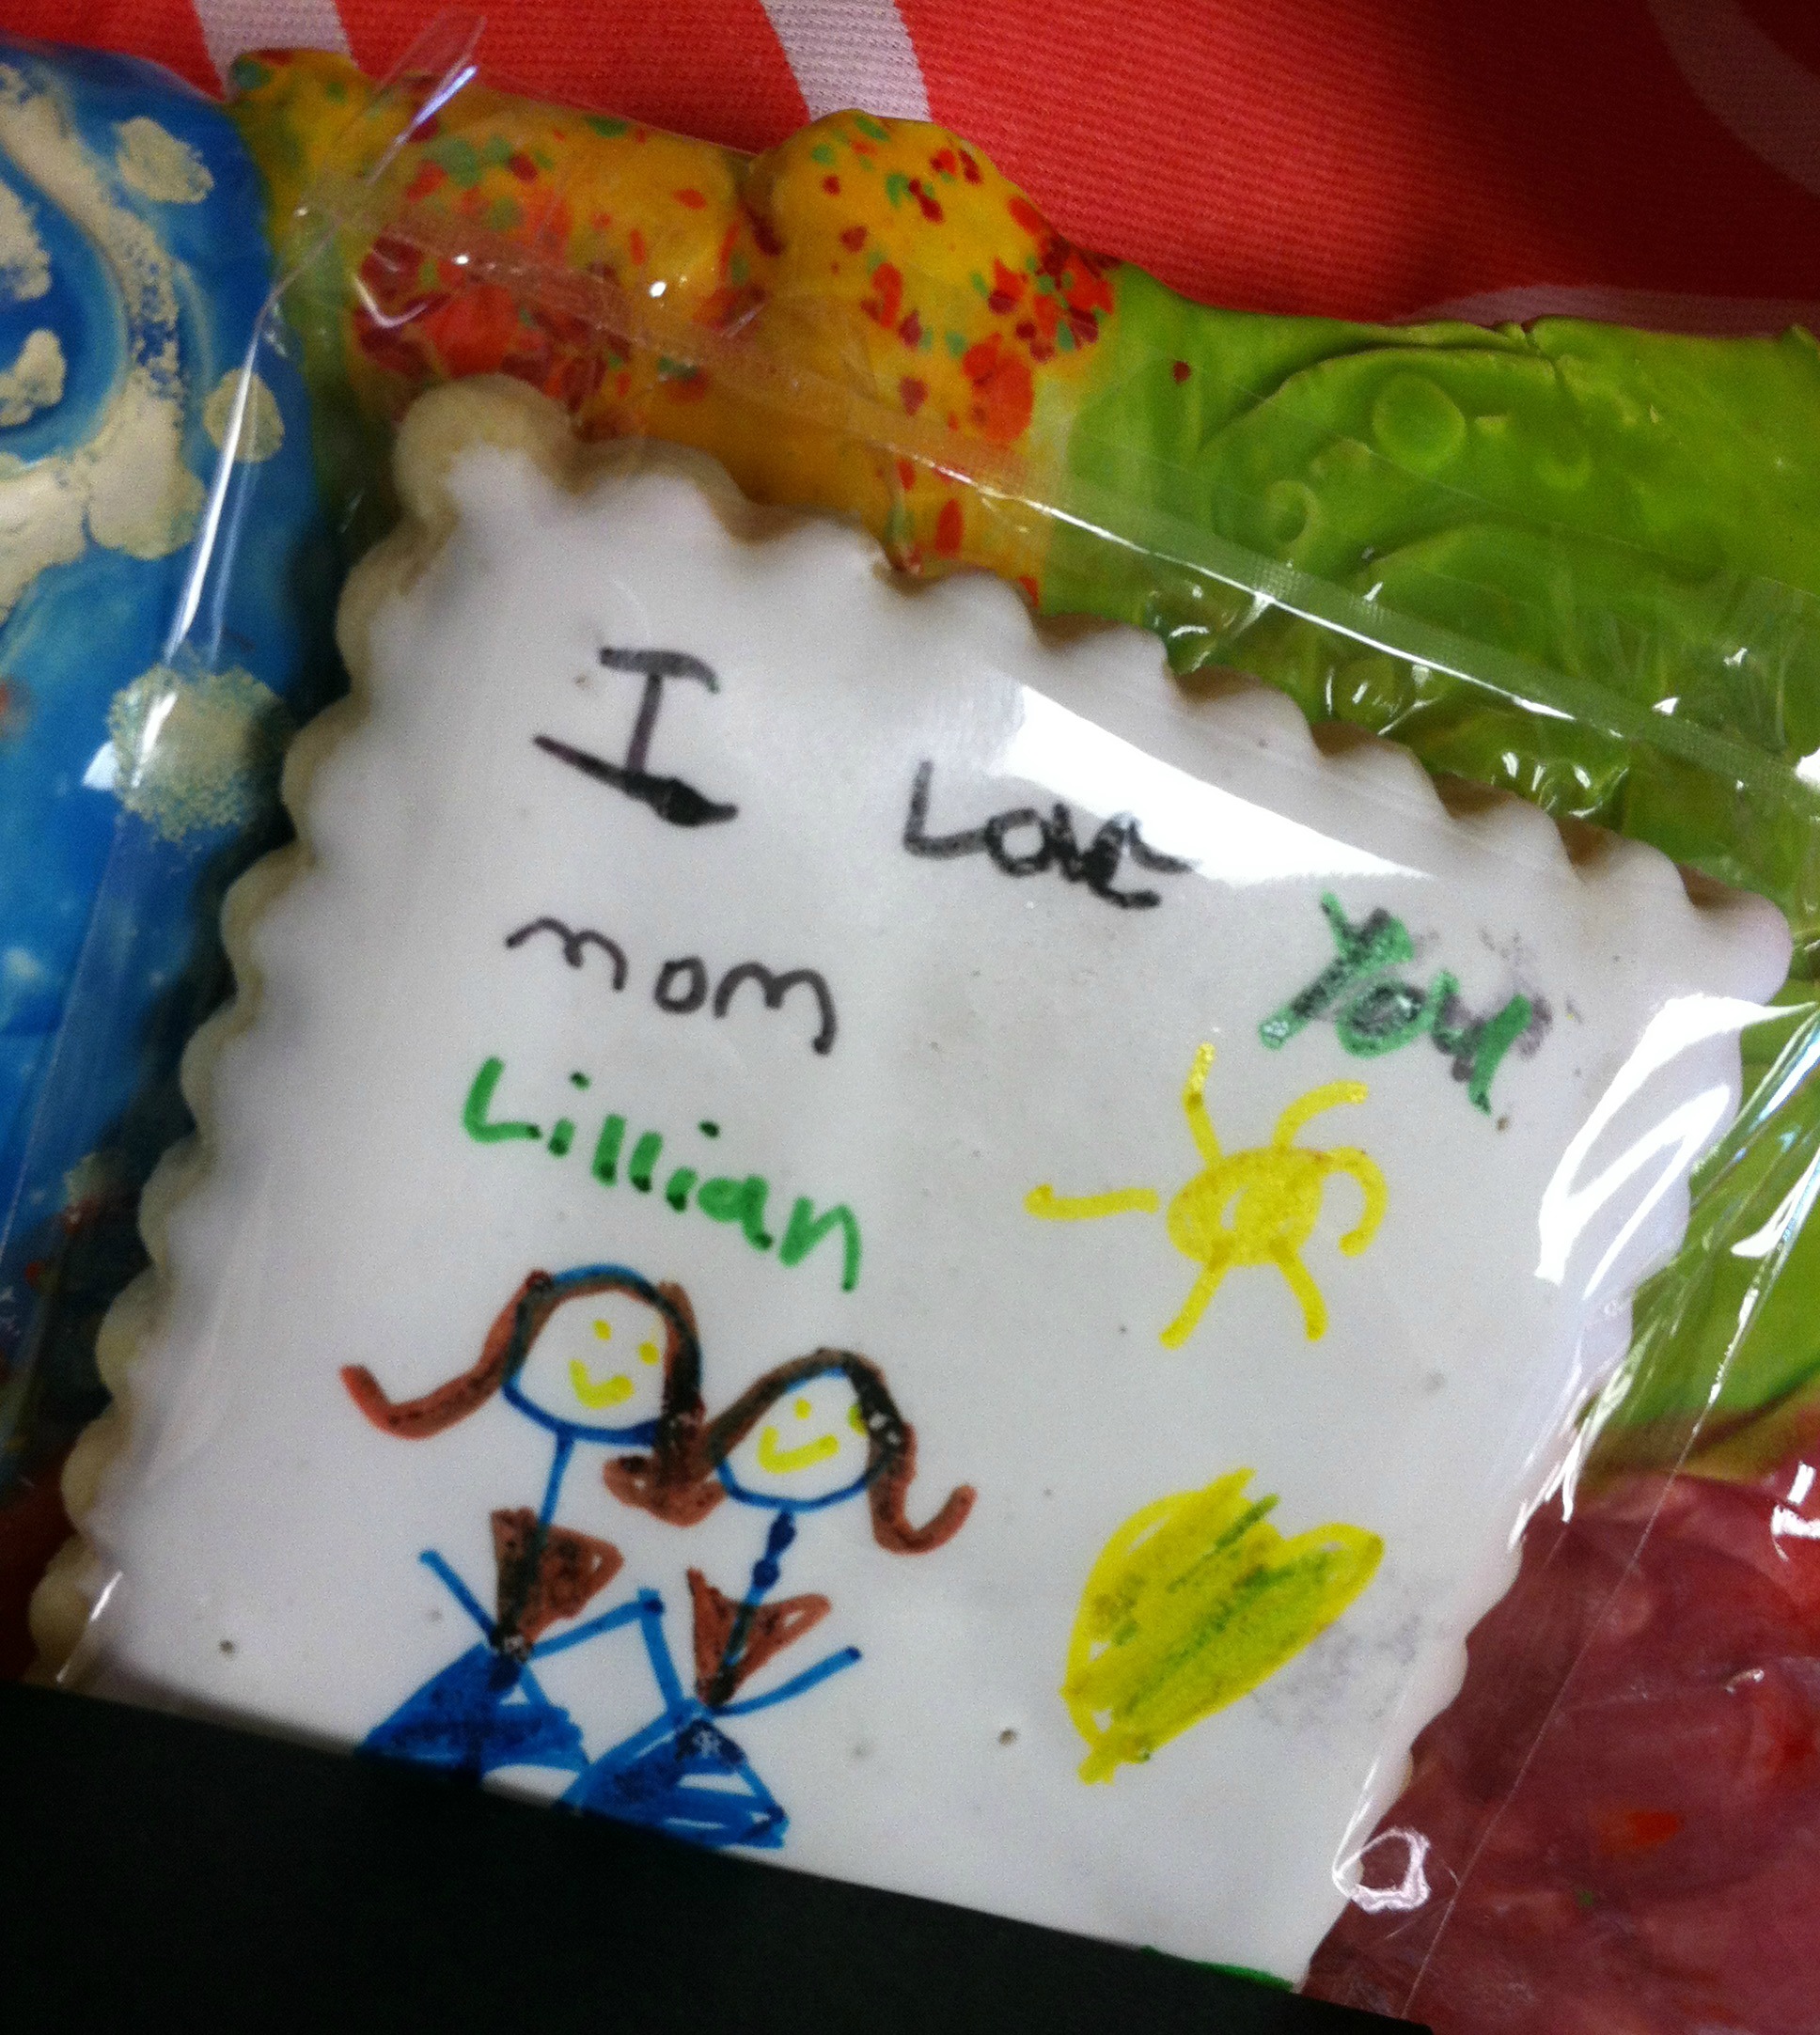
This is one of my favorite ways to decorate a cookie. I love to see how each person will come up with something entirely unique. Some kids finished drawing on their cookie in minutes. Others got so lost in this cookie art project that they wanted more time to continue drawing on their cookie canvas. I highly recommend this activity for large groups of kids. They have all done the buttercream with knife decorating so this is entirely new. Here are a few examples of what the Kindergartner kids made for their moms. They were all so proud!
Step 4 – How to Draw on Cookies – Package the cookies
I loved having my cellophane bags and my bag sealer in the classroom. Sealing was so necessary with these young kids. This kept them from making a mess of their little cookie cards for mother’s day. You could use any food safe bags you can find. Get creative with fancy bows for packaging and have fun! Here are some examples of how the young kindergartners drew on their cookies.
This little girl was so cute making all those tiny dots with the edible ink markers. You really can get a lot of detail with these markers.
 Here is another adorable cookie card for Mom. The kids were so proud once they had learned how to draw on a cookie.
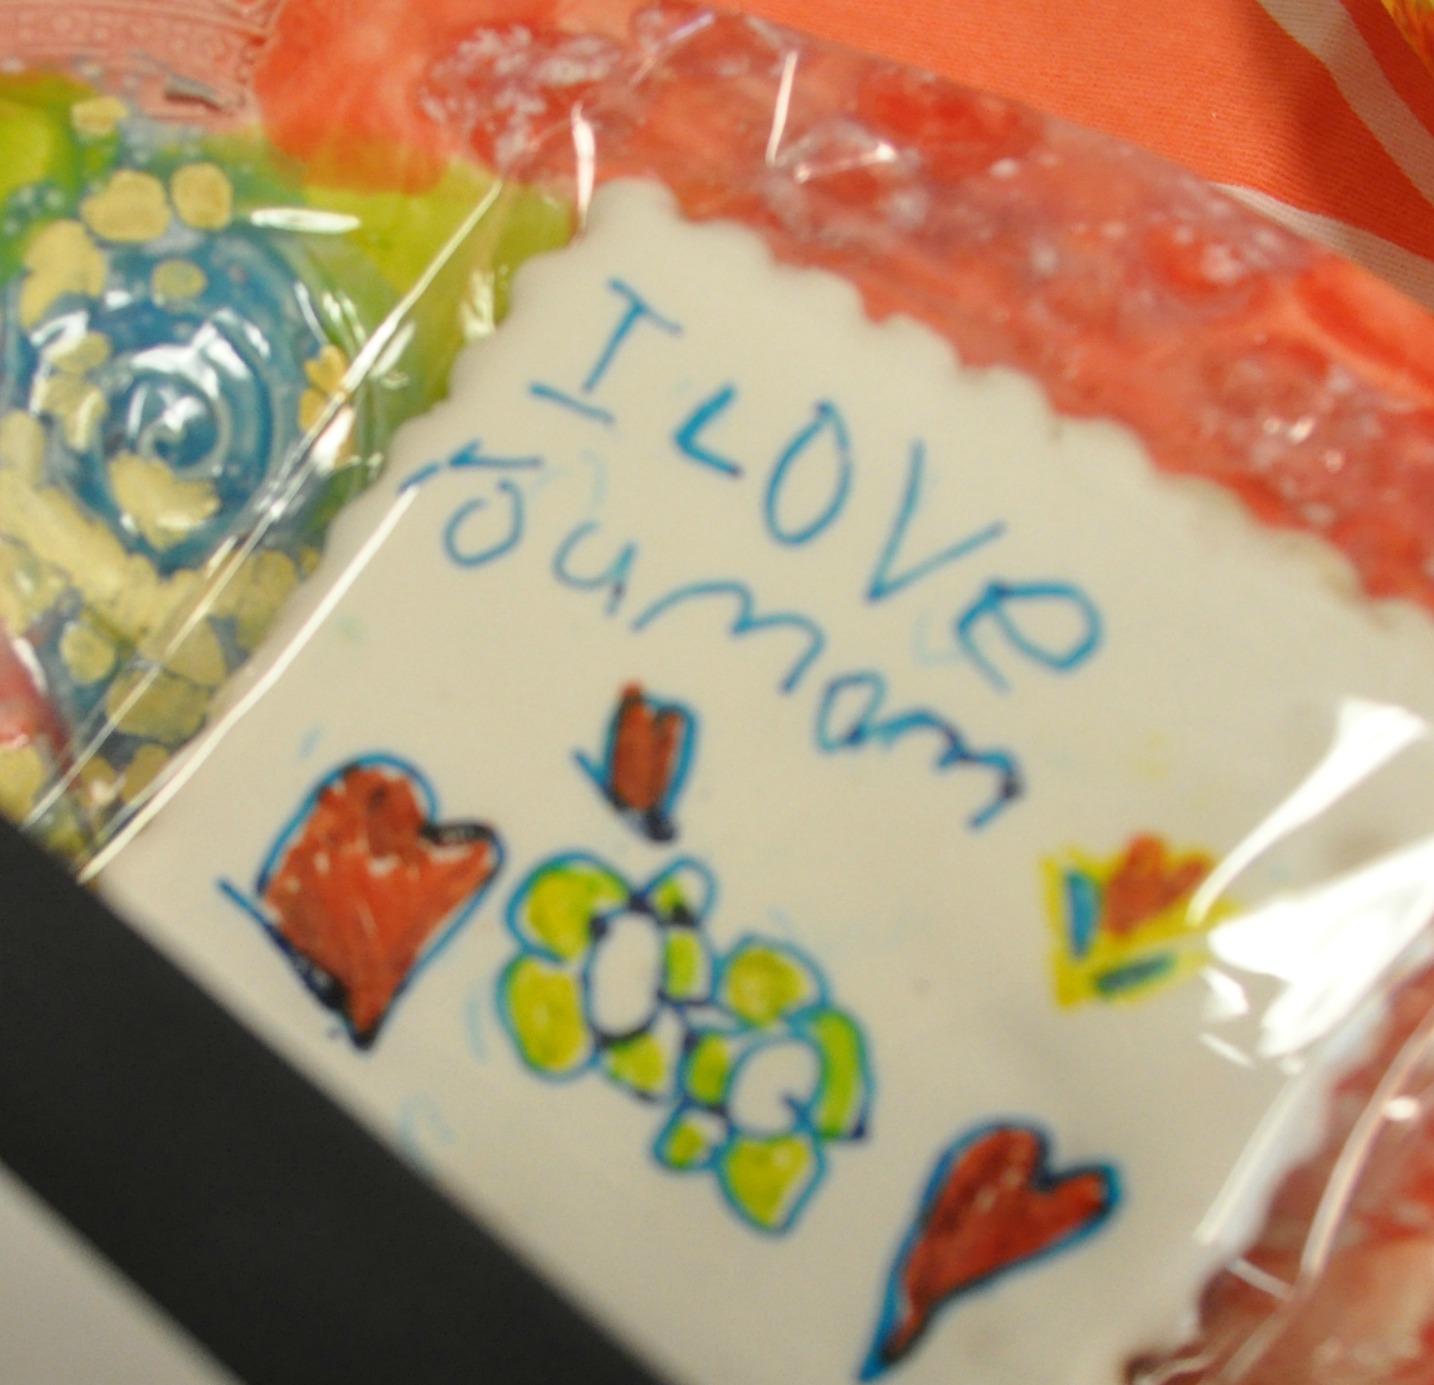 Kid are is the cutest. Most of the kids wrote “I love mom” after learning how to draw on the cookie.
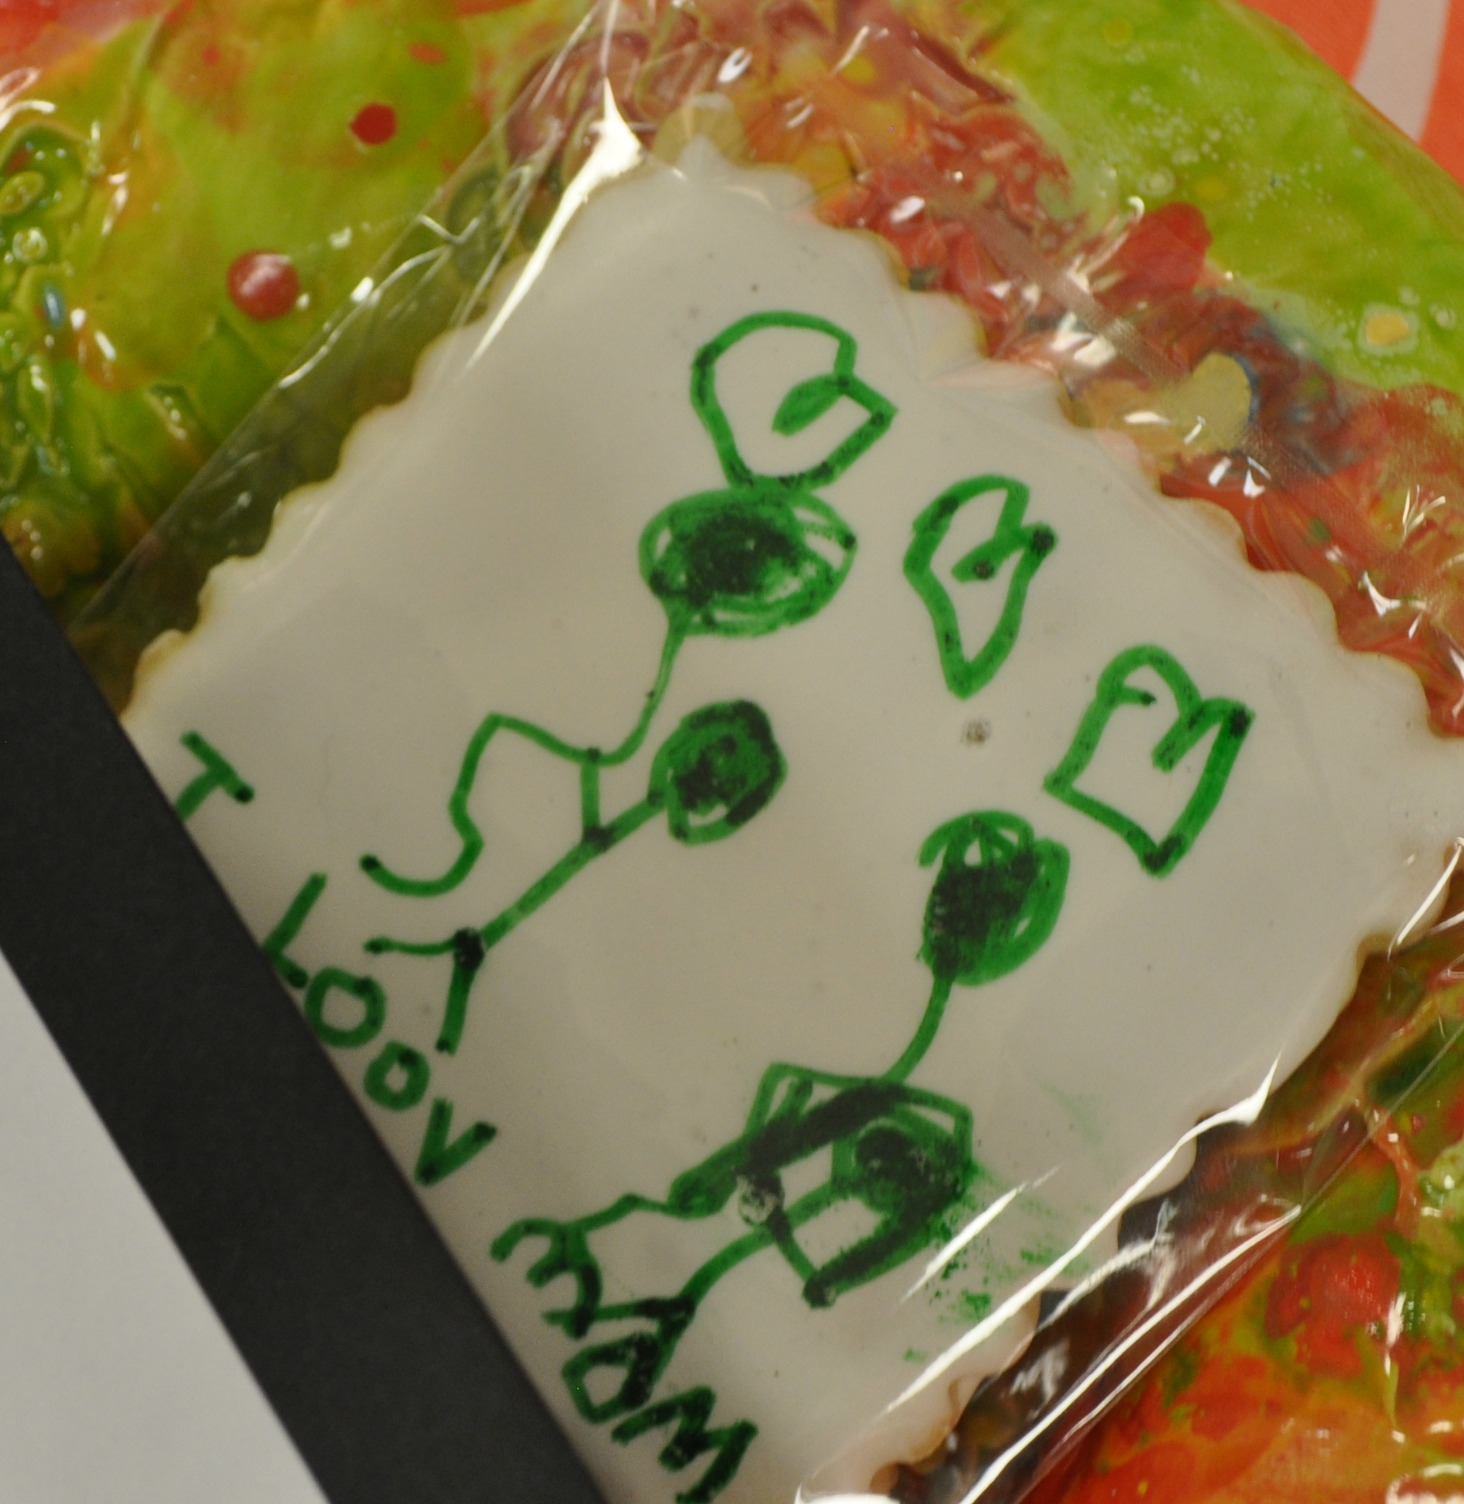 So sweet! Mother and Son with matching green balloons 🙂
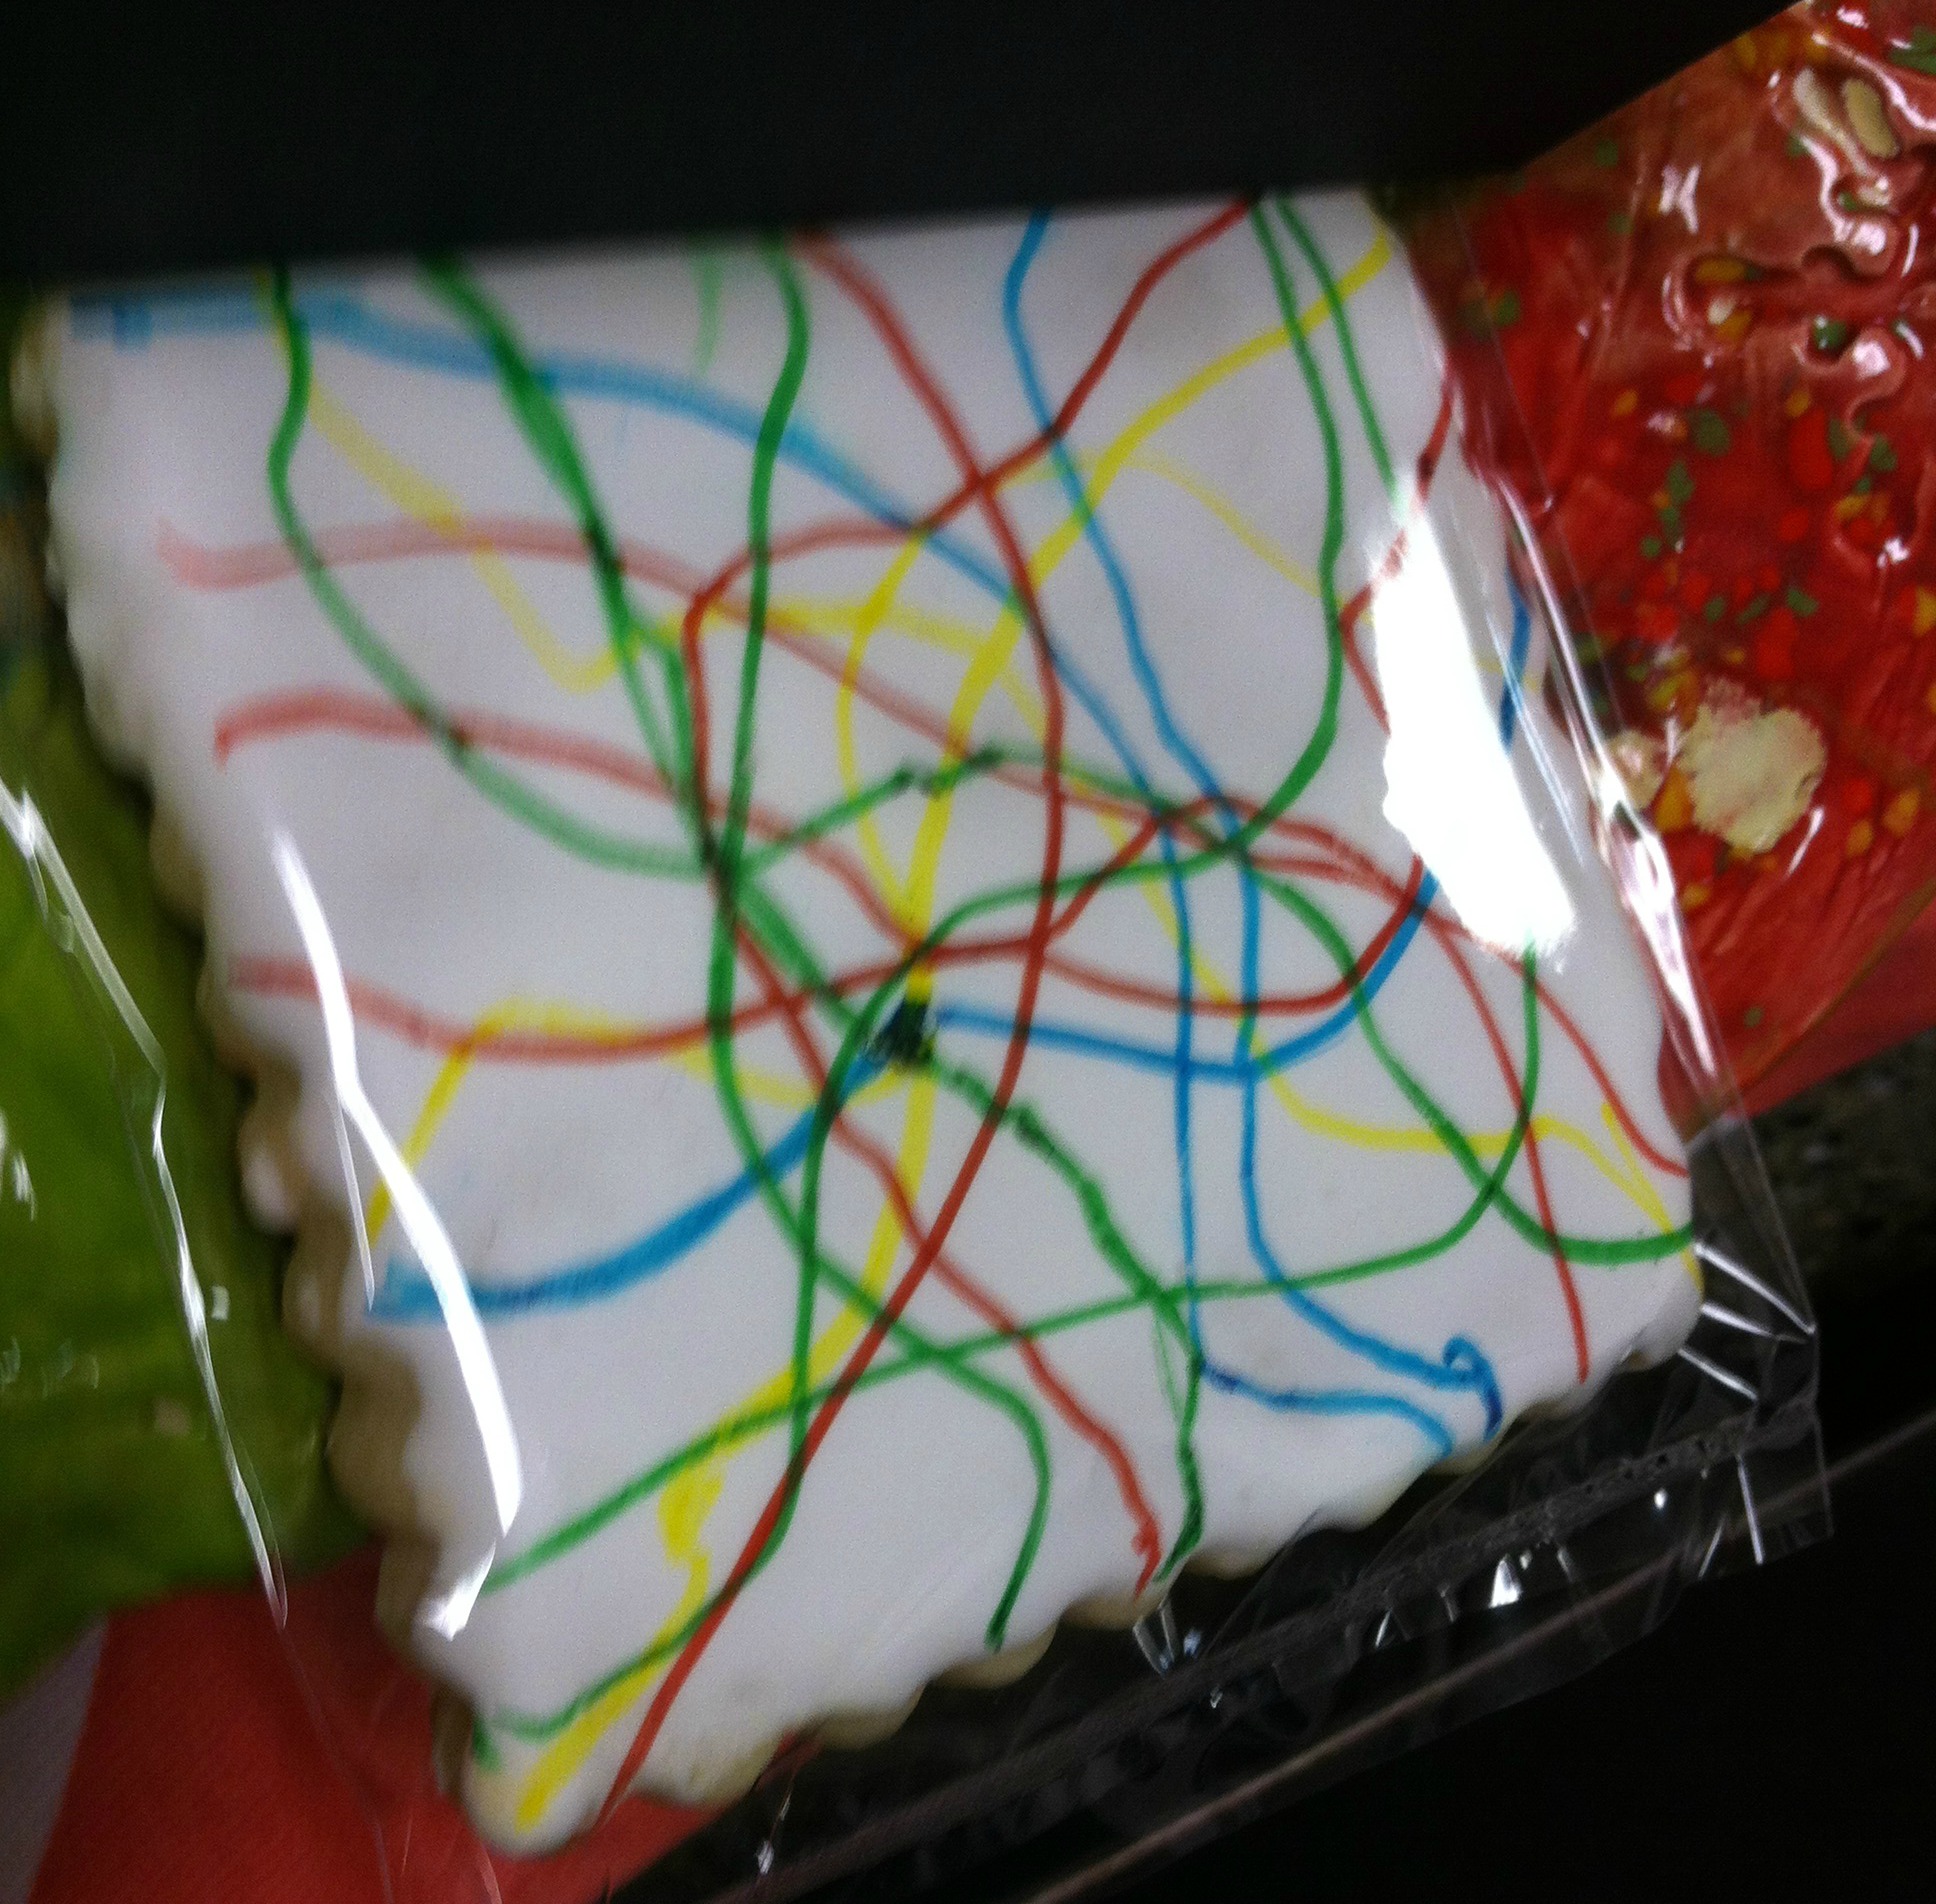
This was my favorite cookie of all the ones the kindergartners made. This little boy spent as much time as he could, and he carefully created the swirly lines across the cookie.
I was so happy to spend time doing this project with the kids in my son’s class. I think this Fall we will make pumpkin shaped cookies for the kids to decorate with edible ink markers. I hope you learned how to draw on a cookie! P.S. you can also draw on marshmallows!


